
How to connect Google Workspace for SAML SSO
Google Workspace needs a custom SAML app for Corma. Start from How to setup SAML SSO, which covers the Corma side, then come back here. You need to be a super administrator in Google Workspace.
Create the custom SAML app
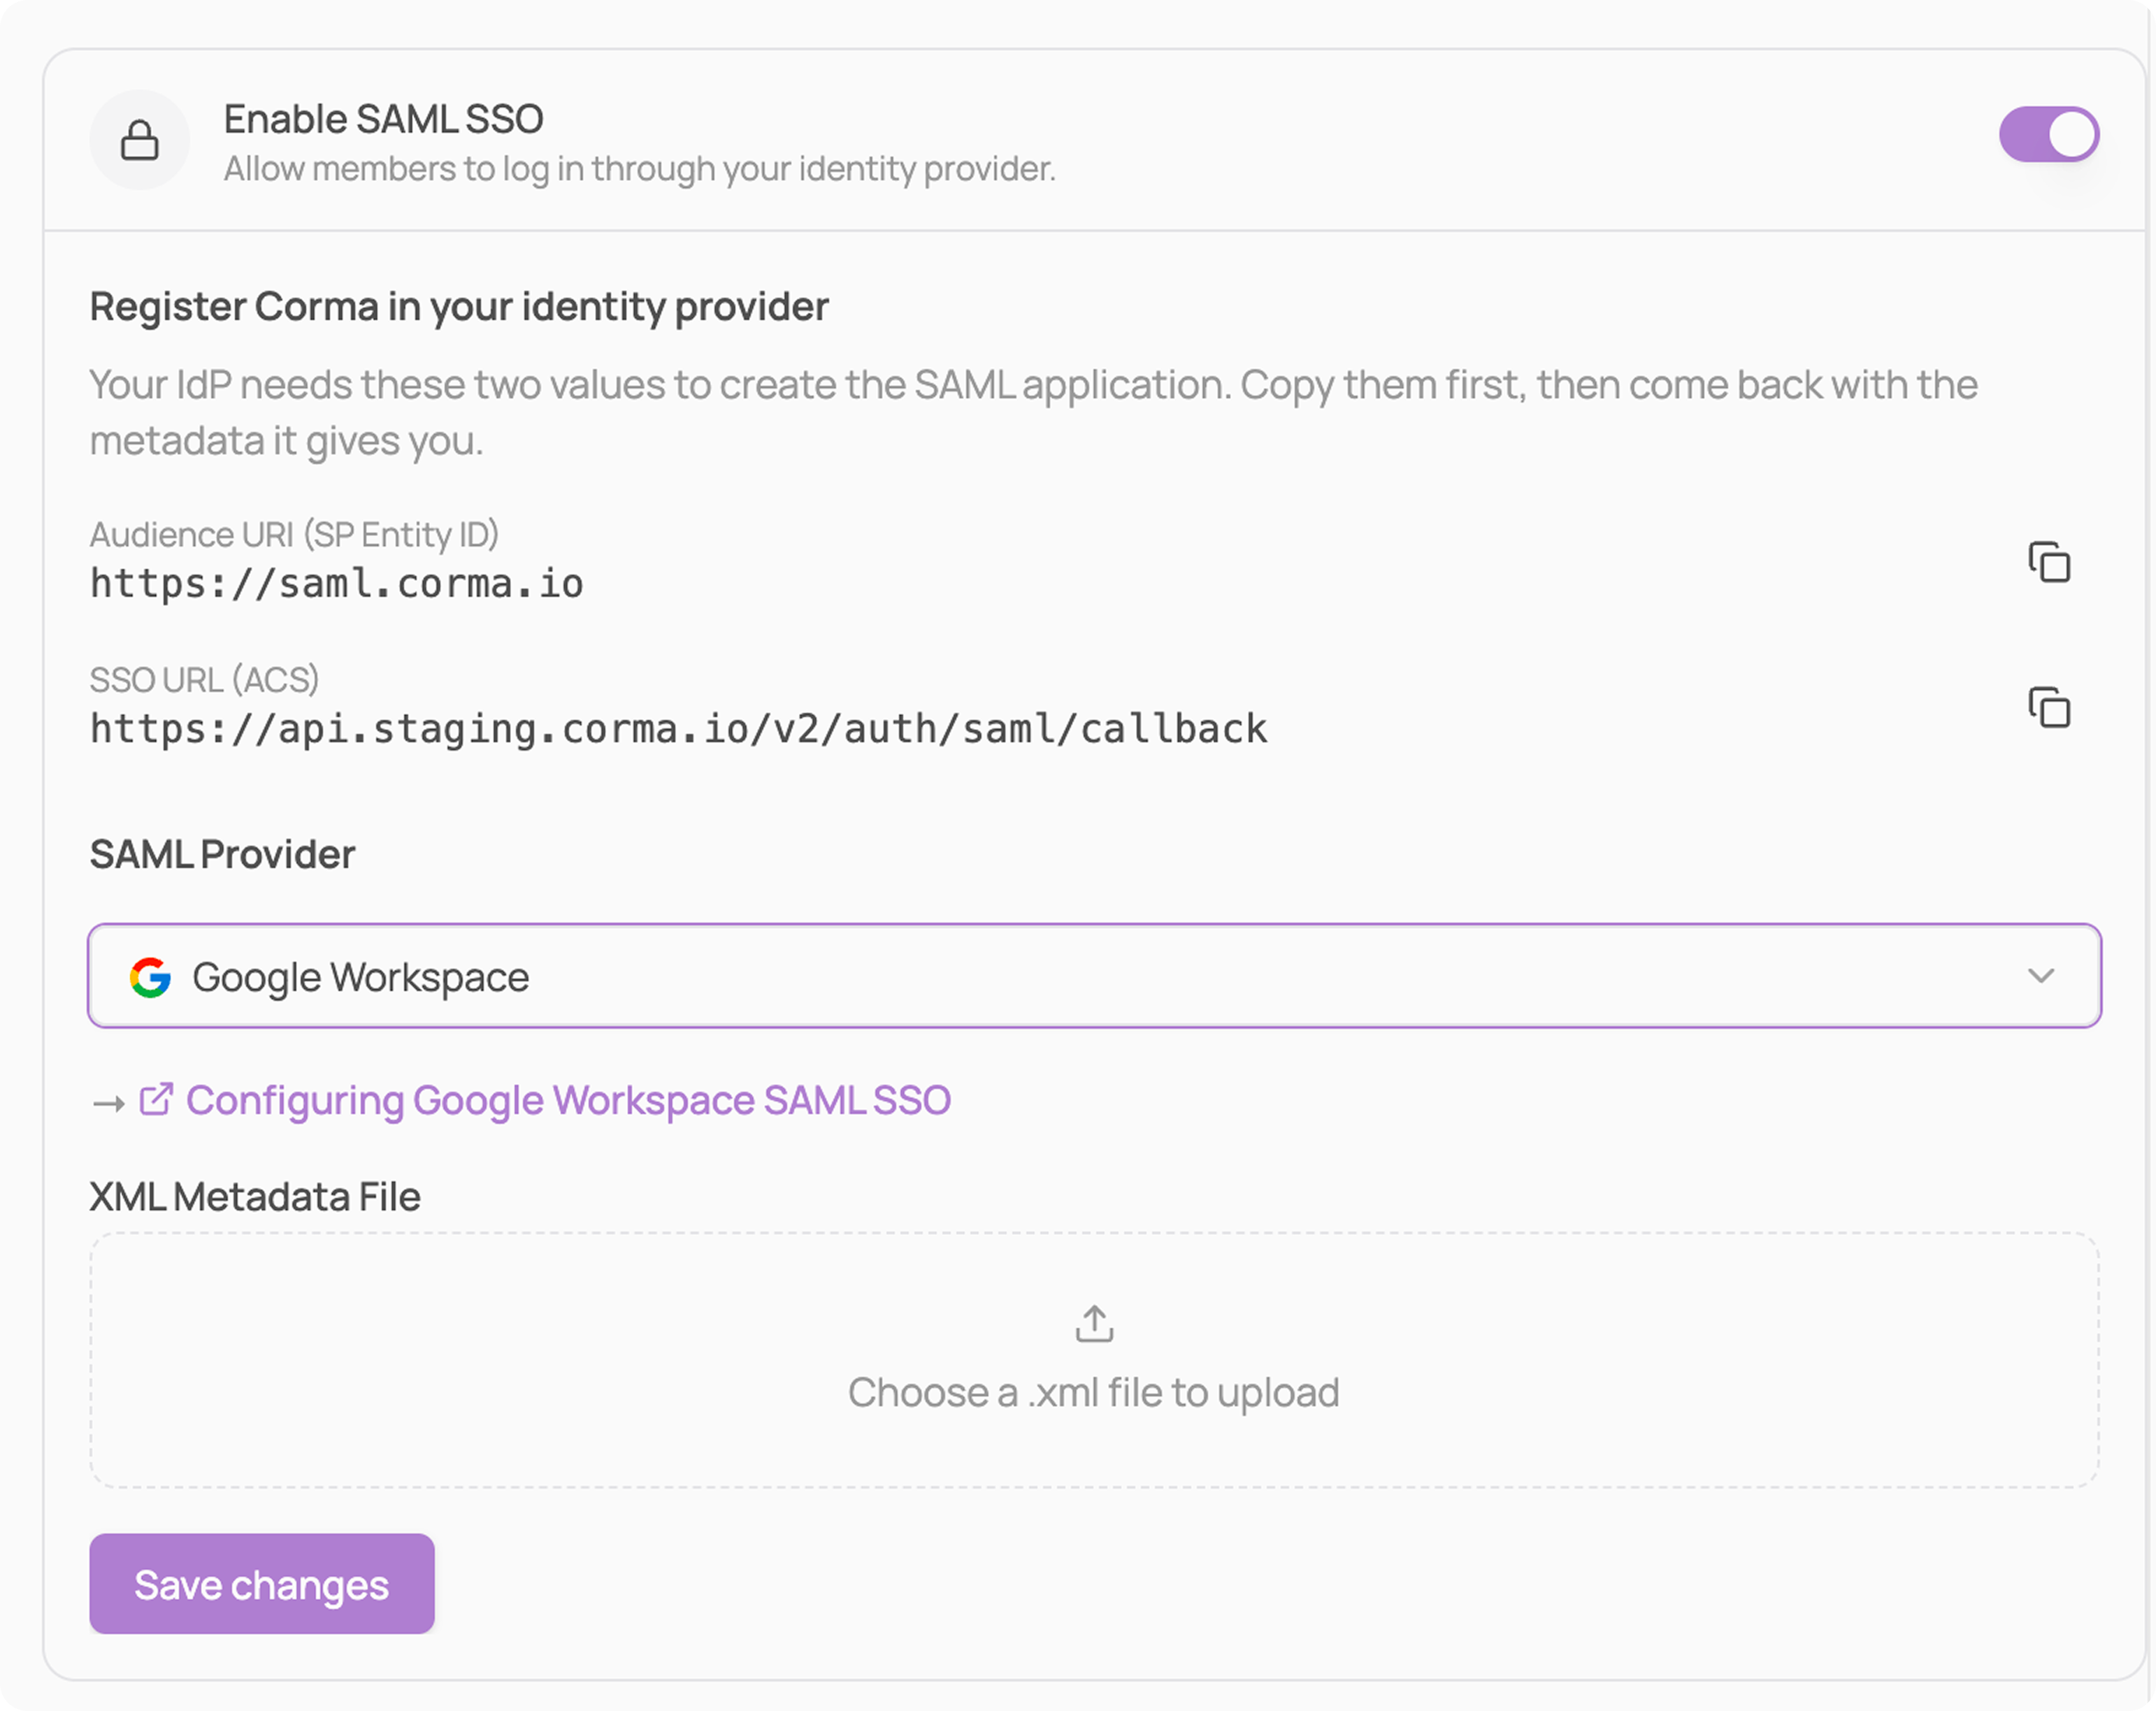
In Corma, navigate to Settings → Security and turn on "Enable SAML SSO". Leave the tab open, you will copy the Audience URI (SP Entity ID) and the SSO URL (ACS) from it shortly.
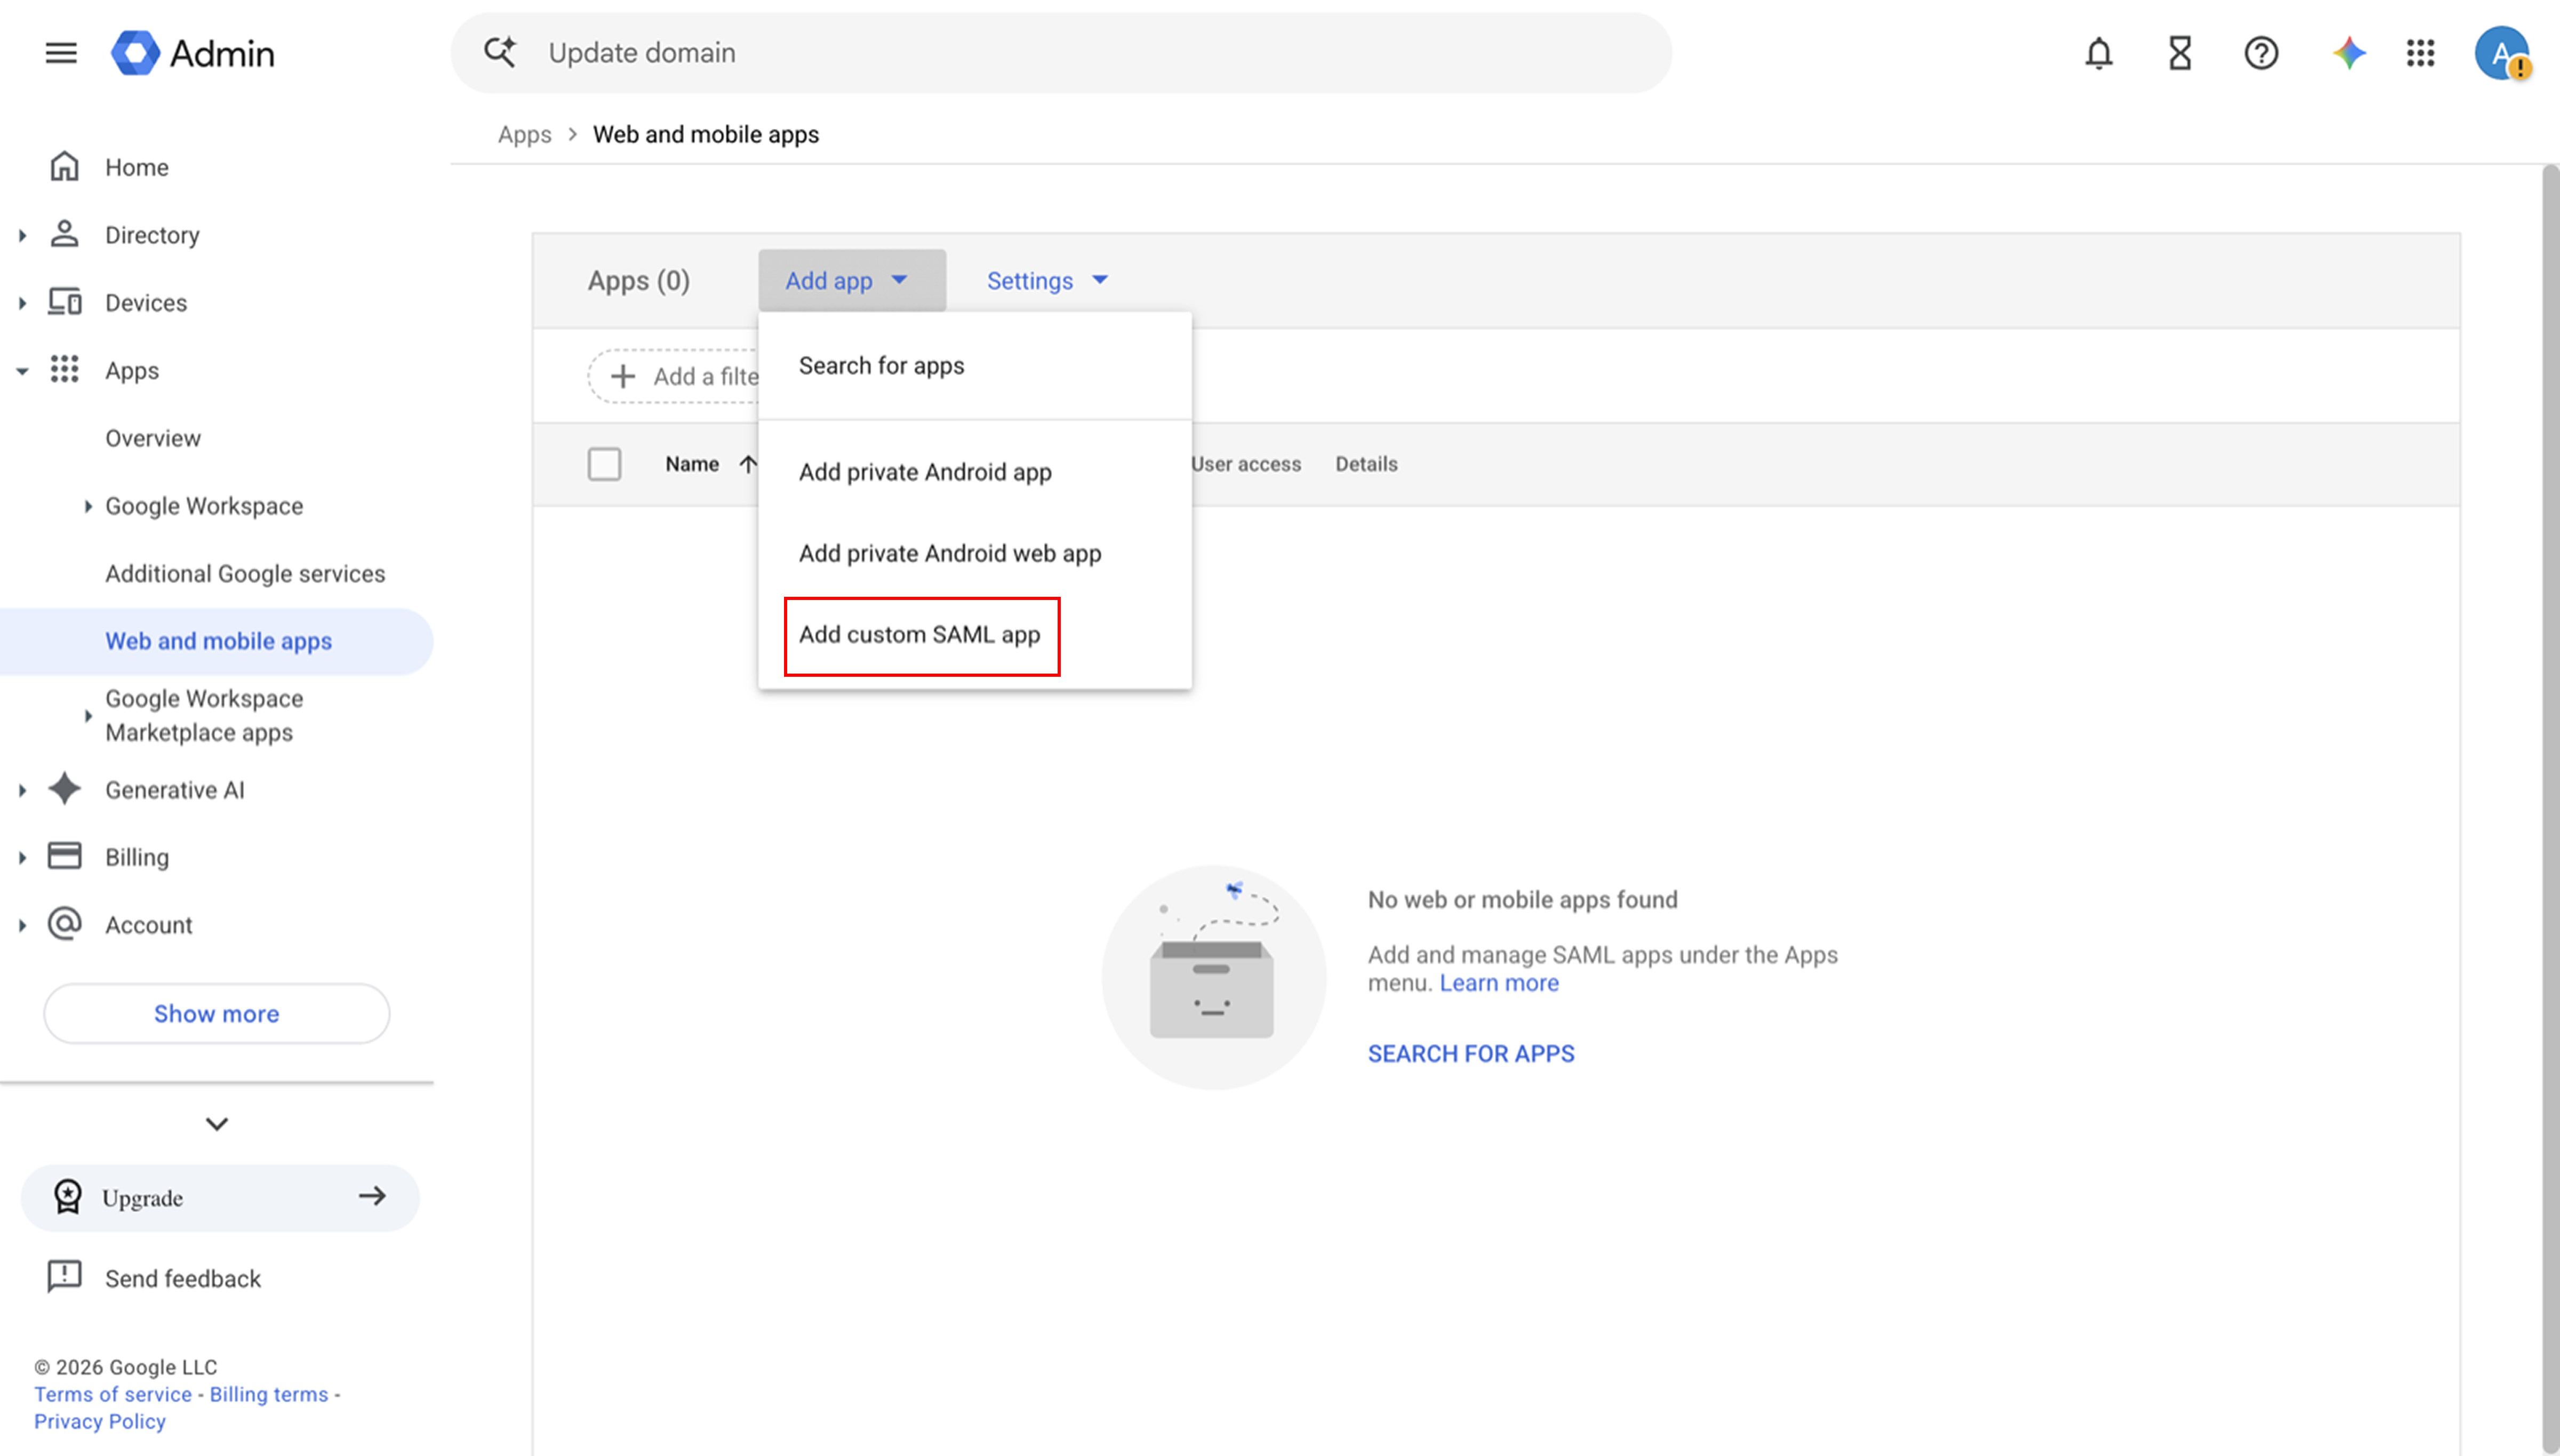
In the Google Admin console, go to Apps → Web and mobile apps, then click "Add app" and "Add custom SAML app".
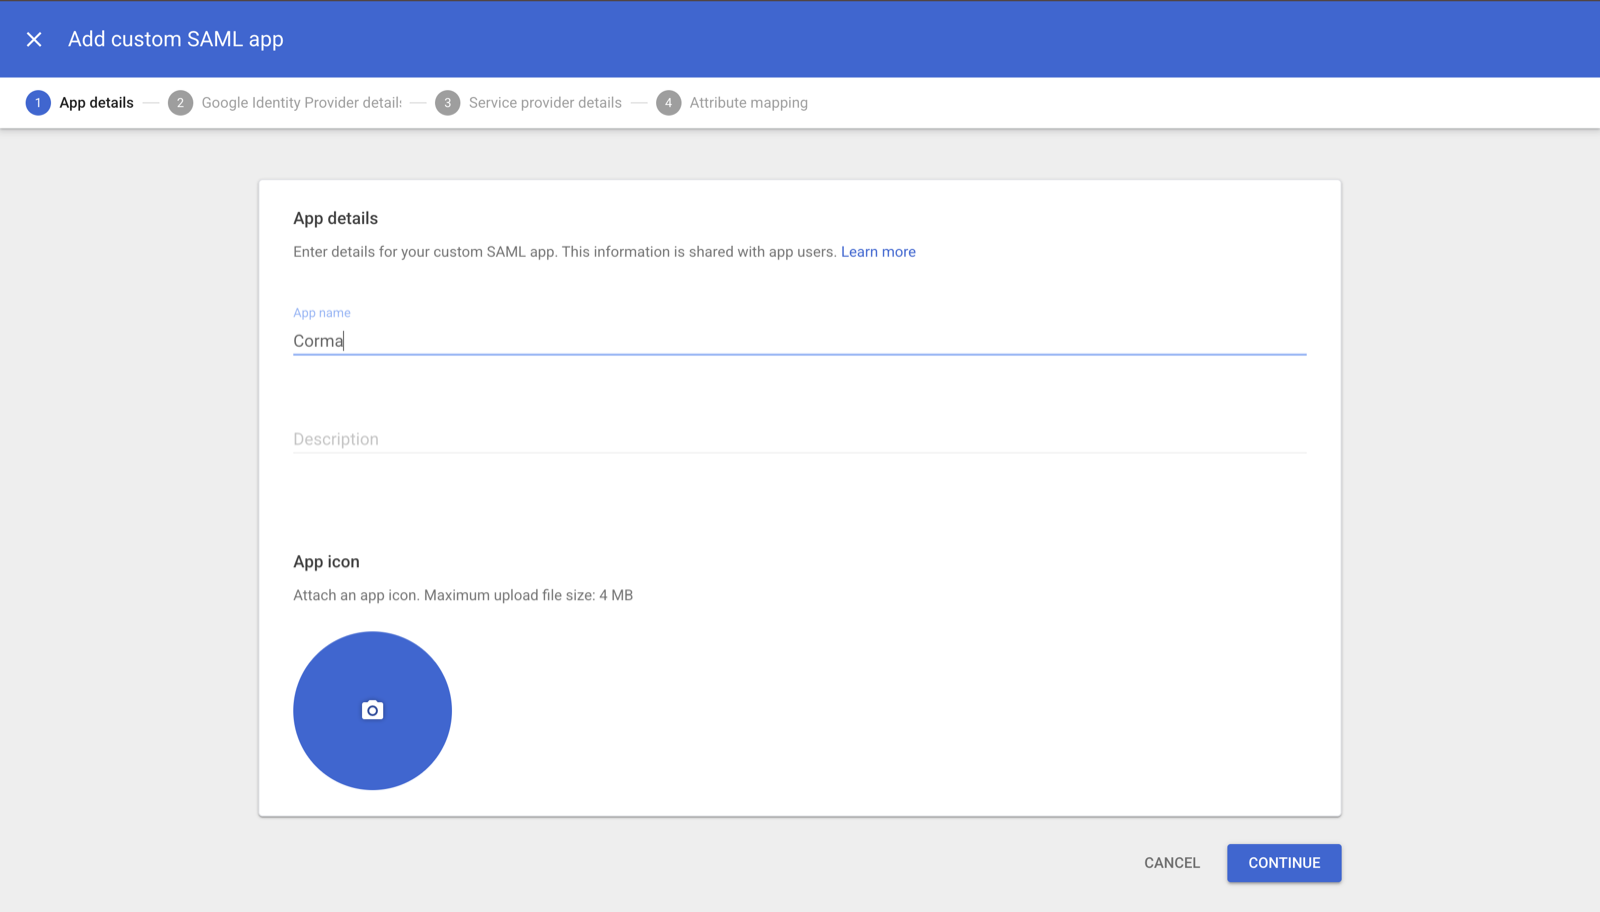
Name the app "Corma", add the logo if you want it recognizable in your employees' app list, and click "Continue".
Click "Download metadata" and keep the XML file. You upload it to Corma at the end. Click "Continue".
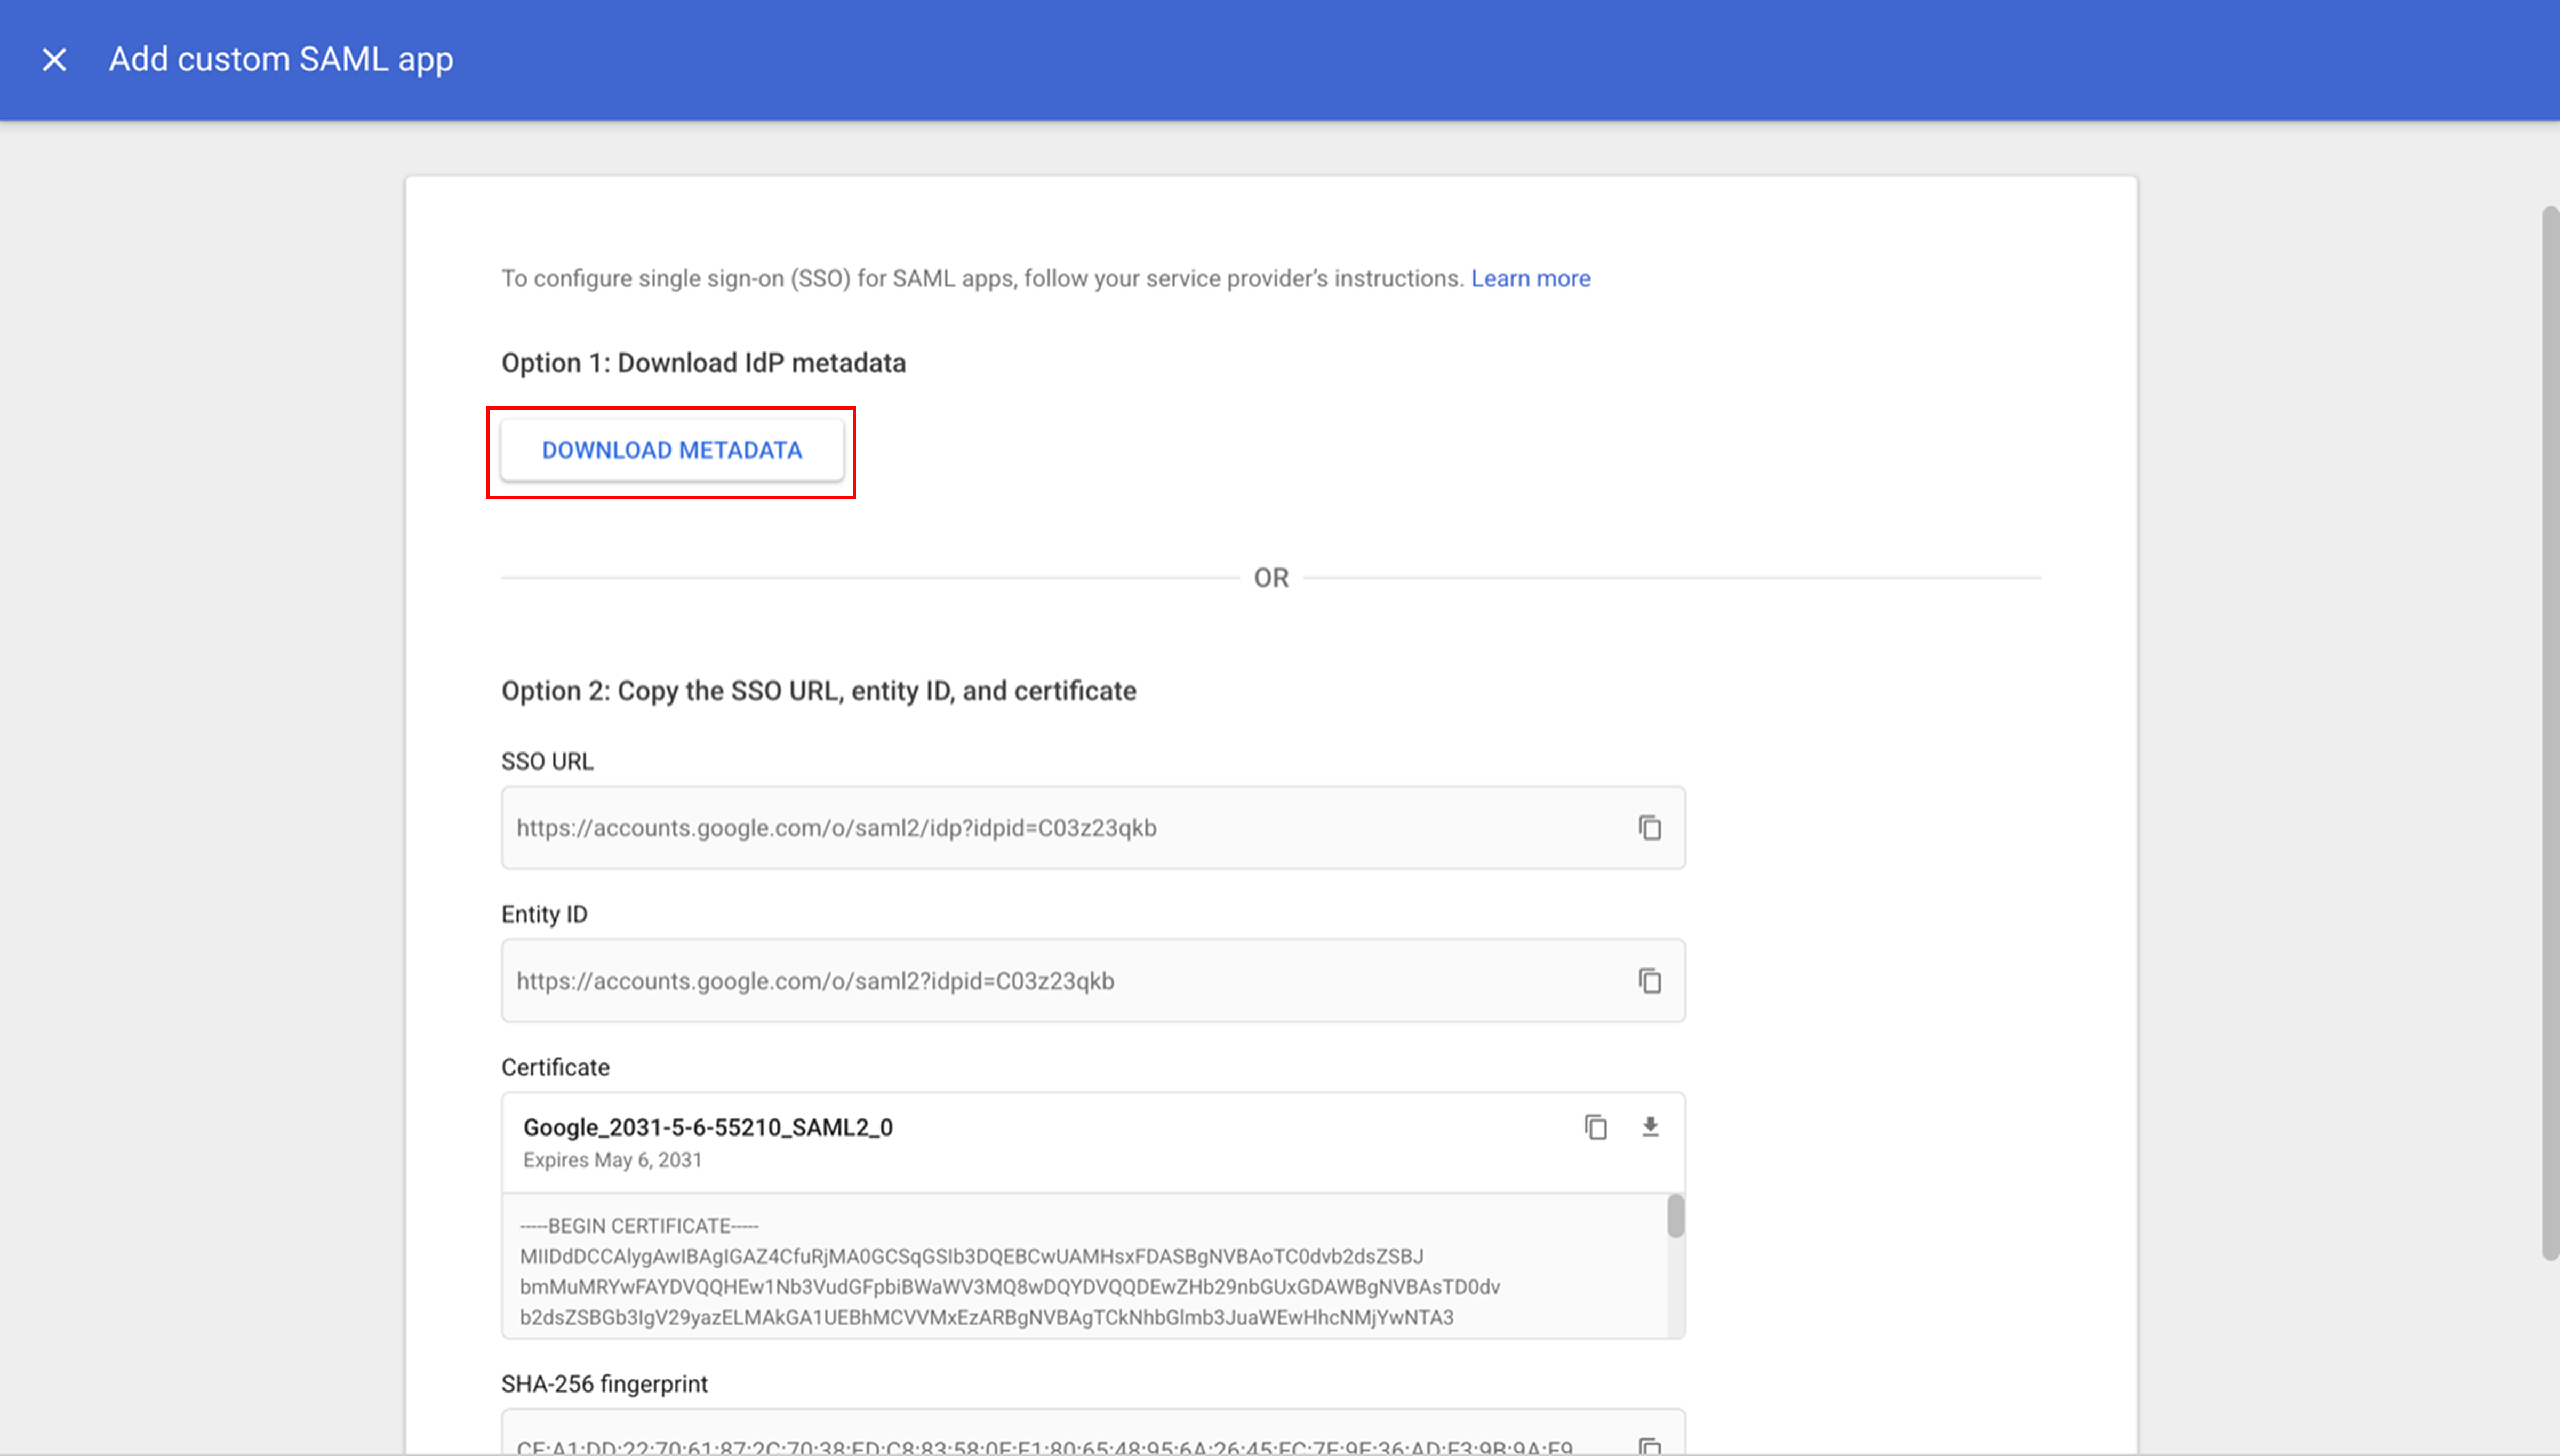
Google offers the same information as an SSO URL, Entity ID and certificate on this screen. Only the XML file is needed. Google does not publish a metadata URL for a custom SAML app, so the file is the only way to give Corma the metadata.
Fill in the service provider details with the two values from your Corma Security page, leave the Name ID format and value at their defaults, and click "Continue". Leave Start URL and Signed response alone.
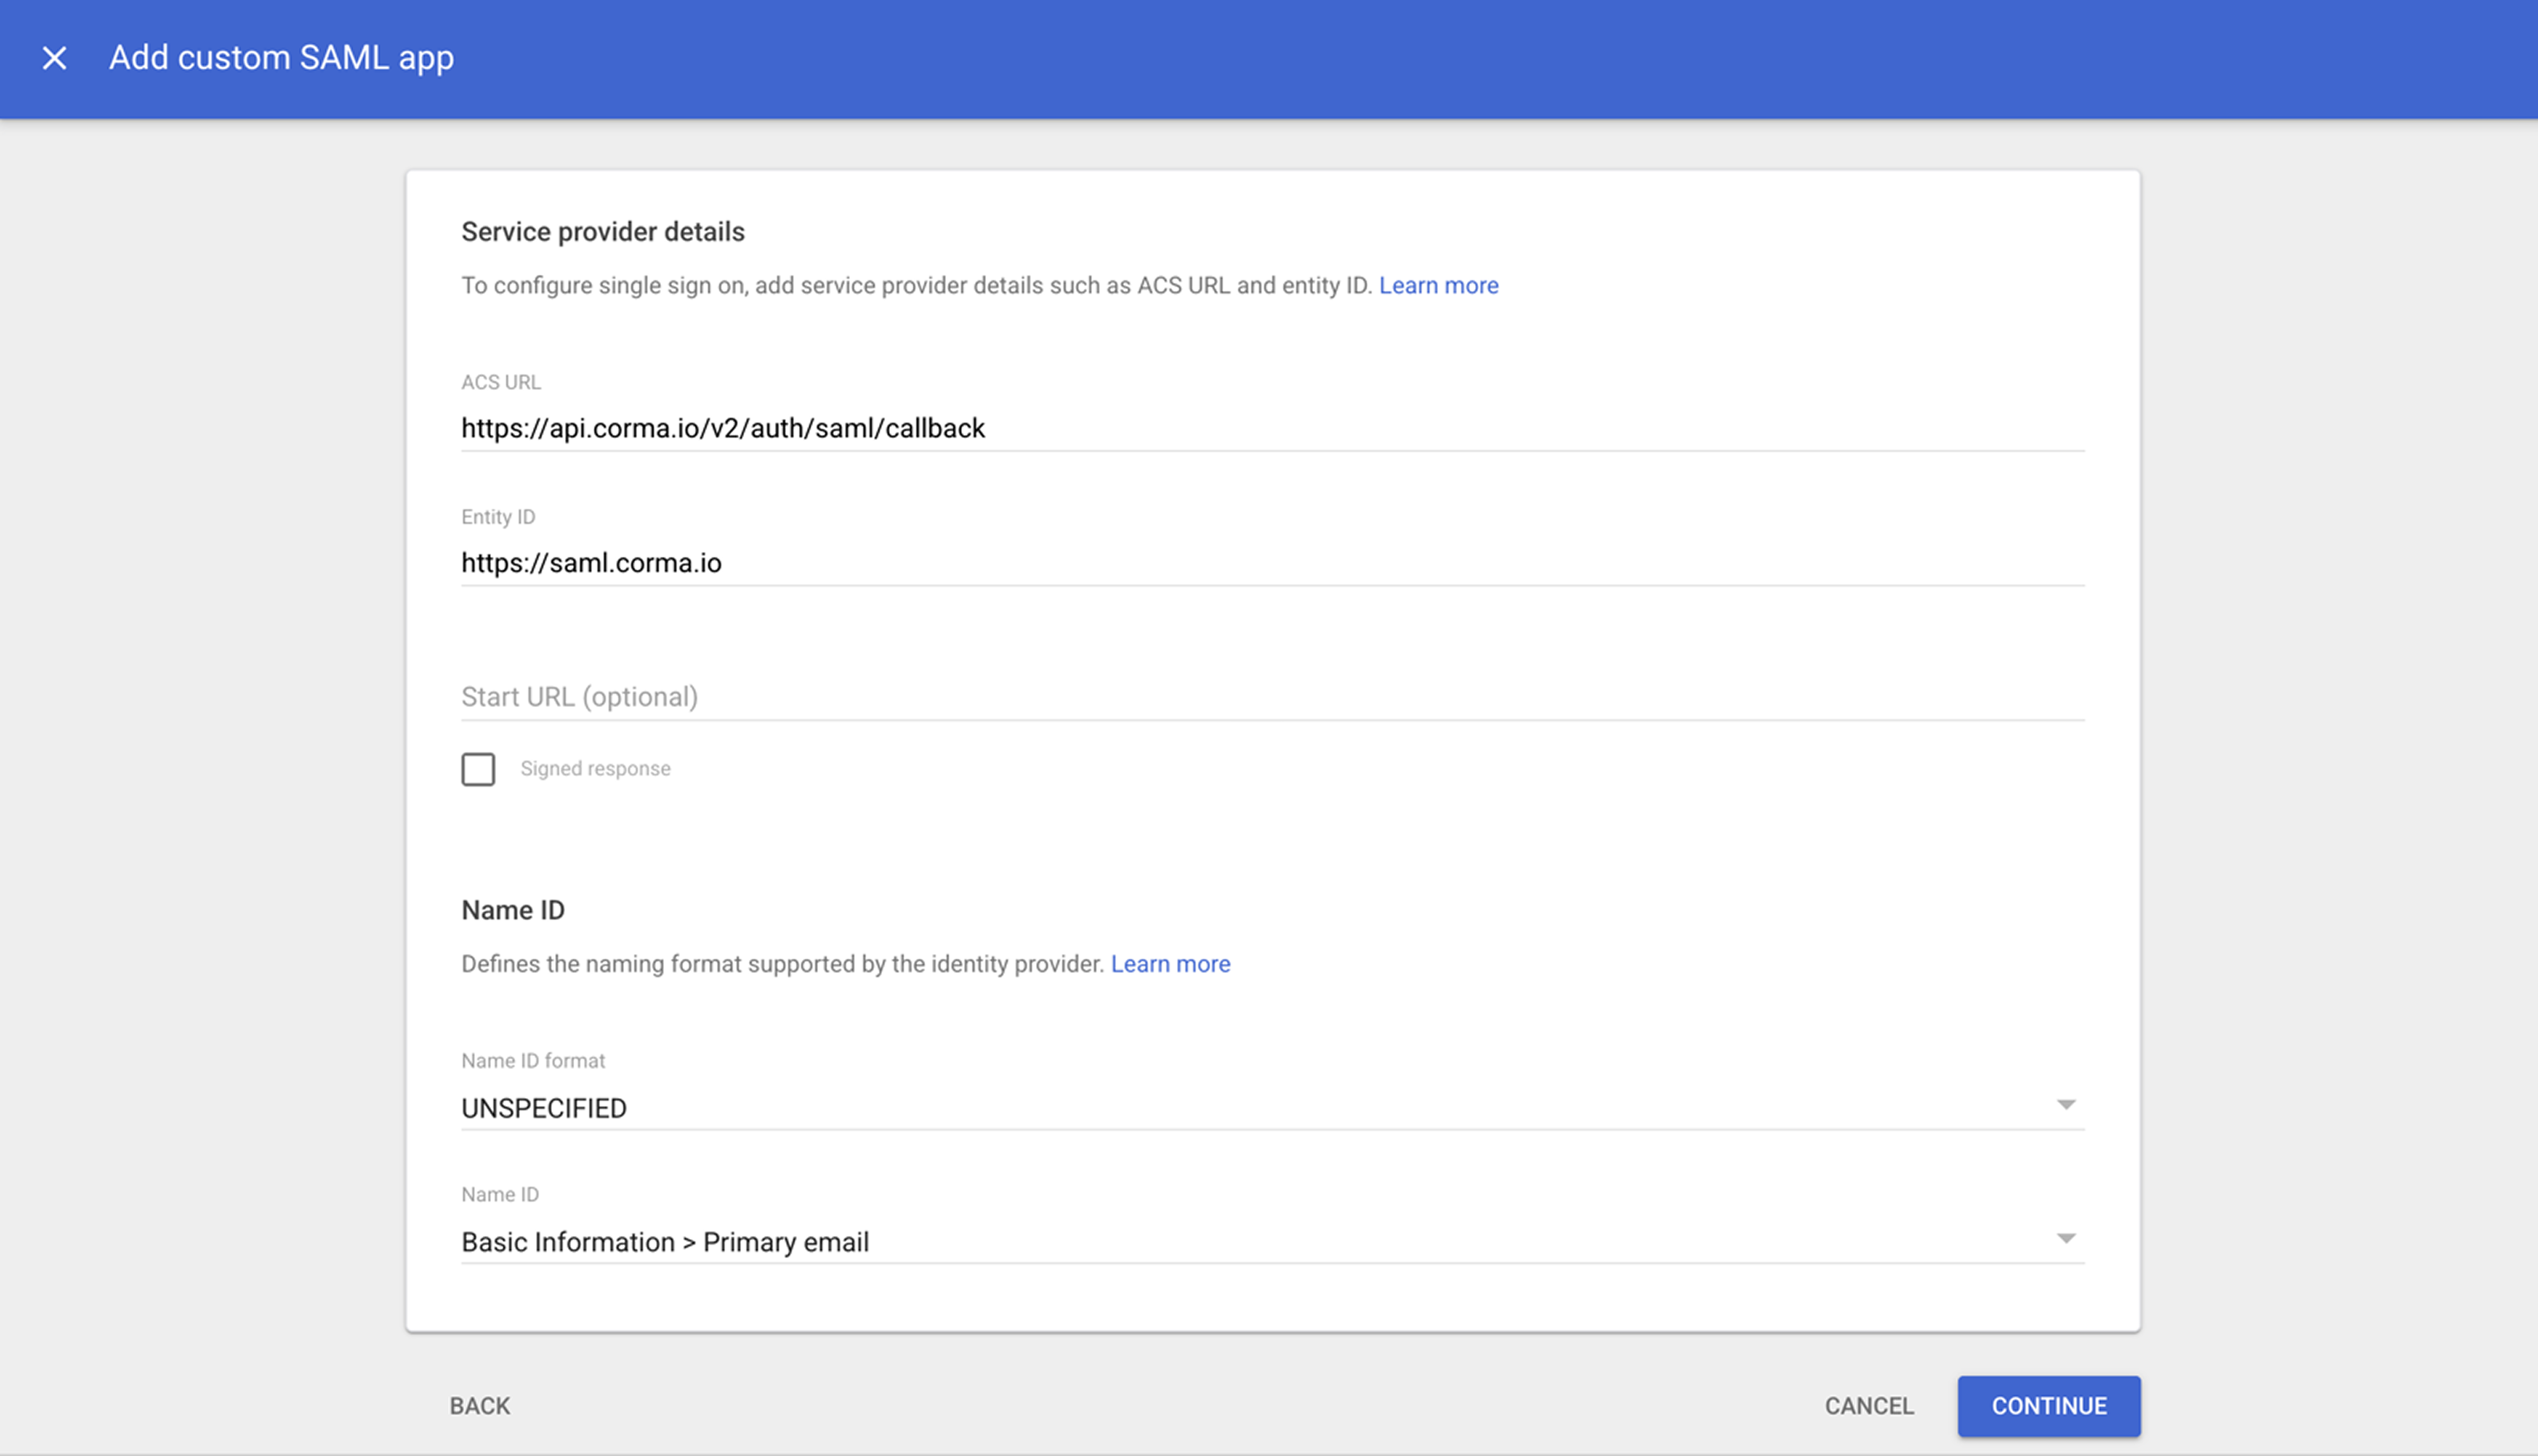
Google requires the ACS URL to start with
https://. Corma's does, so this only matters if you retype the value rather than copying it.Click "Finish" on the attribute mapping screen without mapping anything. Corma does not read identity provider attributes in this version.
Google field | Paste from Corma |
|---|---|
ACS URL | SSO URL (ACS) |
Entity ID | Audience URI (SP Entity ID) |
Turn the app on and connect
Open the app and click "User access".
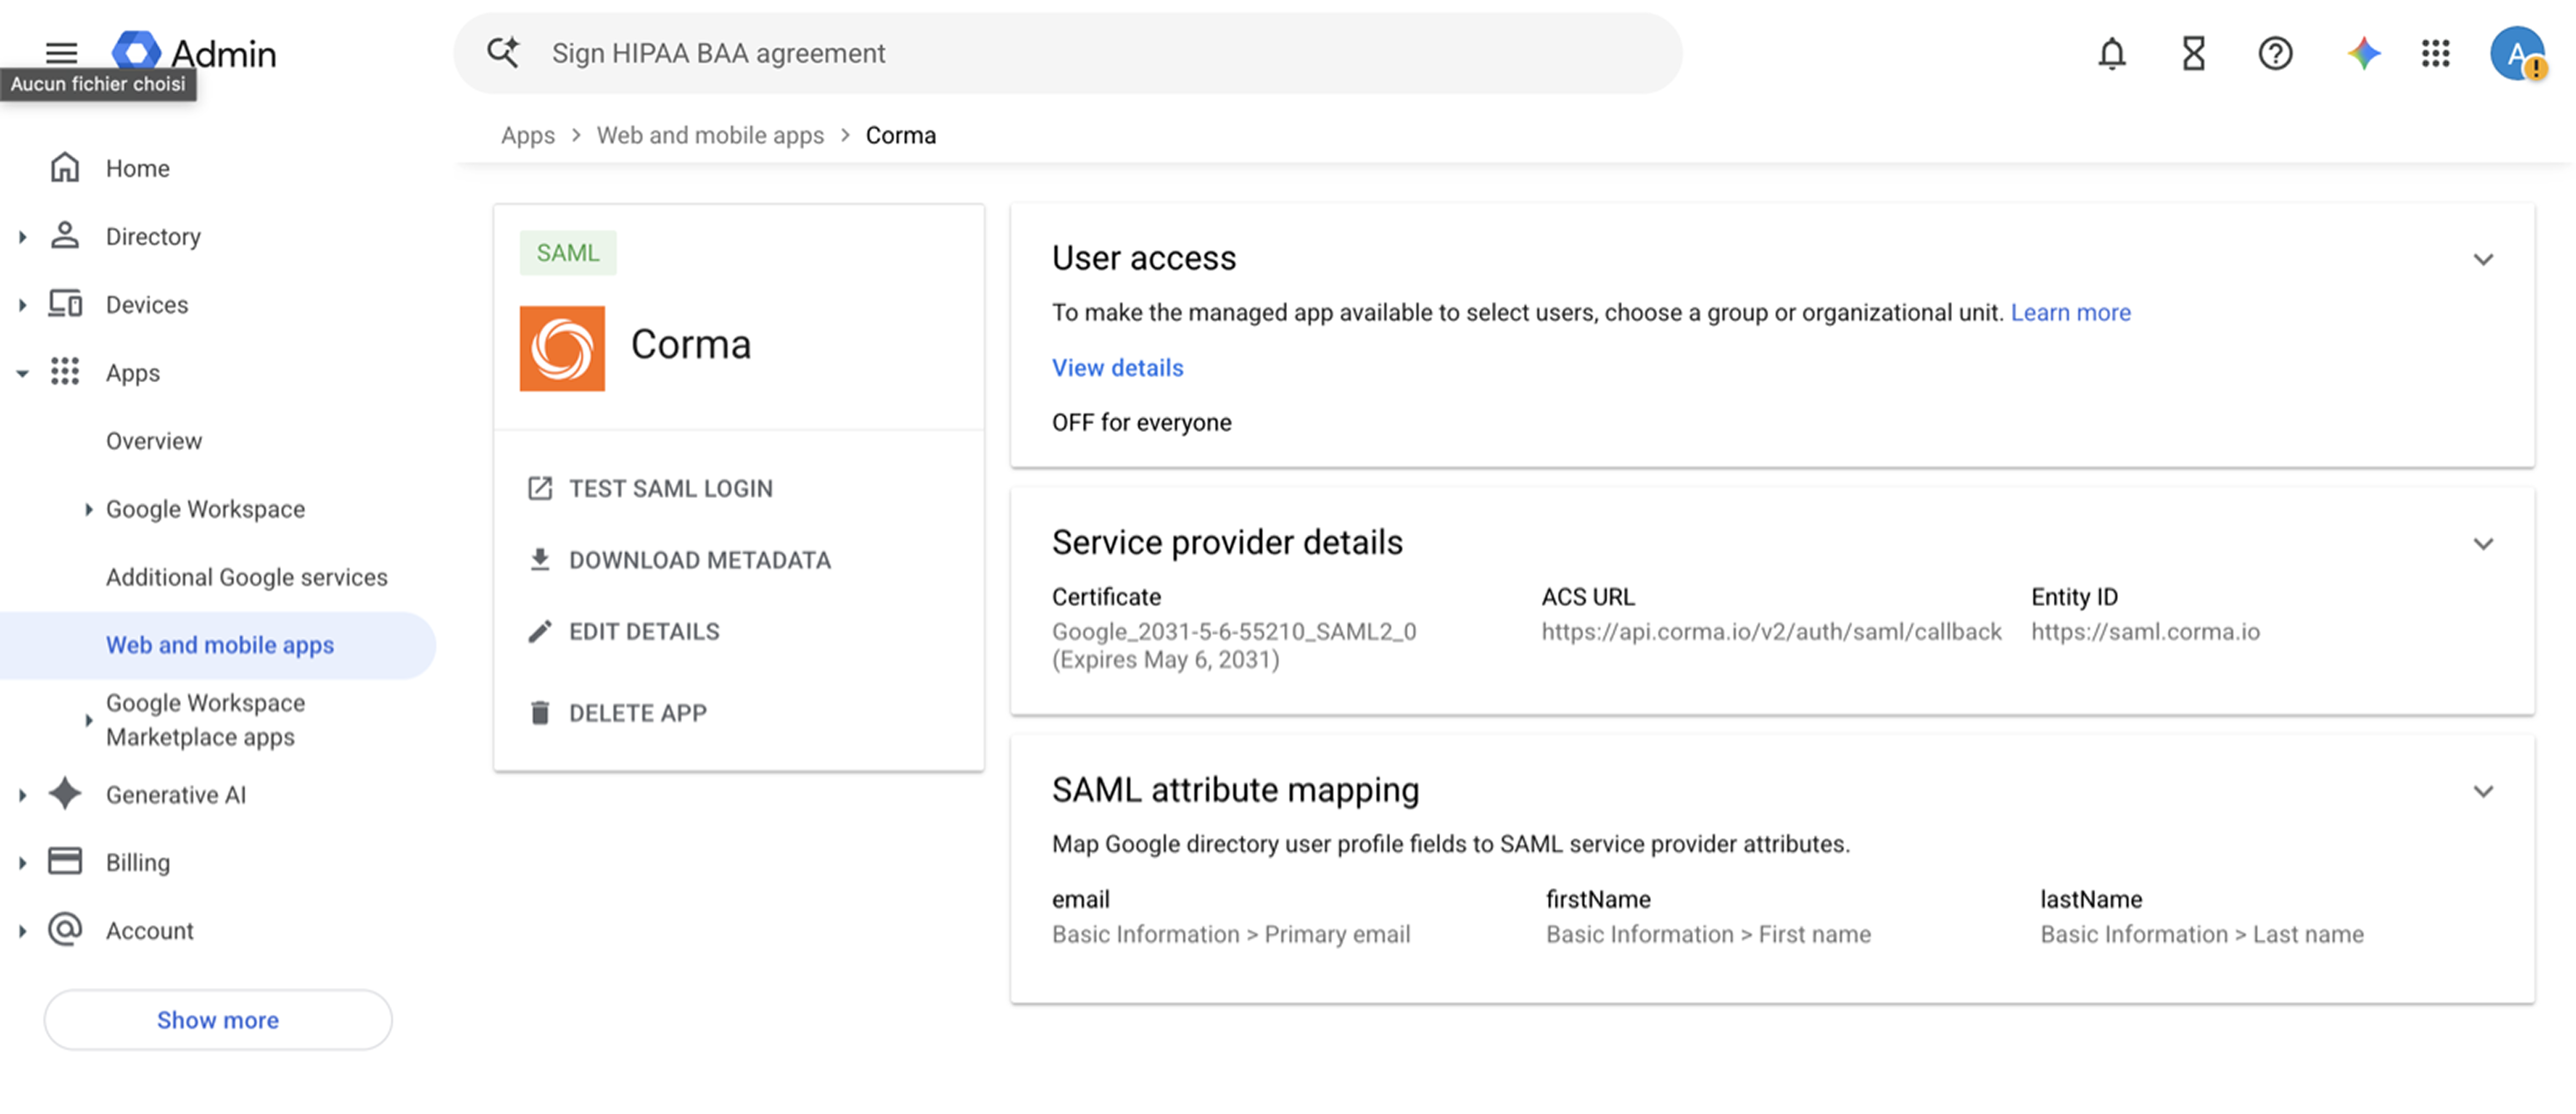
Select On for everyone, or turn it on for the organisational units or access groups that should reach Corma, then click "Save".
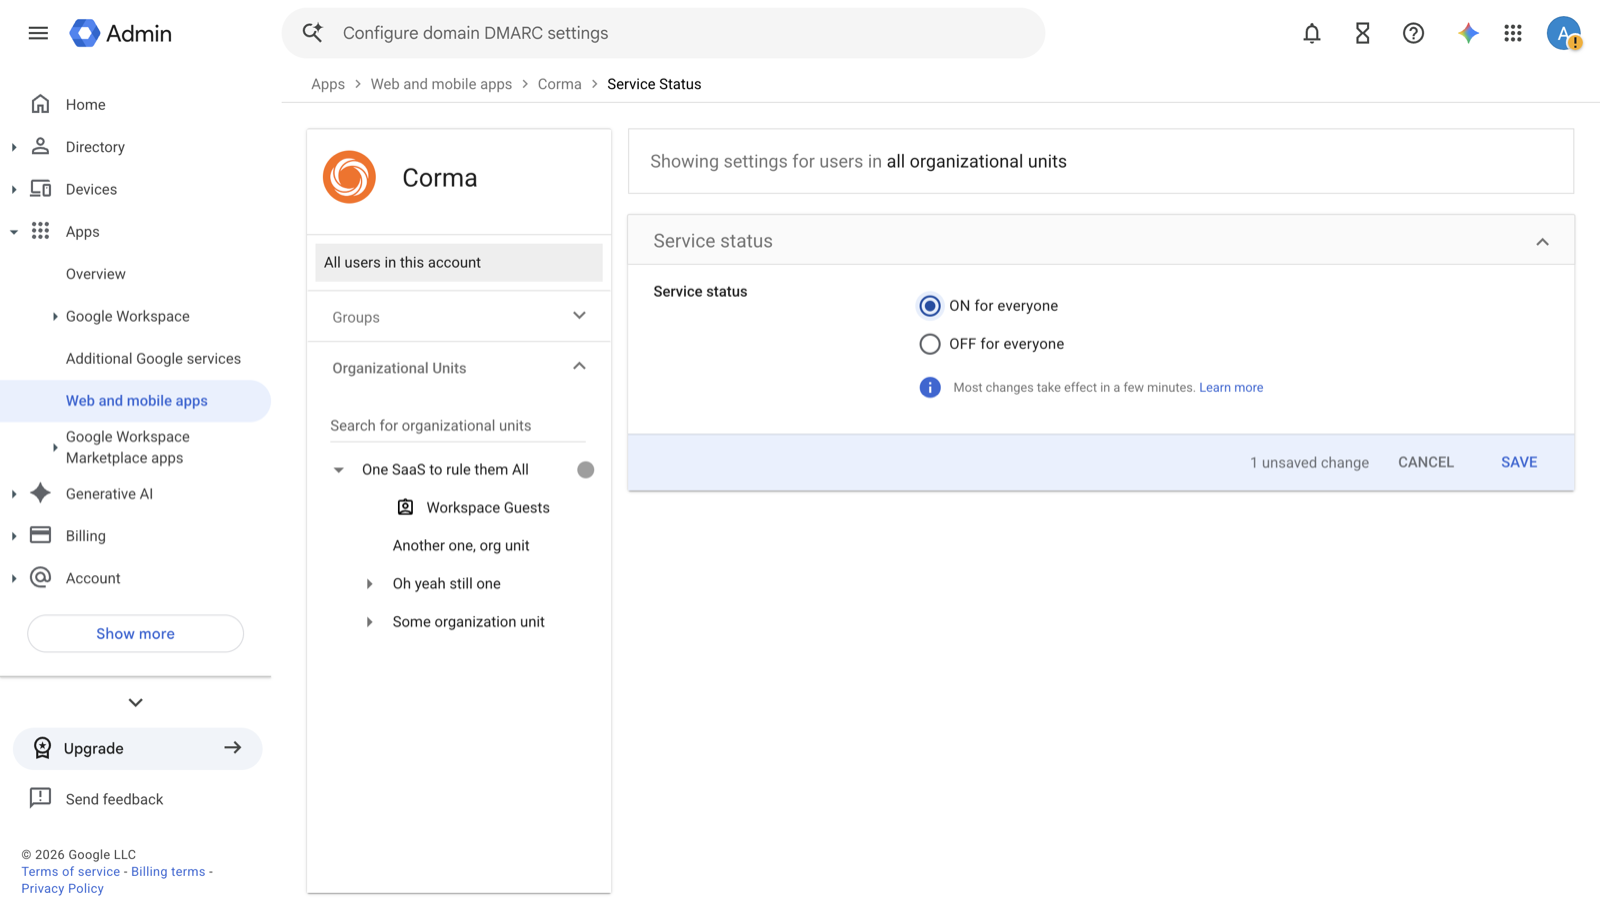
This is the step people miss. A new custom SAML app is Off for everyone by default. The change usually applies within minutes, but Google allows up to 24 hours, so do not conclude the setup is broken straight away.
Back in Corma, select "Google Workspace" from the SAML Provider dropdown.
Drop the Google metadata XML file you downloaded earlier into Or upload the metadata XML file, then click "Save changes". Google gives you a file rather than an address, so leave Metadata URL empty.
Test in a private browsing window using "Sign in with SAML SSO", before you enforce SAML.
If the first test fails, check User access before anything else and give Google time to catch up. You can also use Test SAML login in the Google Admin console to check the connection from Google's side. SAML SSO troubleshooting covers the rest, and Google documents the wizard in Set up your own custom SAML app.
Was this helpful?