
Workflow Builder
Build powerful workflows to automate everything in your IT, from Onboardings to Shadow IT remediations or Access reviews
What Is the Workflow Builder?
The Workflow Builder lets admins create automated, multi-step sequences that execute actions across connected apps, triggered automatically by employee lifecycle events, without any manual intervention.
Instead of manually provisioning access when someone joins, moves teams, or leaves, you define the rules once and Corma handles execution every time the trigger condition is met.
Why Use It?
Manual provisioning doesn't scale. As your organization grows, the risk of errors, delays, and forgotten offboarding steps increases. The Workflow Builder solves this by:
Eliminating manual work: access is granted or revoked automatically based on rules you define
Reducing security risk: offboarding workflows ensure access is always revoked on time
Speeding up onboarding: new employees get the right tools from day one, without waiting on IT
Standardizing processes: every employee goes through the same consistent flow, every time
How It Works
A workflow is made of three components:
1. Trigger
The event that starts the workflow. Currently supported triggers:
Manual trigger: run the workflow manually, with no automatic firing
User start date reached: fires when a user's configured start date is reached
User end date reached: fires when a user's configured termination date is reached
Scheduled: run a workflow on a recurring schedule (e.g. every X days or months)
License status changed: trigger on billing or activity status changes: renewed, expired, cancelled, activated, deactivated
New app detected : fire a workflow whenever a new app is discovered in your SaaS directory, with the option to filter by app status
Ticket created: fires when a new ticket is created, for example to forward it to an external platform such as Jira
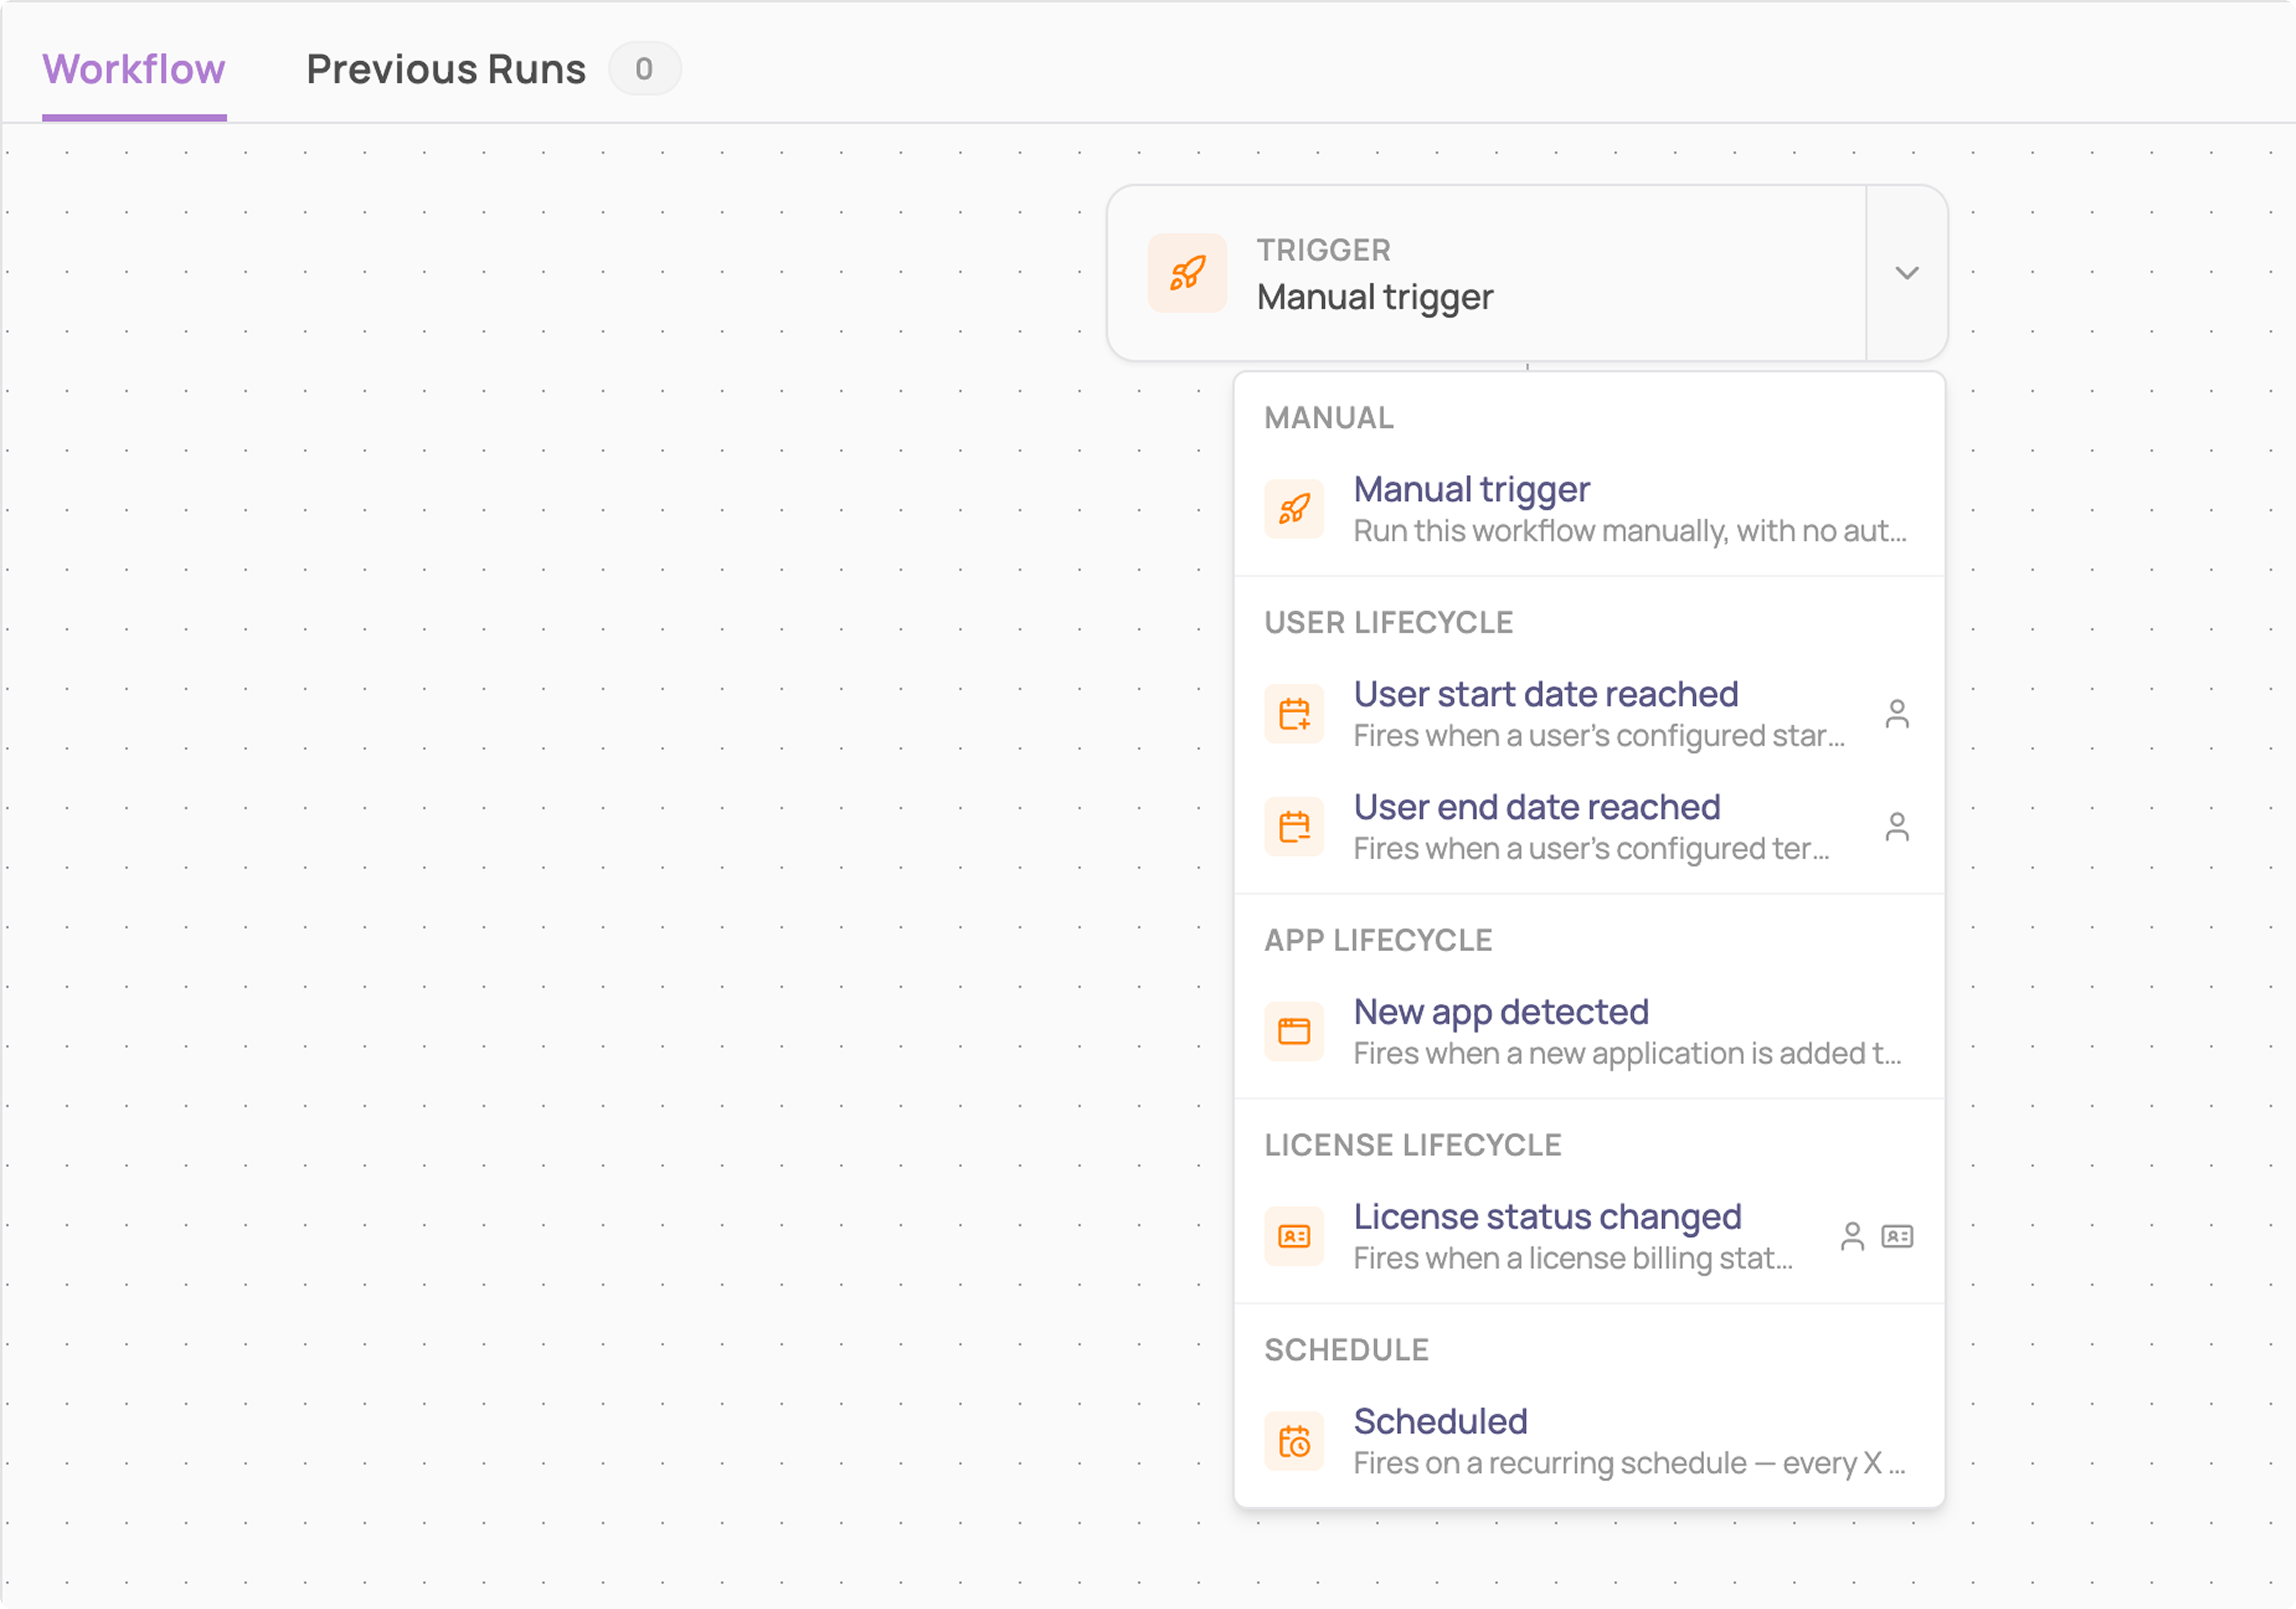
User start date reached and User end date reached fire at midnight in your company timezone by default. You can change how many days ahead of the date each one fires, and at what time of day, in Administration → General settings → Workflows → Trigger timing. Useful when offboarding should run at, for example, 18:00 on someone's last day rather than at 00:00.
2. Actions
The steps executed when the trigger fires. Actions are drawn from your connected apps and executed sequentially. Examples:
Create a Notion account
Revoke access to Google Workspace
Add a user to a Slack channel
Send a notification
Change app status
Revoke all tokens
Launch access review
Send email
Wait
Call a webhook
Add role on Datadog
Log a license
Get license data
Mark ticket as completed
Remove a user from Atlassian groups
Ask for approval
Every workflow also exposes a variable holding its run ID and run URL, so a message or a ticket created by the workflow can link straight back to the run.
Each action is configurable and can use dynamic variables (e.g. {{context.targetUser.username}}, {{context.targetUser.email}}) to personalize execution for each target user.
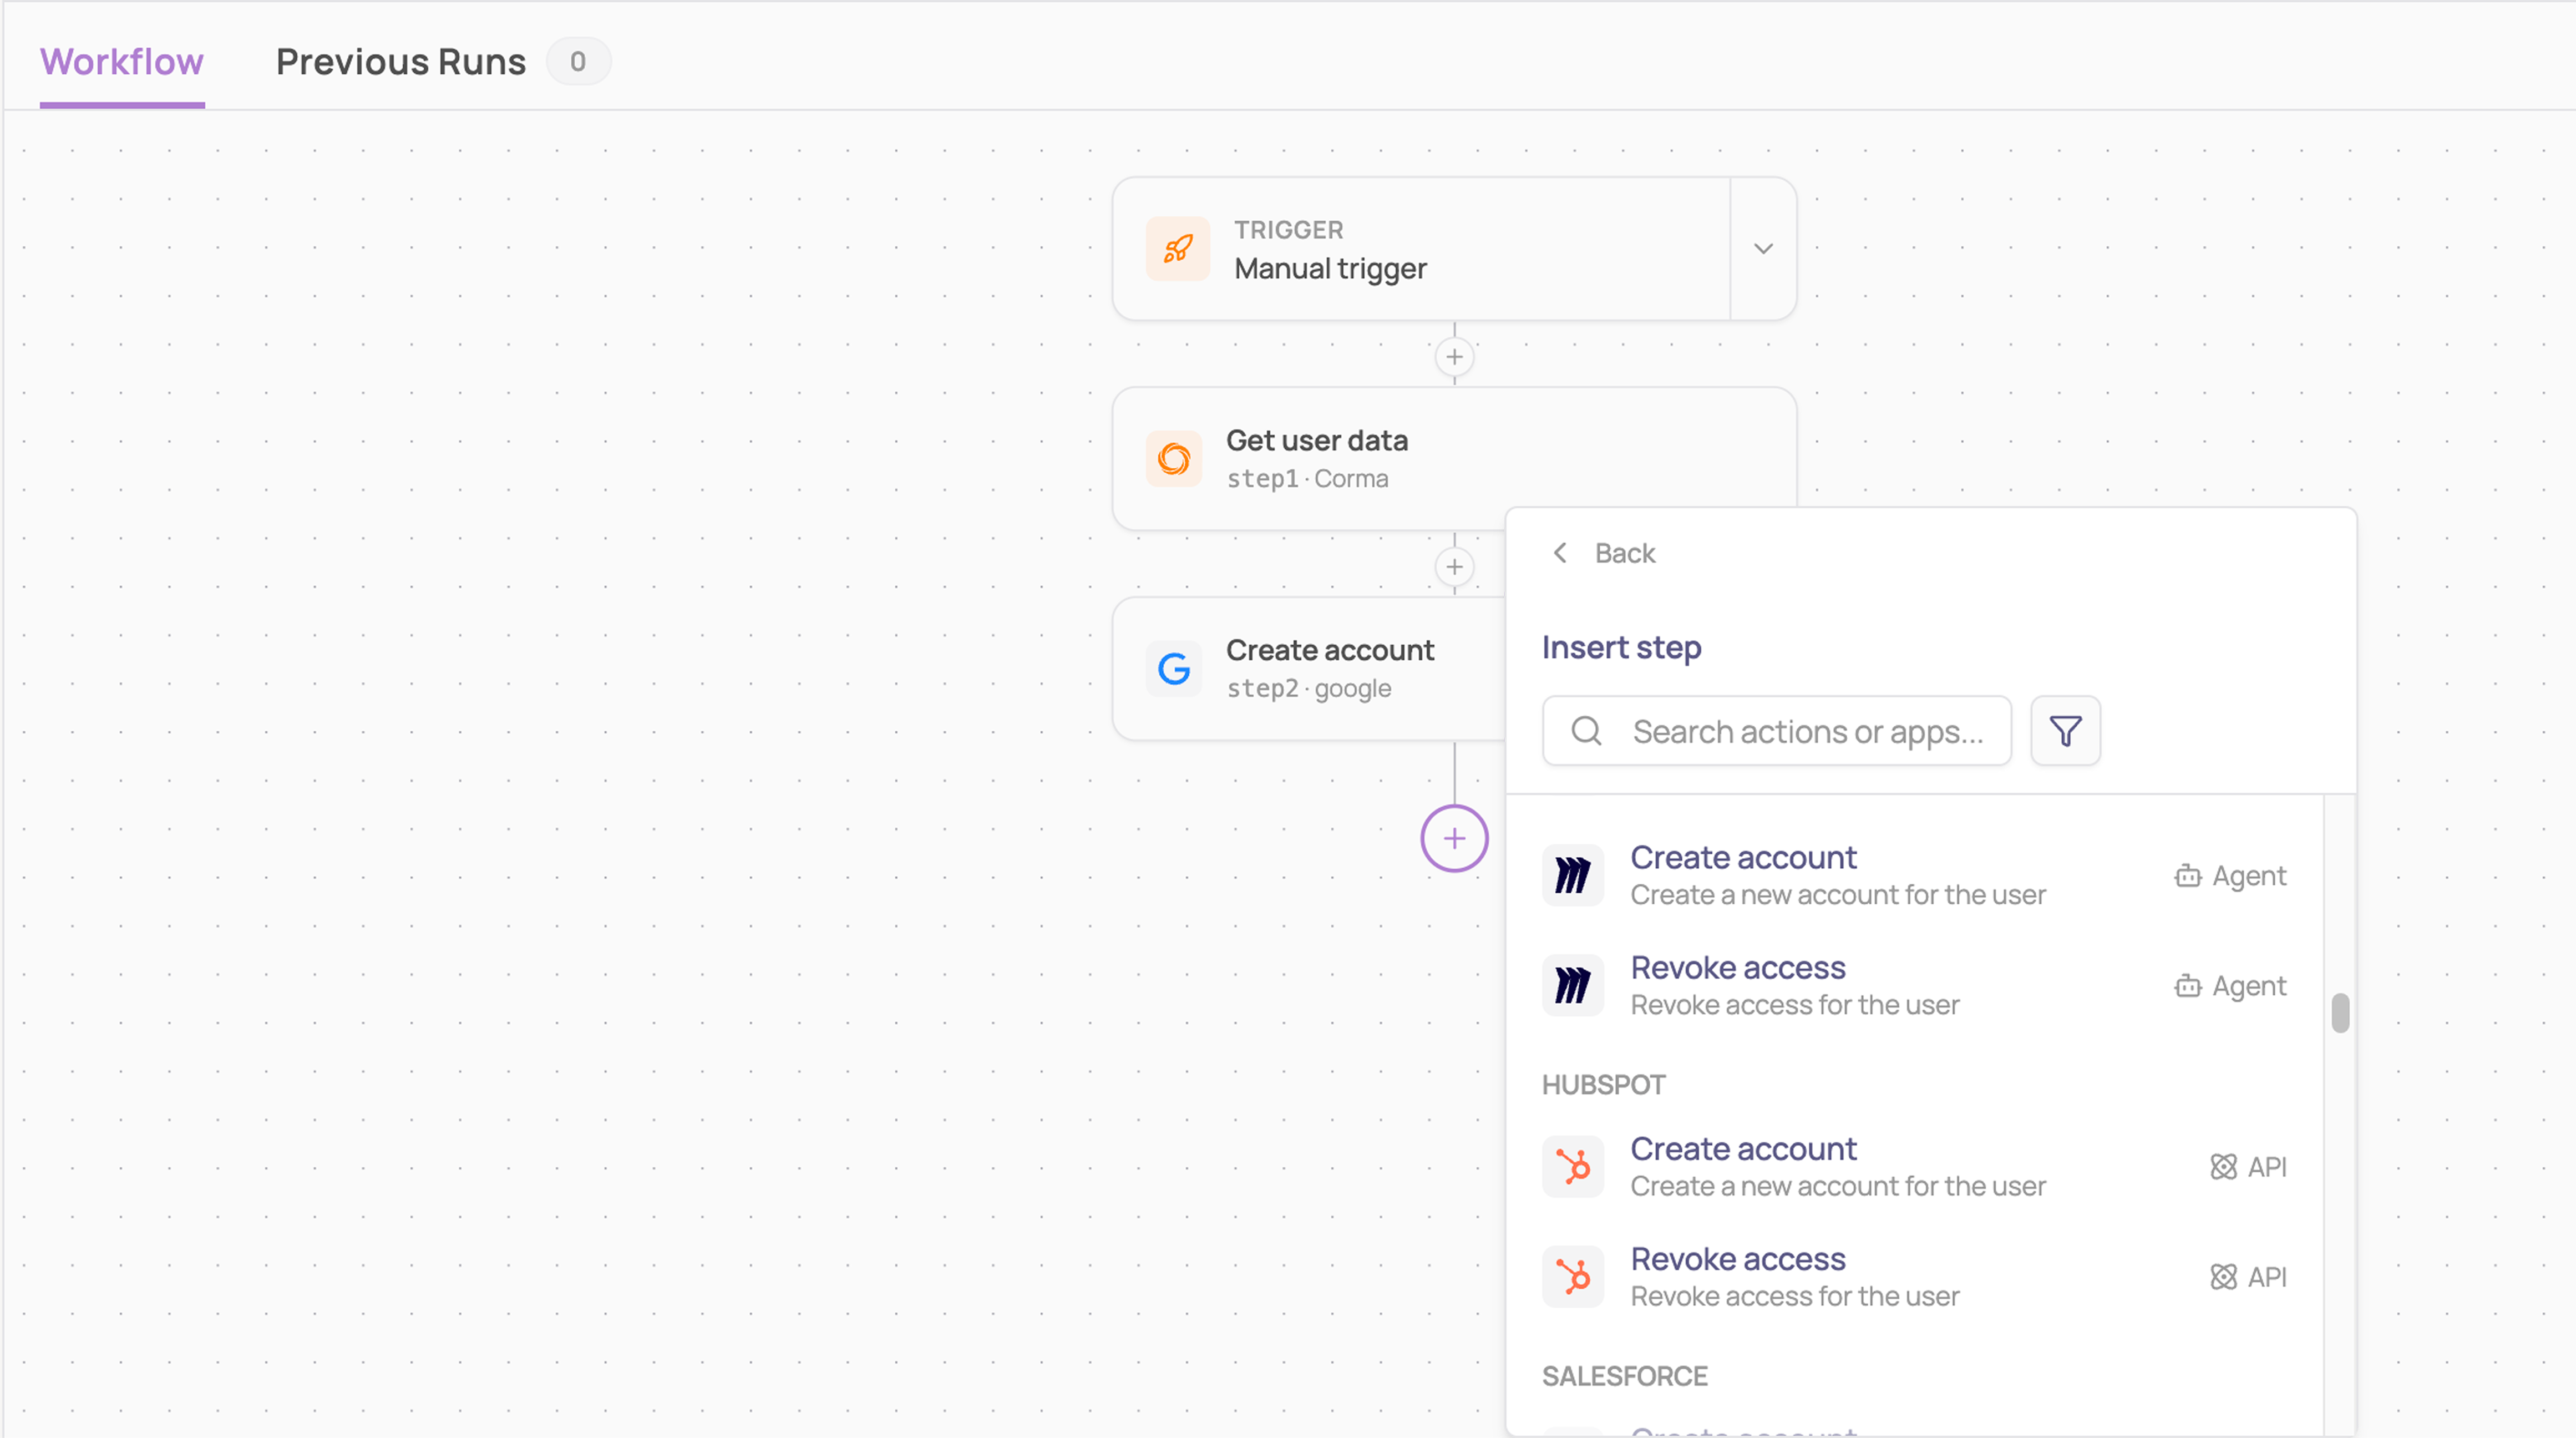
One action behaves differently from the others: Ask for approval pauses the workflow instead of running straight through. It creates a ticket for the approver you designate, and the workflow only resumes once they respond.
See How to add an approval step to a workflow for the full setup.
3. Branching
Workflows also include conditional and parallel paths rather than always running in a single straight line. Three branch types are available from the plus icon on the canvas:
Add condition (if): route down one of two paths, true or false, based on a condition
Add switch: compare a value against multiple cases, routing to whichever one matches, or default if none do
Split in parallel: run two or more branches at the same time
All branch types can be nested inside one another, and all branches merge back into a single path once complete.
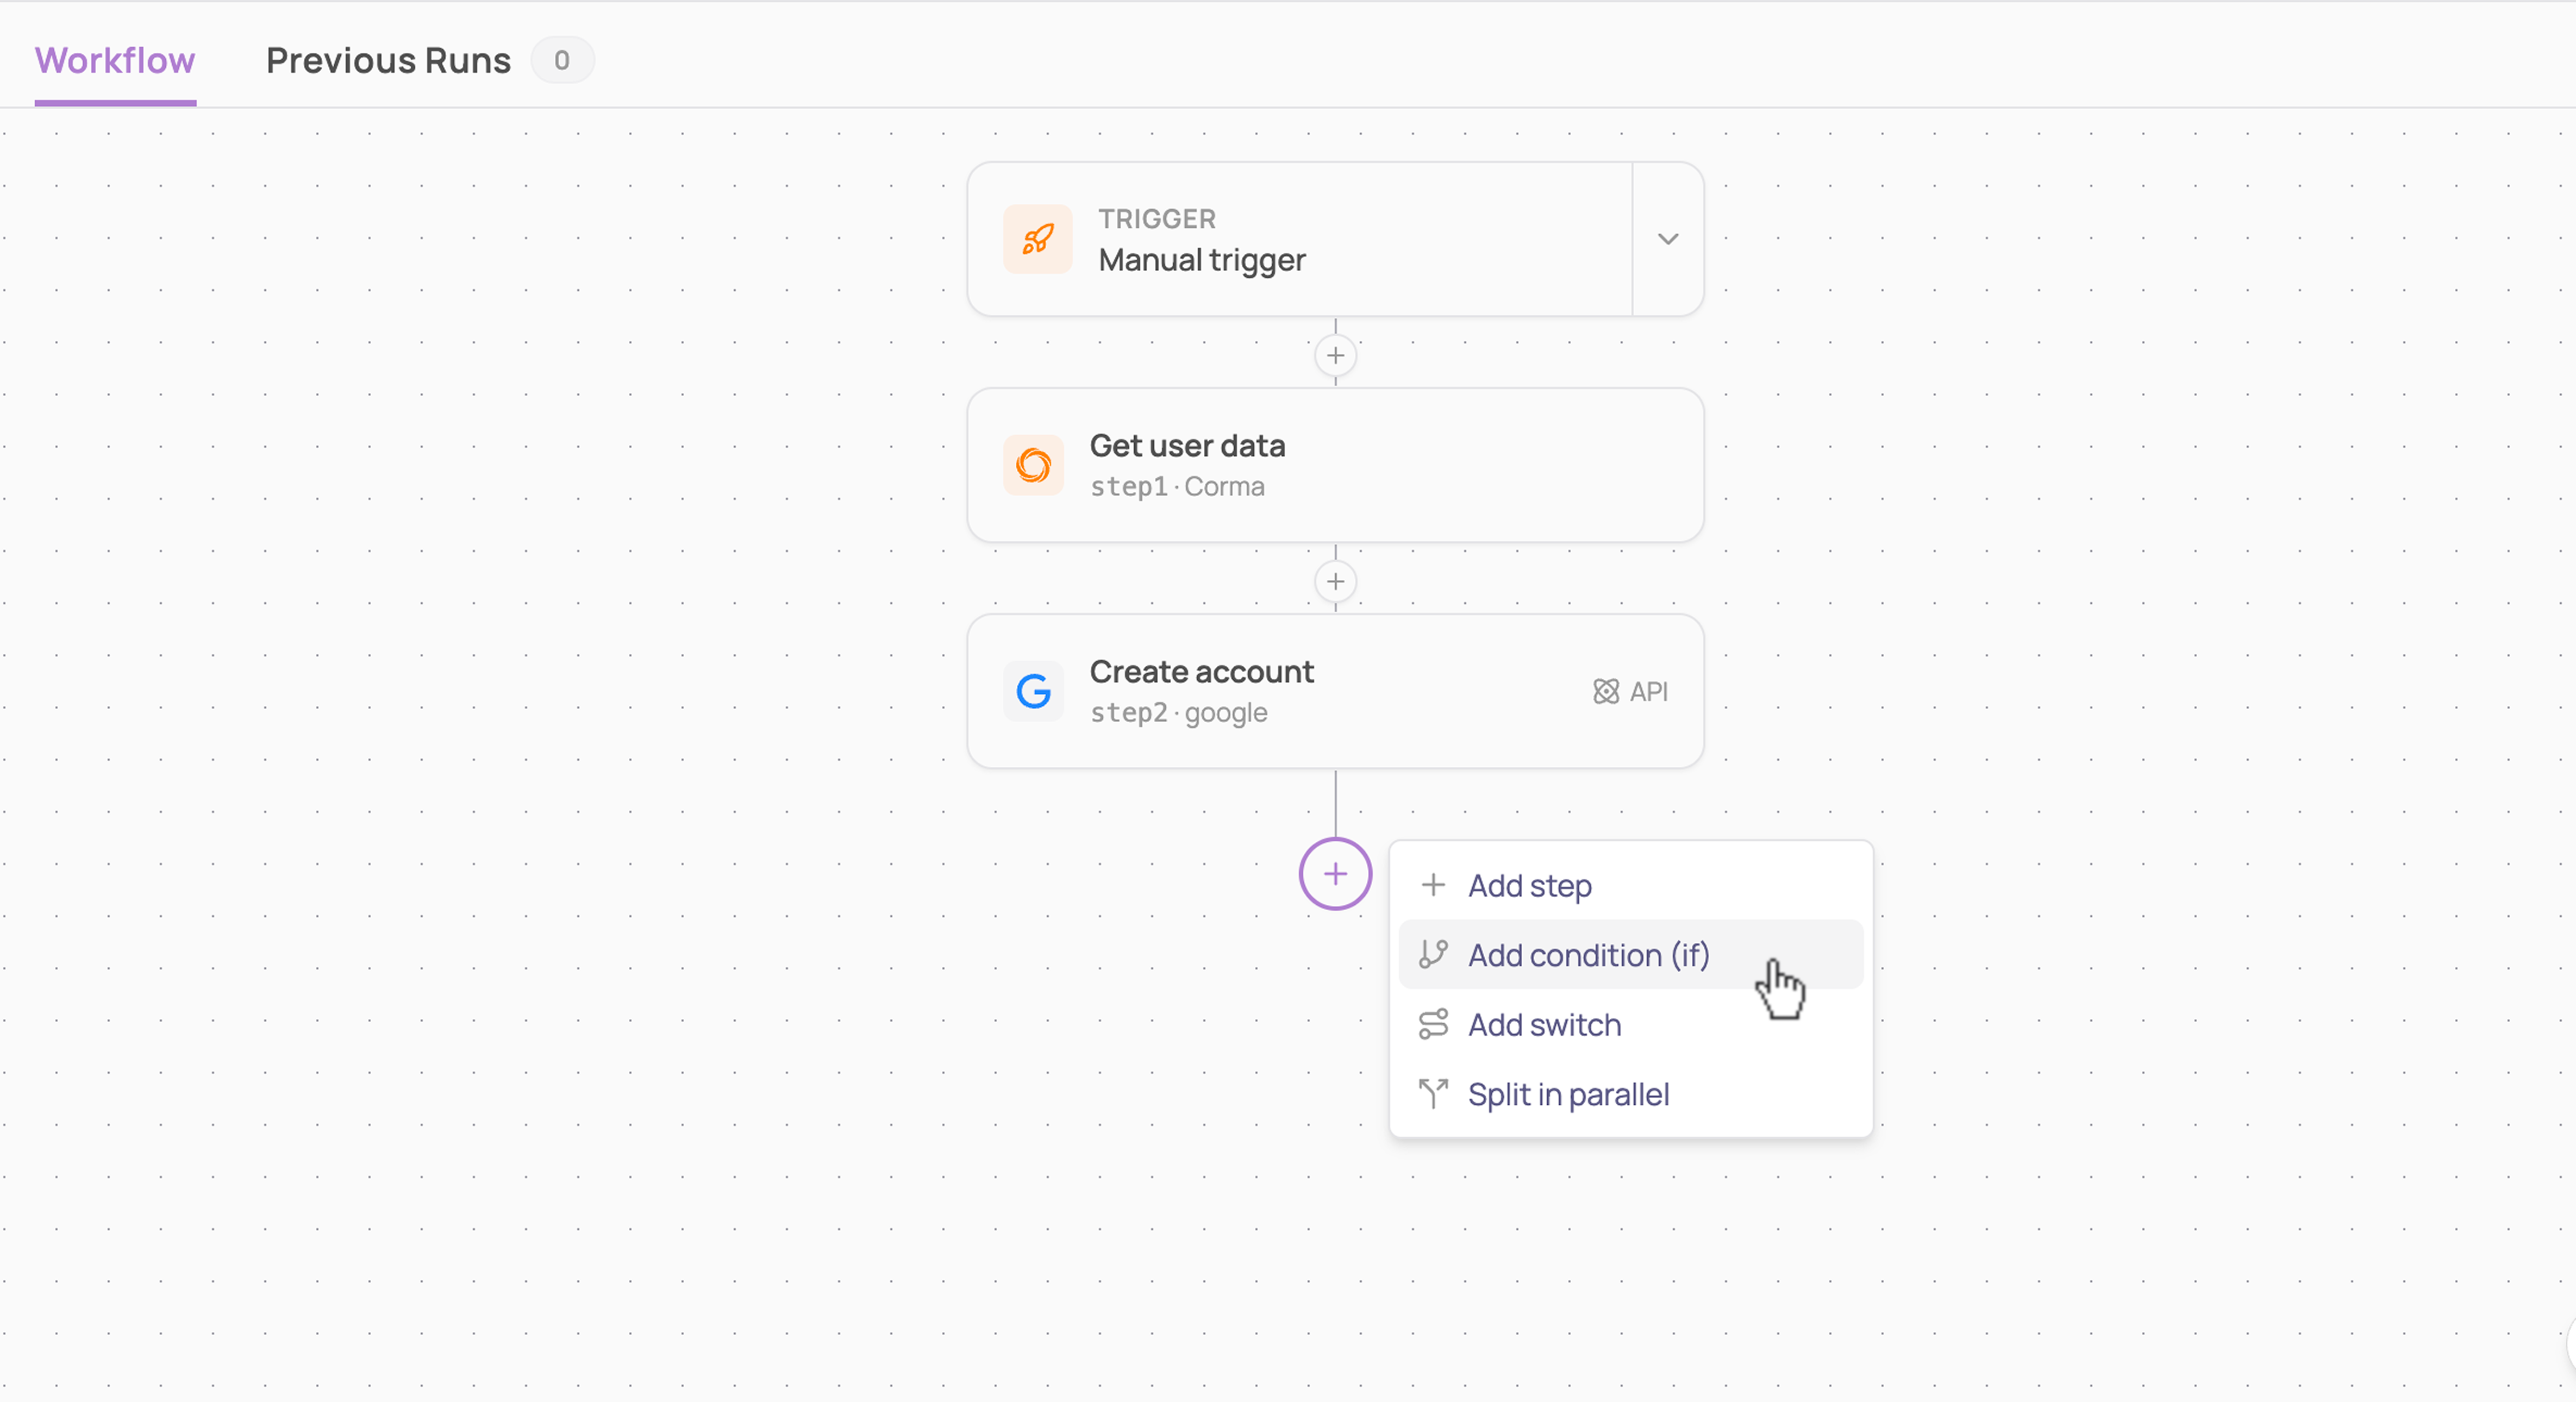
See the full Conditional Workflows guide for details on configuring each type.
Creating a Workflow
Go to Workflows in the left sidebar
Click "Create workflow"

In the creation modal, fill in:
Workflow name (required)
Description (optional)
Owner
Trigger: select one of the available triggers (you can switch later on)
Add actions from the action library by clicking the plus icon between steps on the canvas, search by app or action type
Configure each action step as needed
Set the workflow status to Active when ready to deploy
Workflow Statuses
Status | Description |
|---|---|
Active | Running, will fire when trigger conditions are met |
Draft | Temporarily disabled, will not fire |
Archived | Inactive and archived, cannot be re-activated |
Monitoring Runs
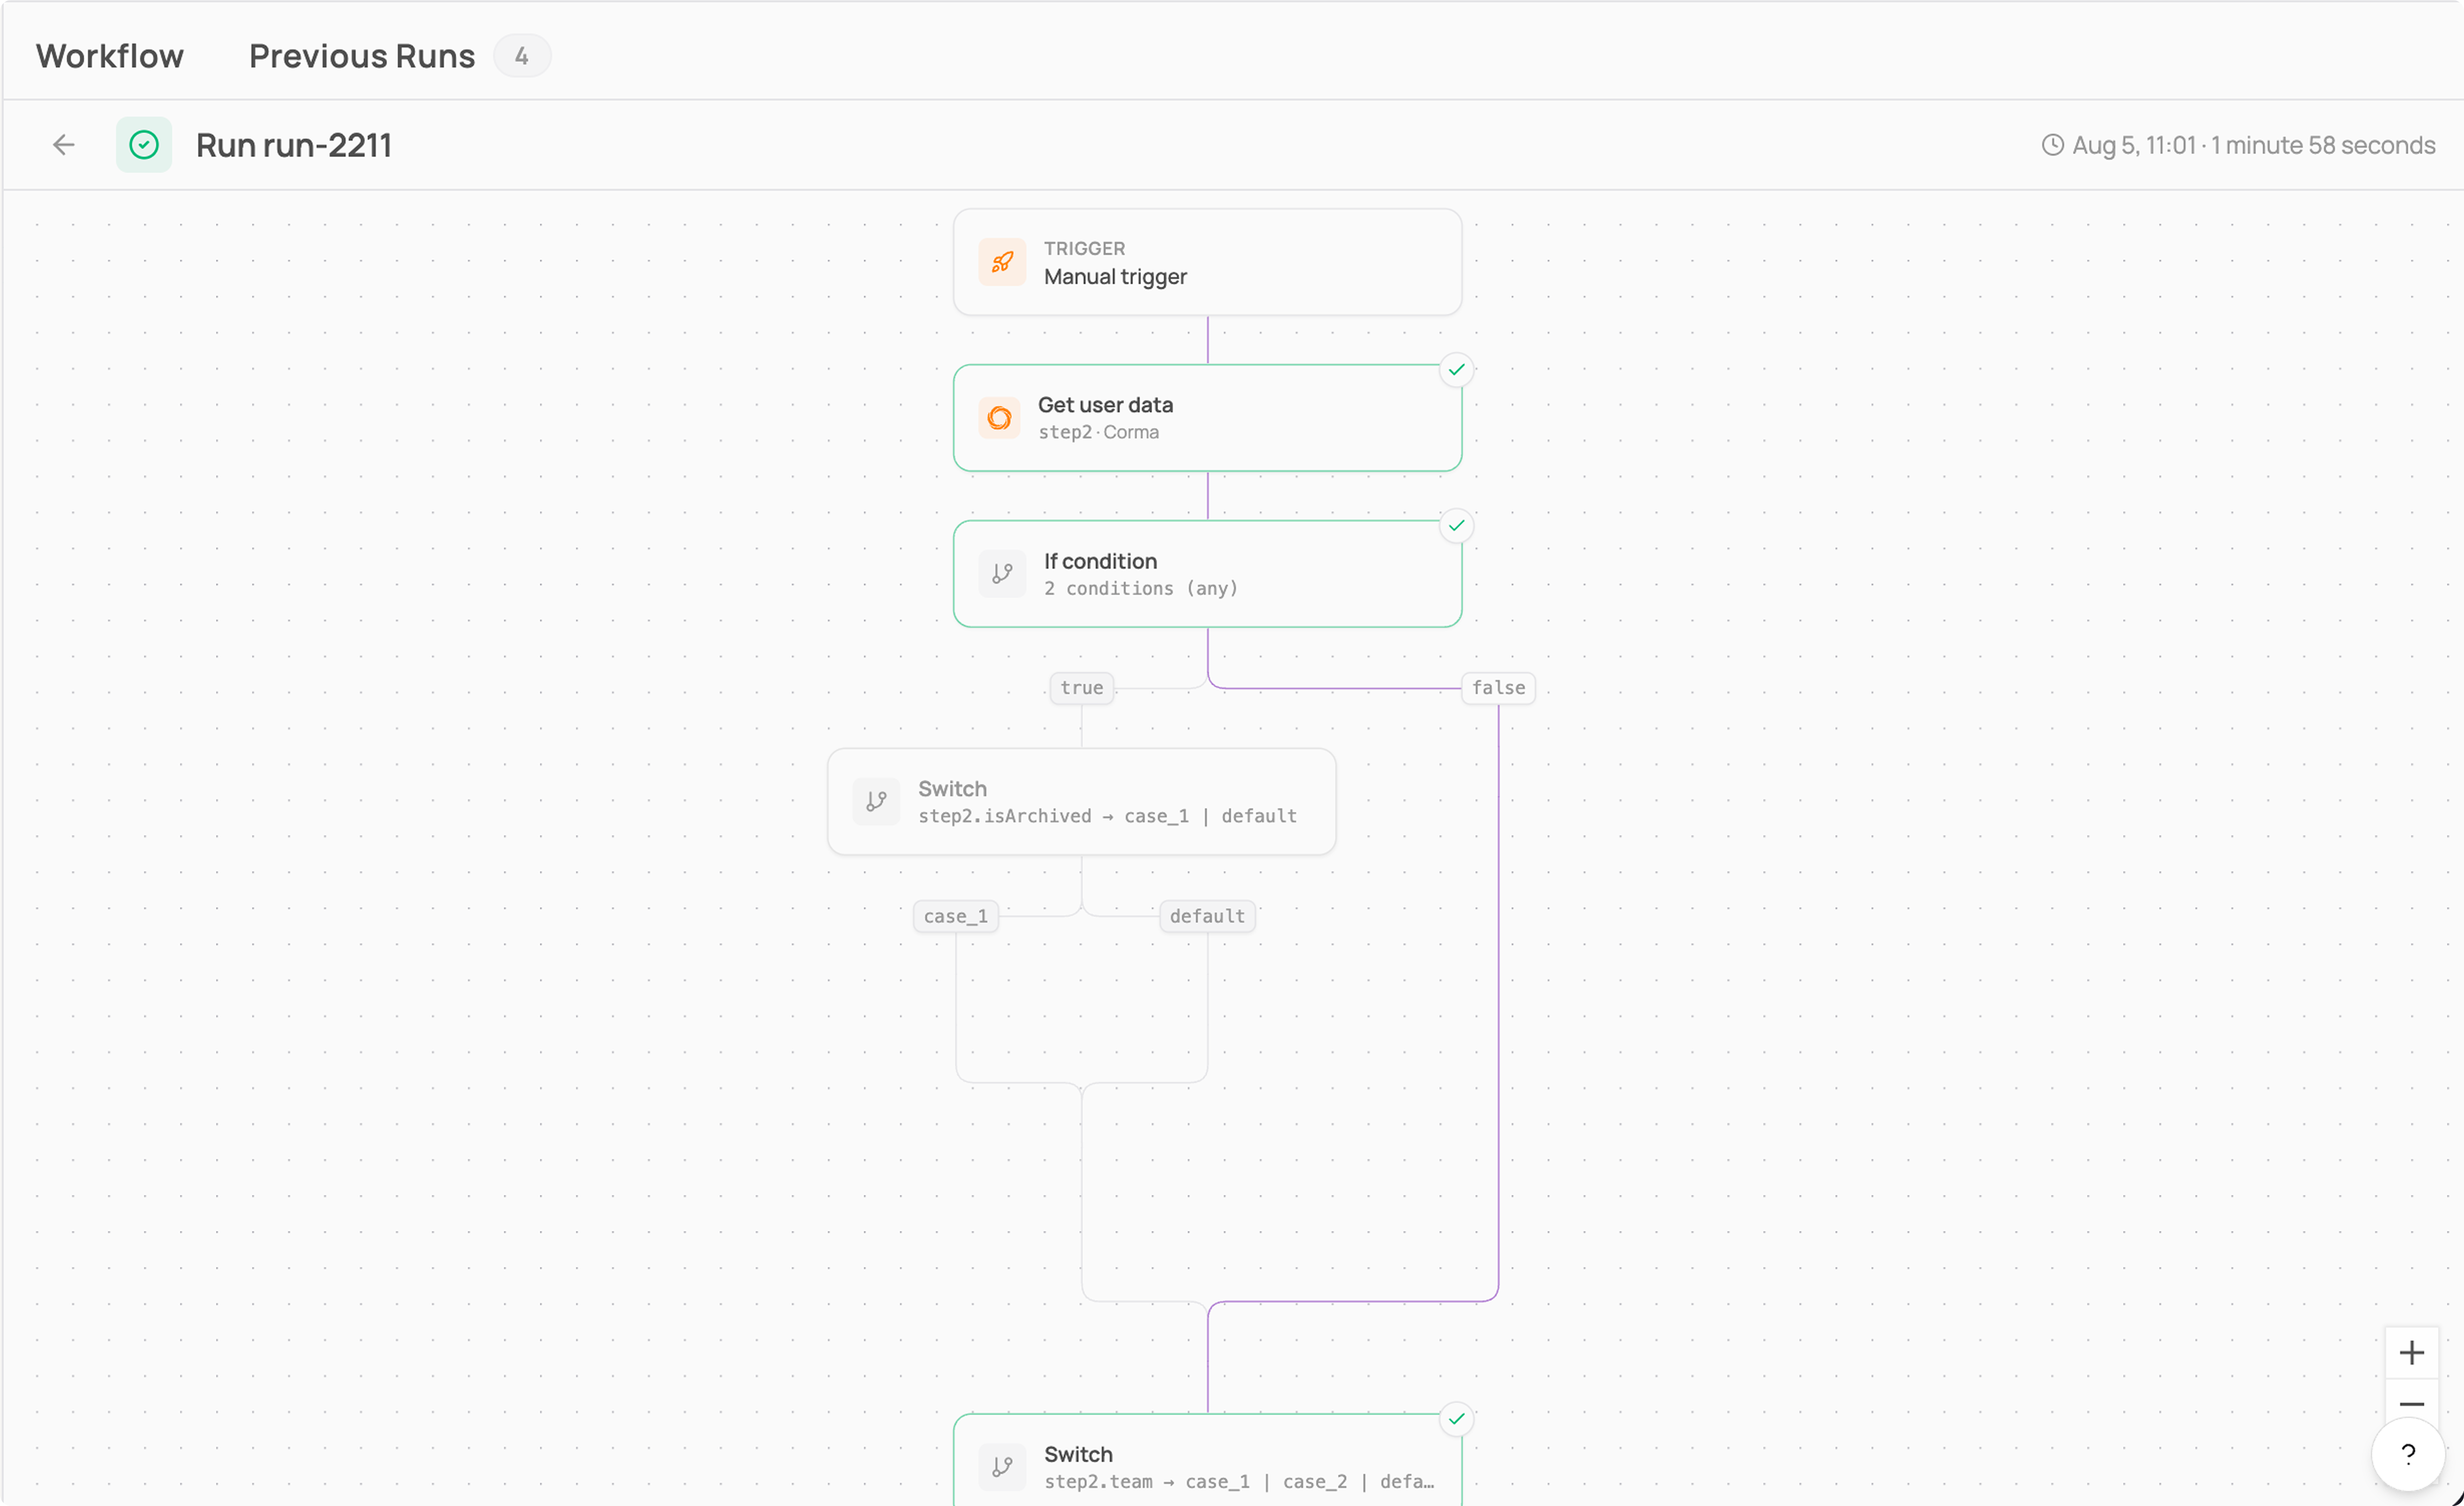
Every time a workflow is triggered, a run is created. Click on Previous Runs tab inside a workflow to see all past executions. Click on any run to see its details:
Run status (Success, Skipped, etc.)
Target user
Date and time of execution
Each individual step with its own status and execution timestamp
The live run graph, matching the structure you built, showing exactly which path was taken
Retry, appears if any steps failed, re-runs just those steps
Input and Output per step, with a Copy button on the output
This provides a full audit trail of every automated action performed by Corma.
Workflow Settings
From inside any workflow, click the Settings button in the top-right corner to:
Edit the workflow name
Edit the description
Change the workflow owner
Things to Keep in Mind
A workflow must be set to Active to run. Draft workflows will not fire.
Dynamic variables like
{{context.targetUser.username}}allow actions to be personalized per user without creating separate workflows.Workflows can now include conditional branching and parallel paths. See How to create a conditional workflow? for full detail.