
How to trigger a webhook?
This guide walks you through setting up a Call a webhook step in your Corma workflow. Use this action to send an HTTP request to an external URL, for example, to notify another system, trigger an integration, or push data out of Corma when a workflow runs.
Add the step
From your workflow builder, add a new step and select Call a webhook from the list of available actions. This action sends an HTTP request to an external URL and can optionally read the response back into your workflow.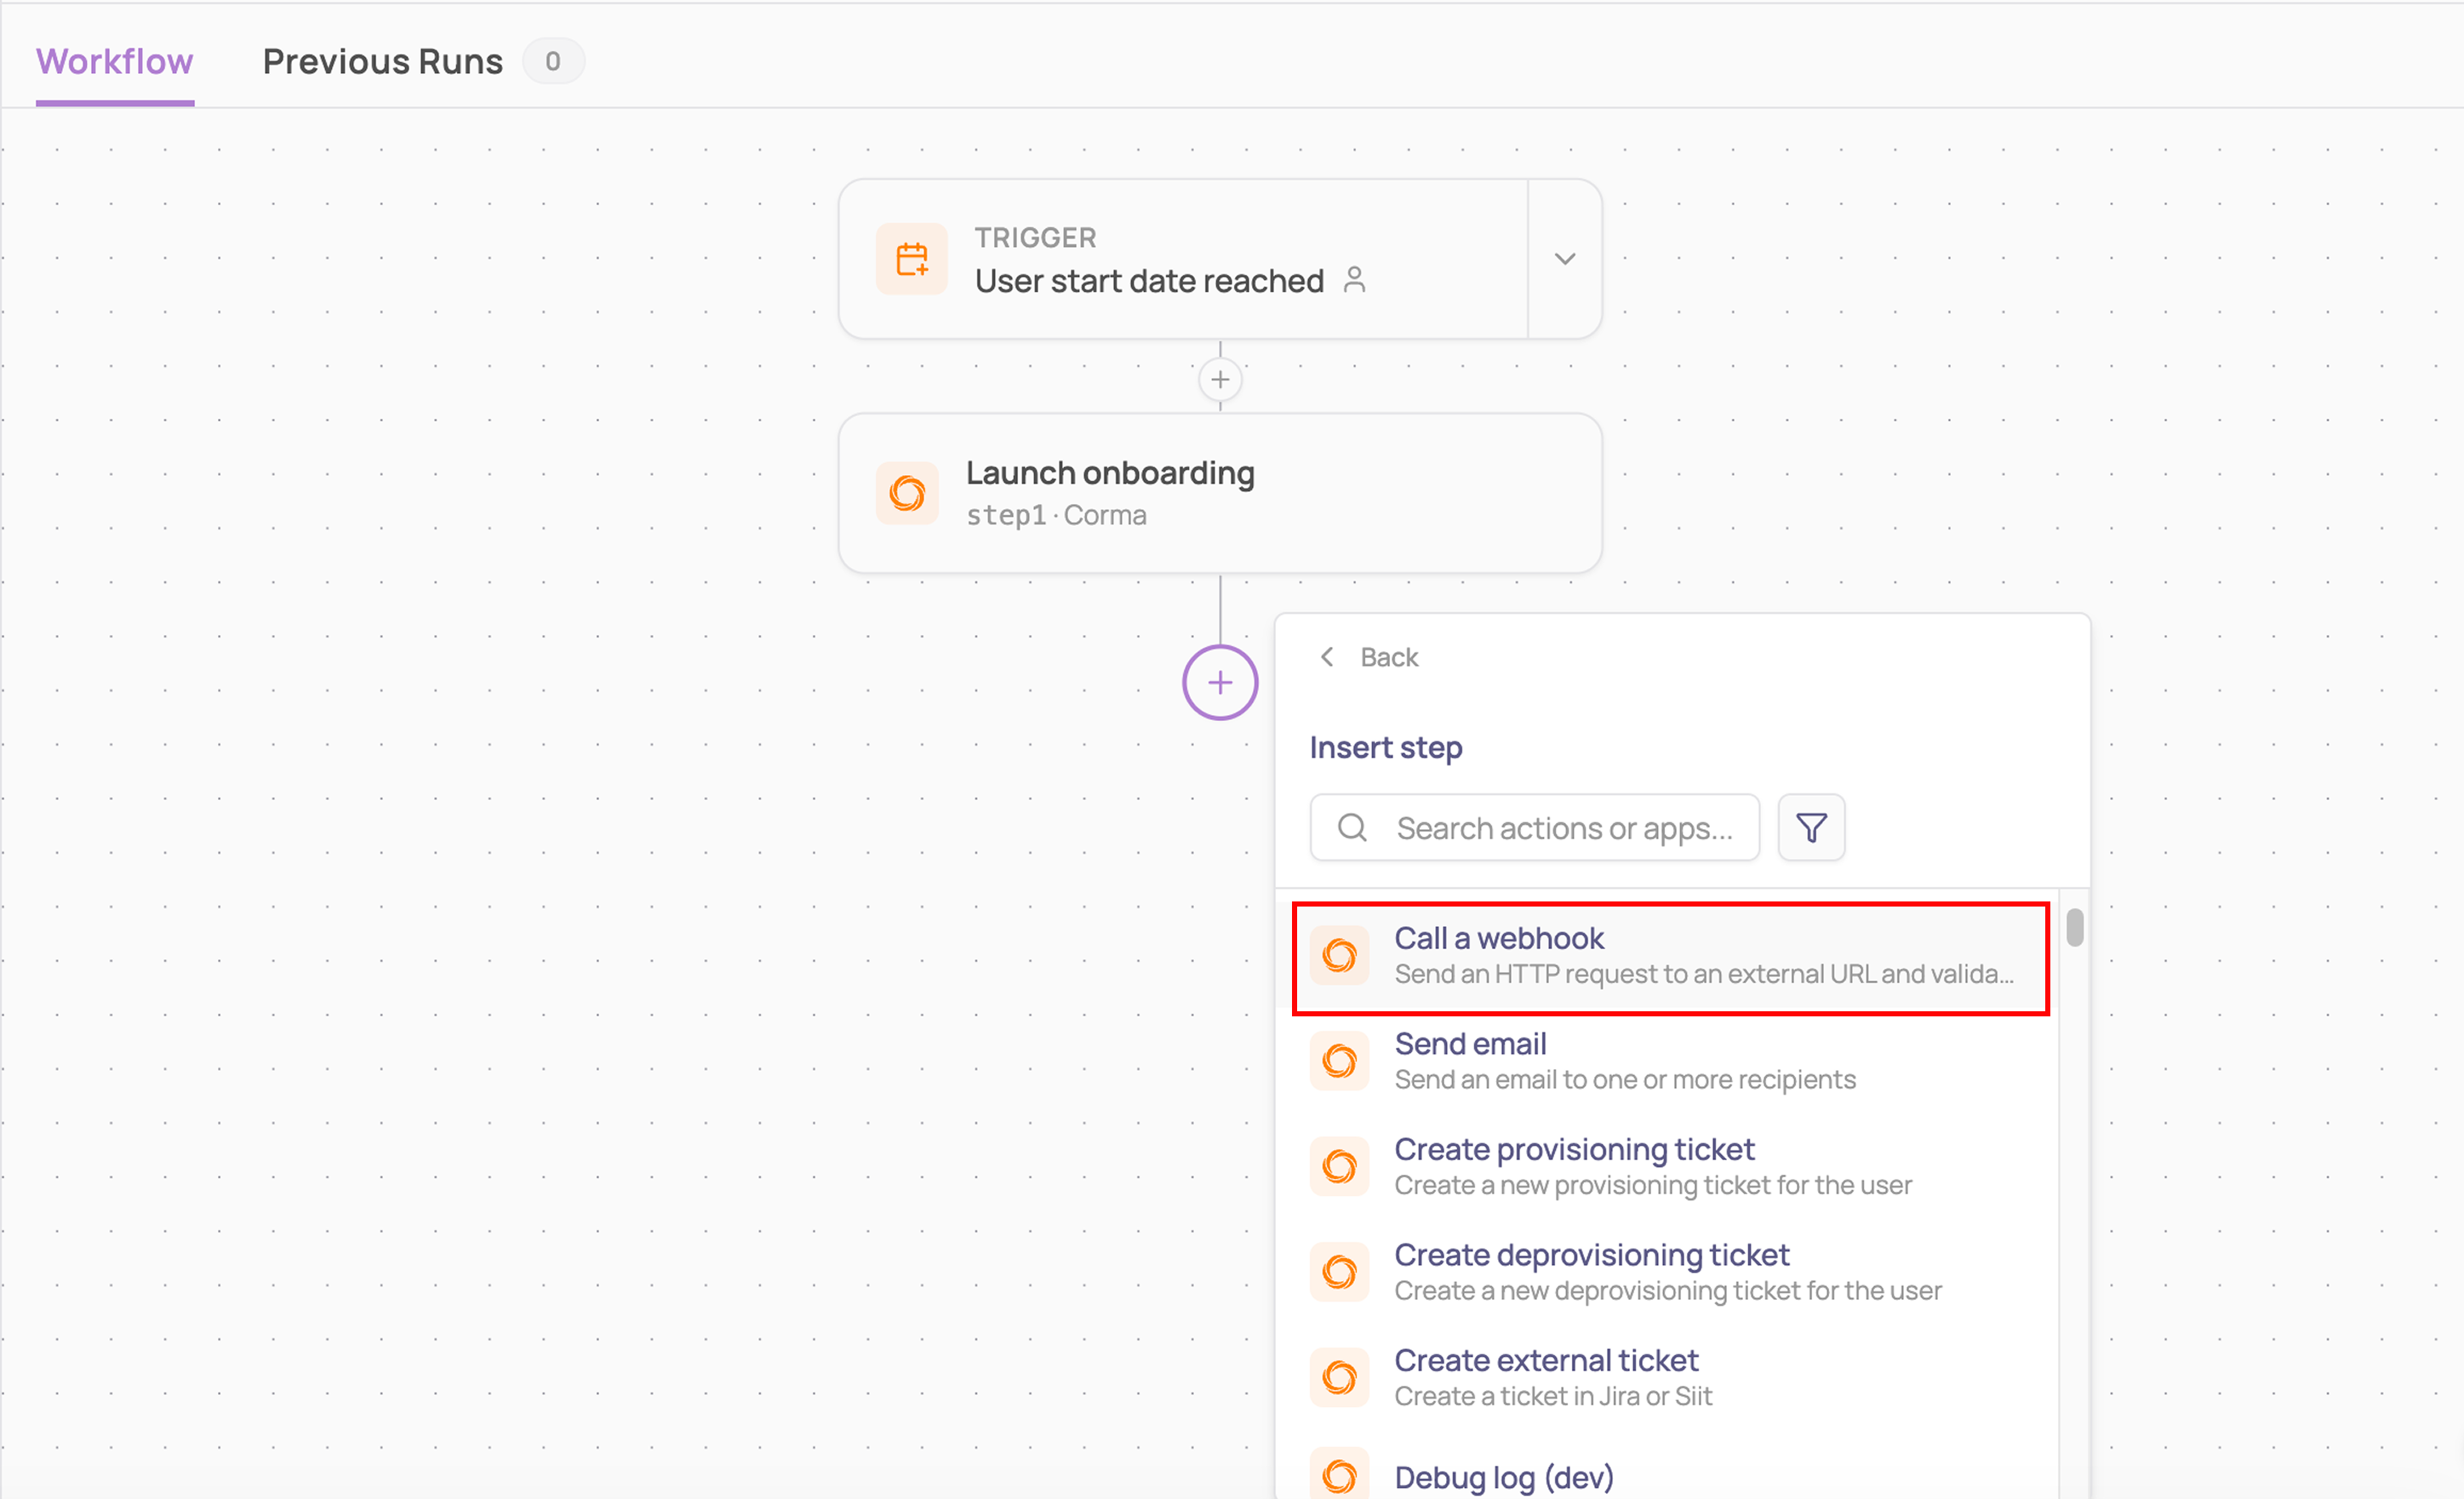
Name your step
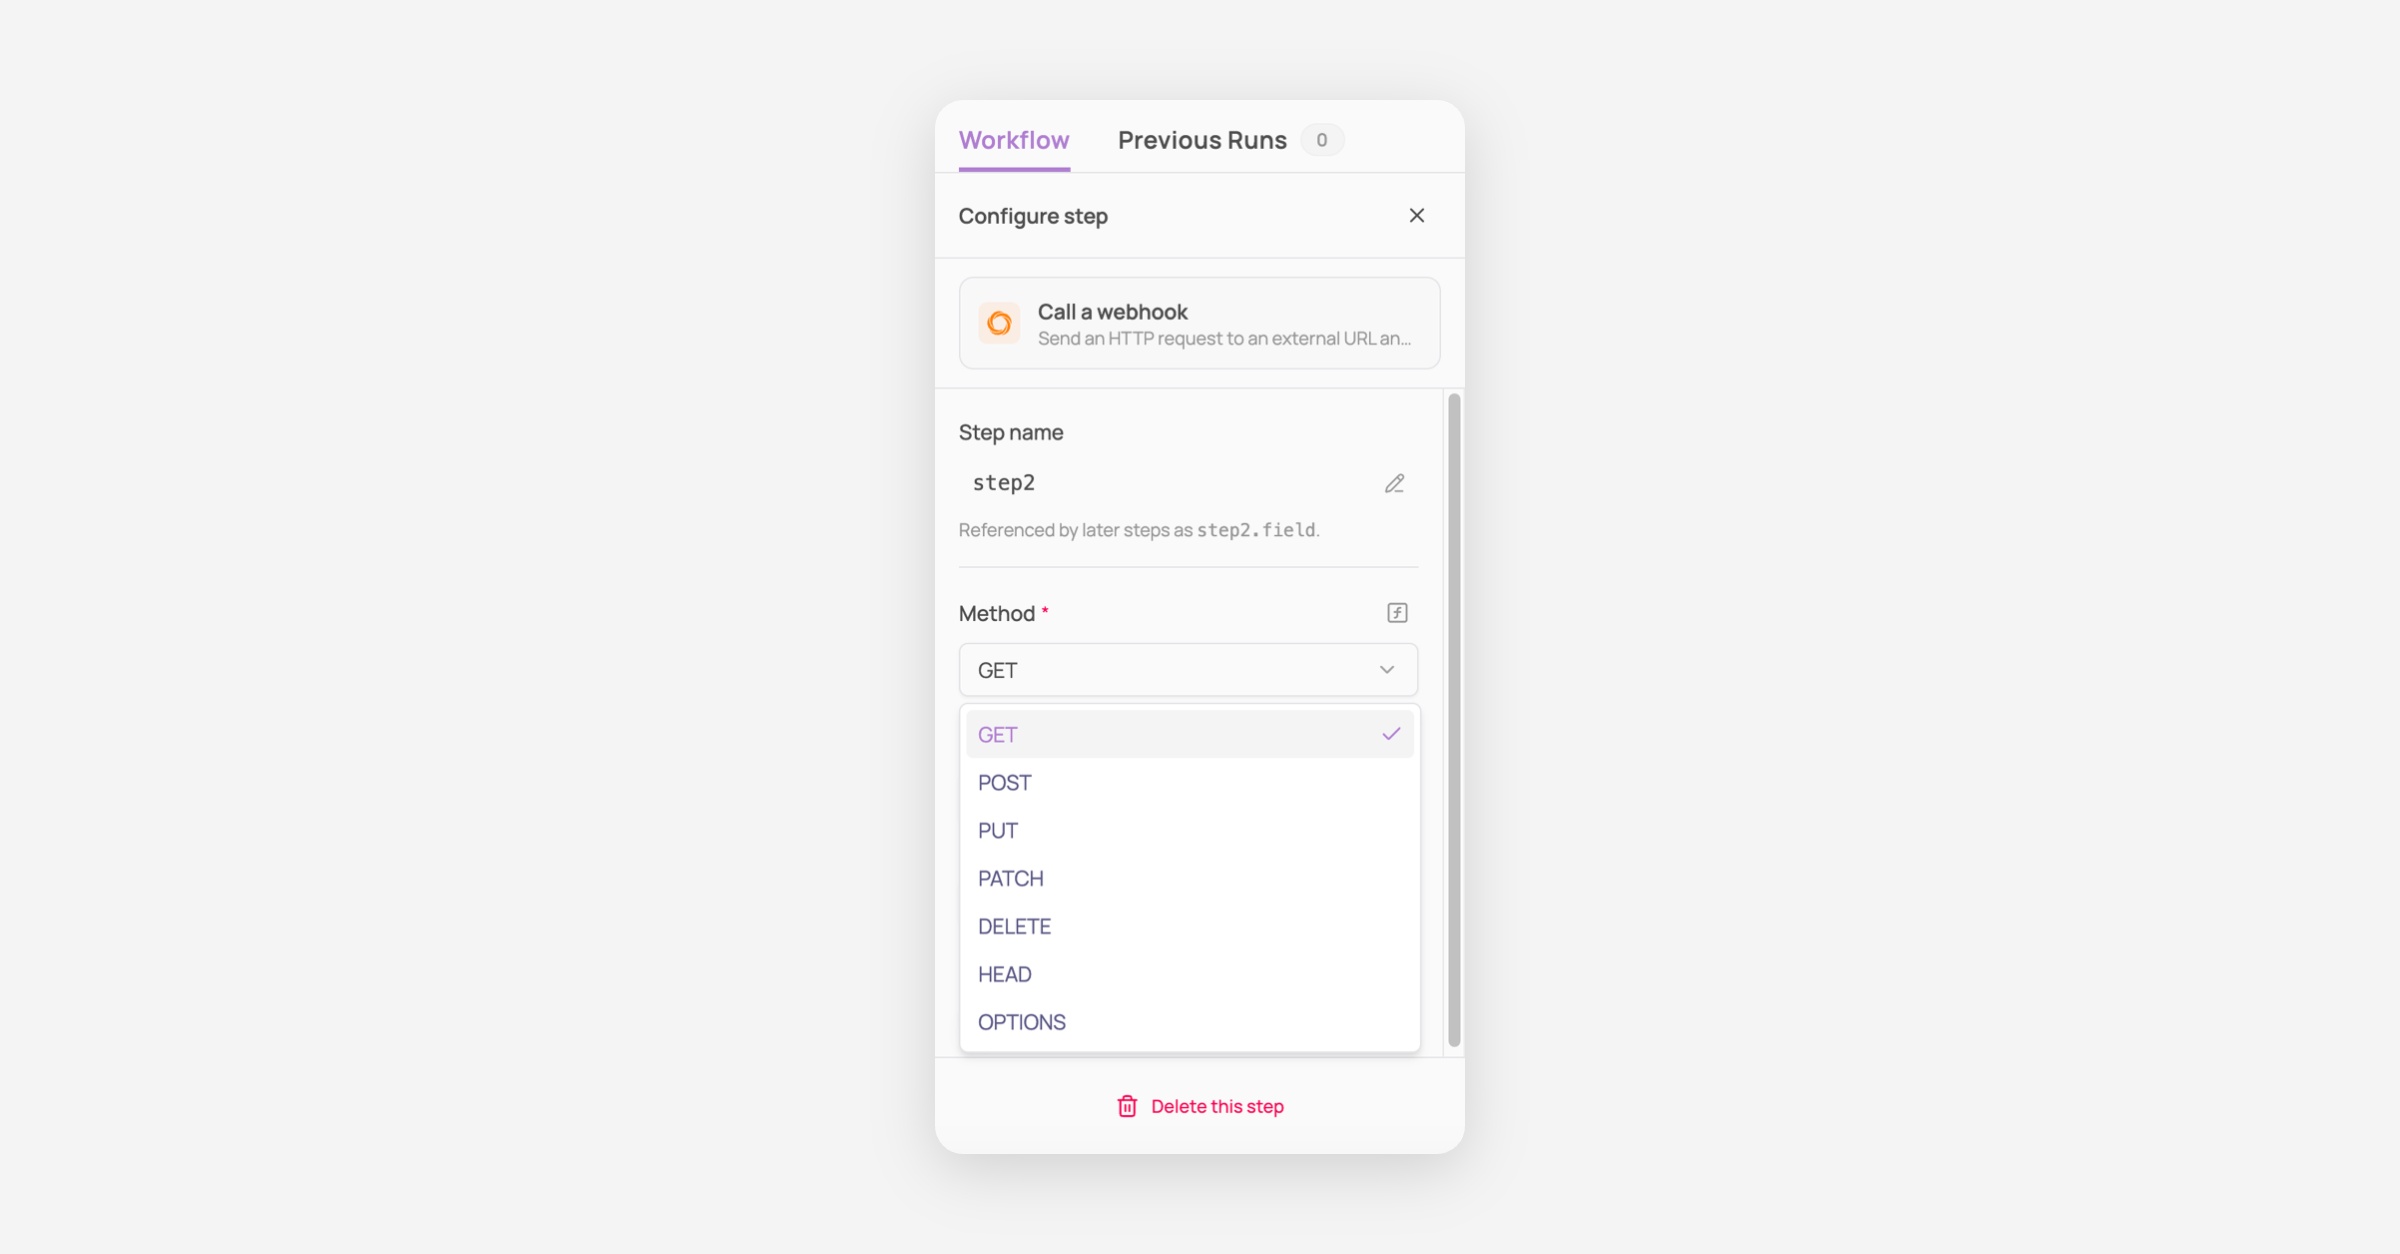
By default, each step is auto-named (e.g. 'step6'). Click the pencil icon next to the Step name field to rename it
Tip: Later steps in your workflow can reference this step's output using the format step6.field (substituting your actual step name). Choose a clear, descriptive name if you plan to reuse its output further down the workflow.
Choose the HTTP method
Under Method, select the HTTP verb for your request:
GET: retrieve data from the external URL
POST: send data to create something
PUT / PATCH: update an existing resource
DELETE: remove a resource
Pick the method required by the external API or service you're calling. This field is required (marked with a red asterisk).
Enter the URL
In the URL field, enter the full endpoint you want to call, e.g.:
https://api.example.com/webhookThis field is required. Click the f icon next to the field to switch it into expression mode, this opens a picker with two sections: built-in Functions (e.g.
concat,coalesce,json_escape,date_add,date_subtract,now), and, if an earlier step has Read response turned on, a Variables section exposing that step's output (e.g.{{step1.statusCode}},{{step1.body}}) for you to reference.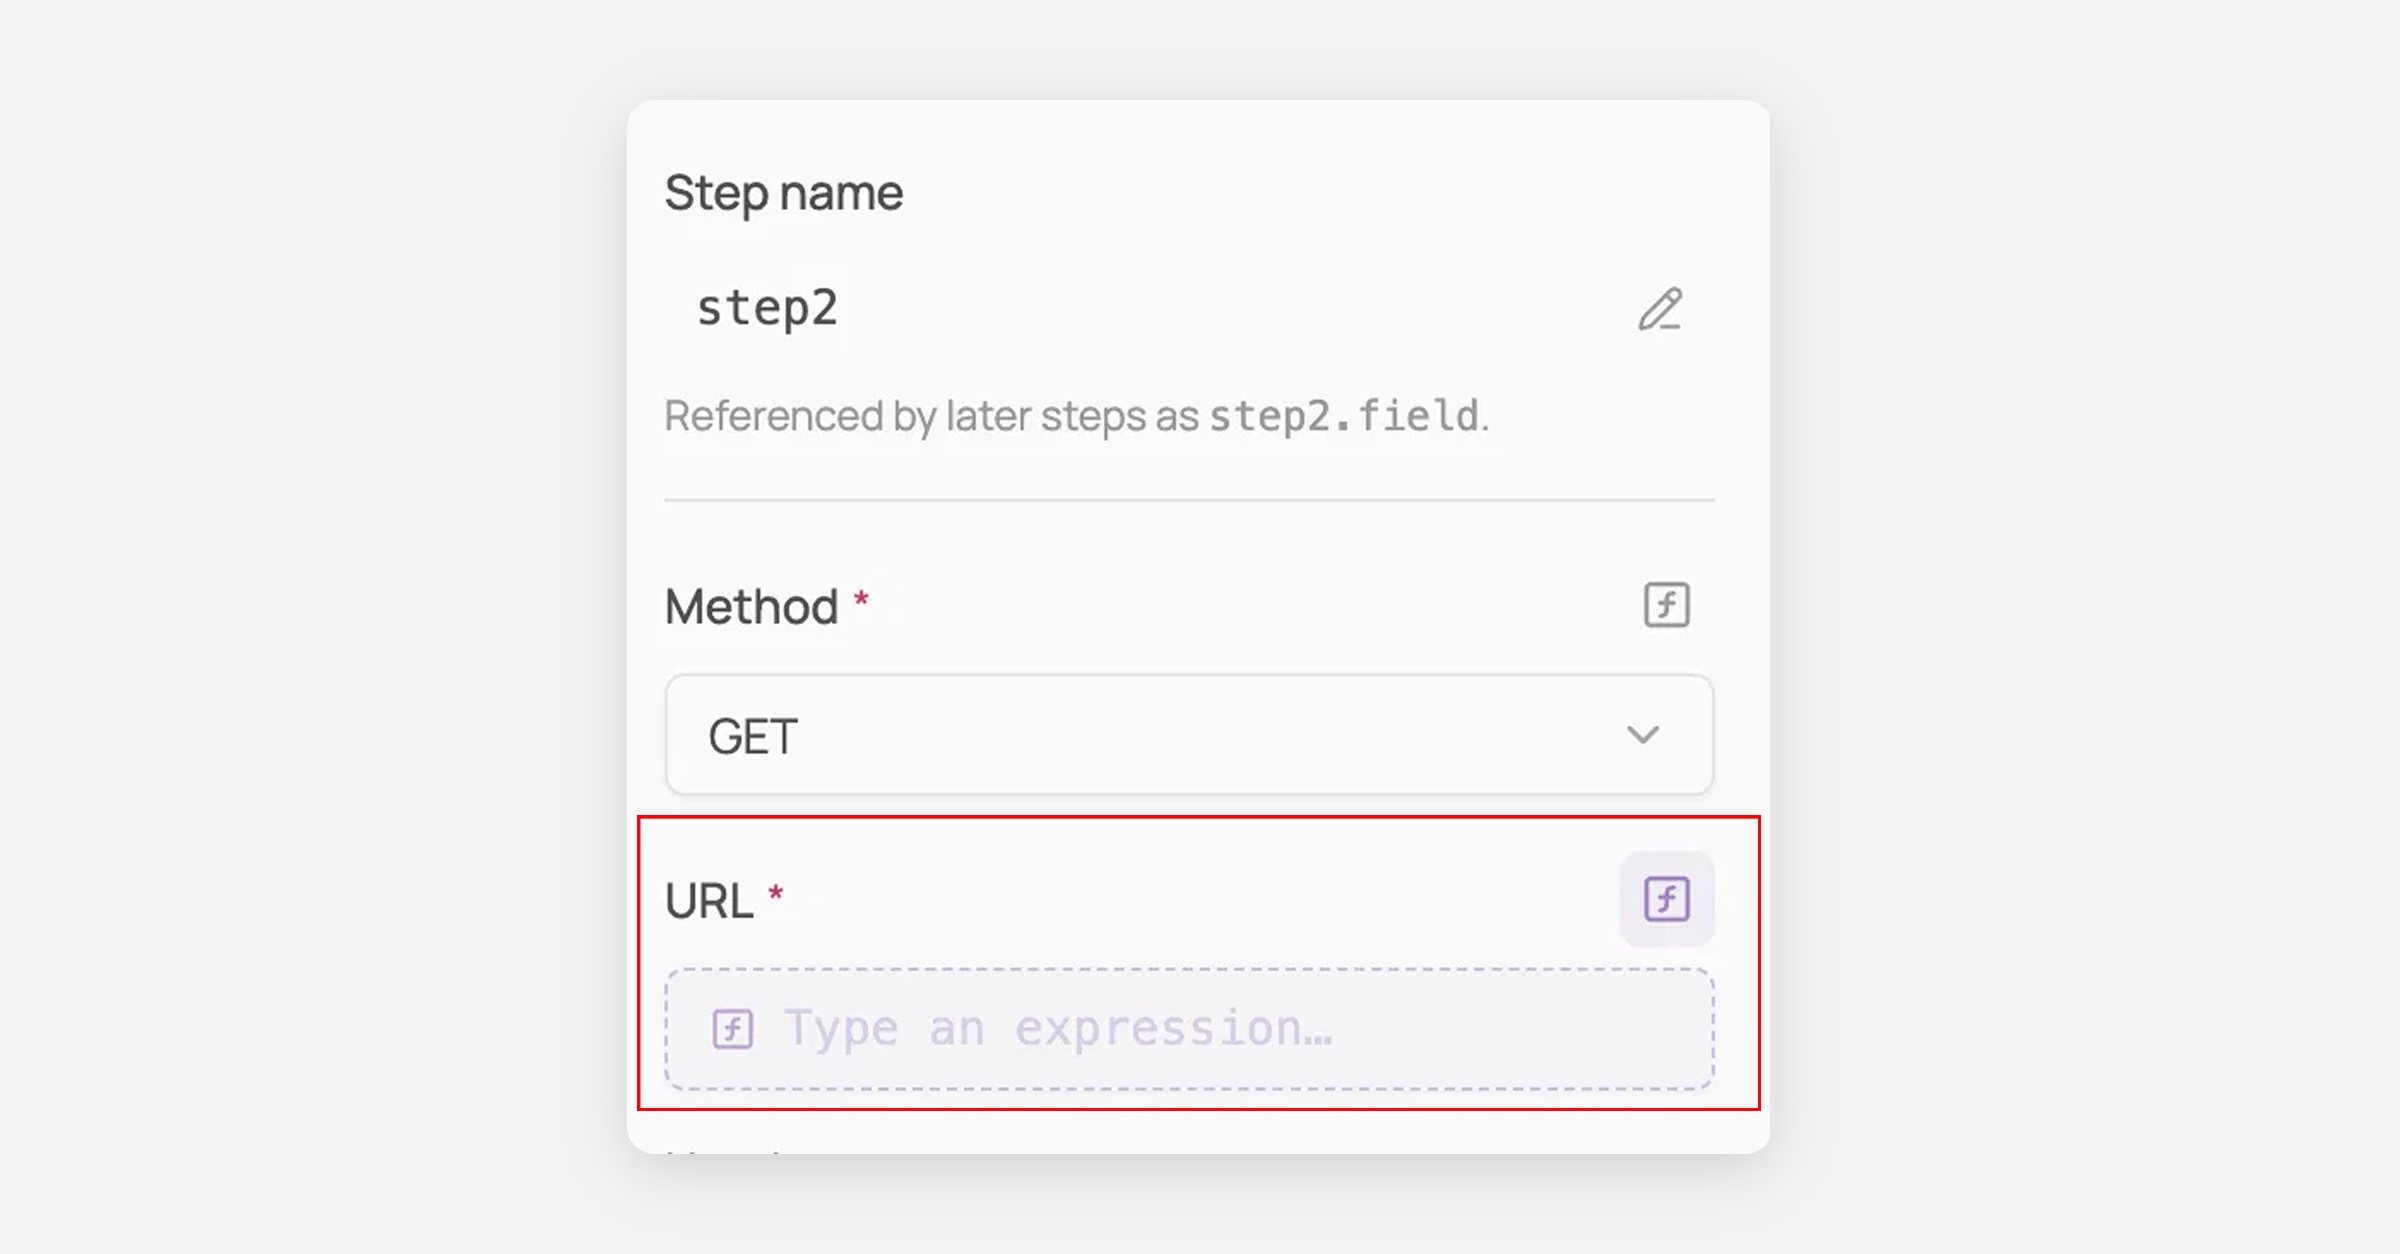
Add headers (optional but common)
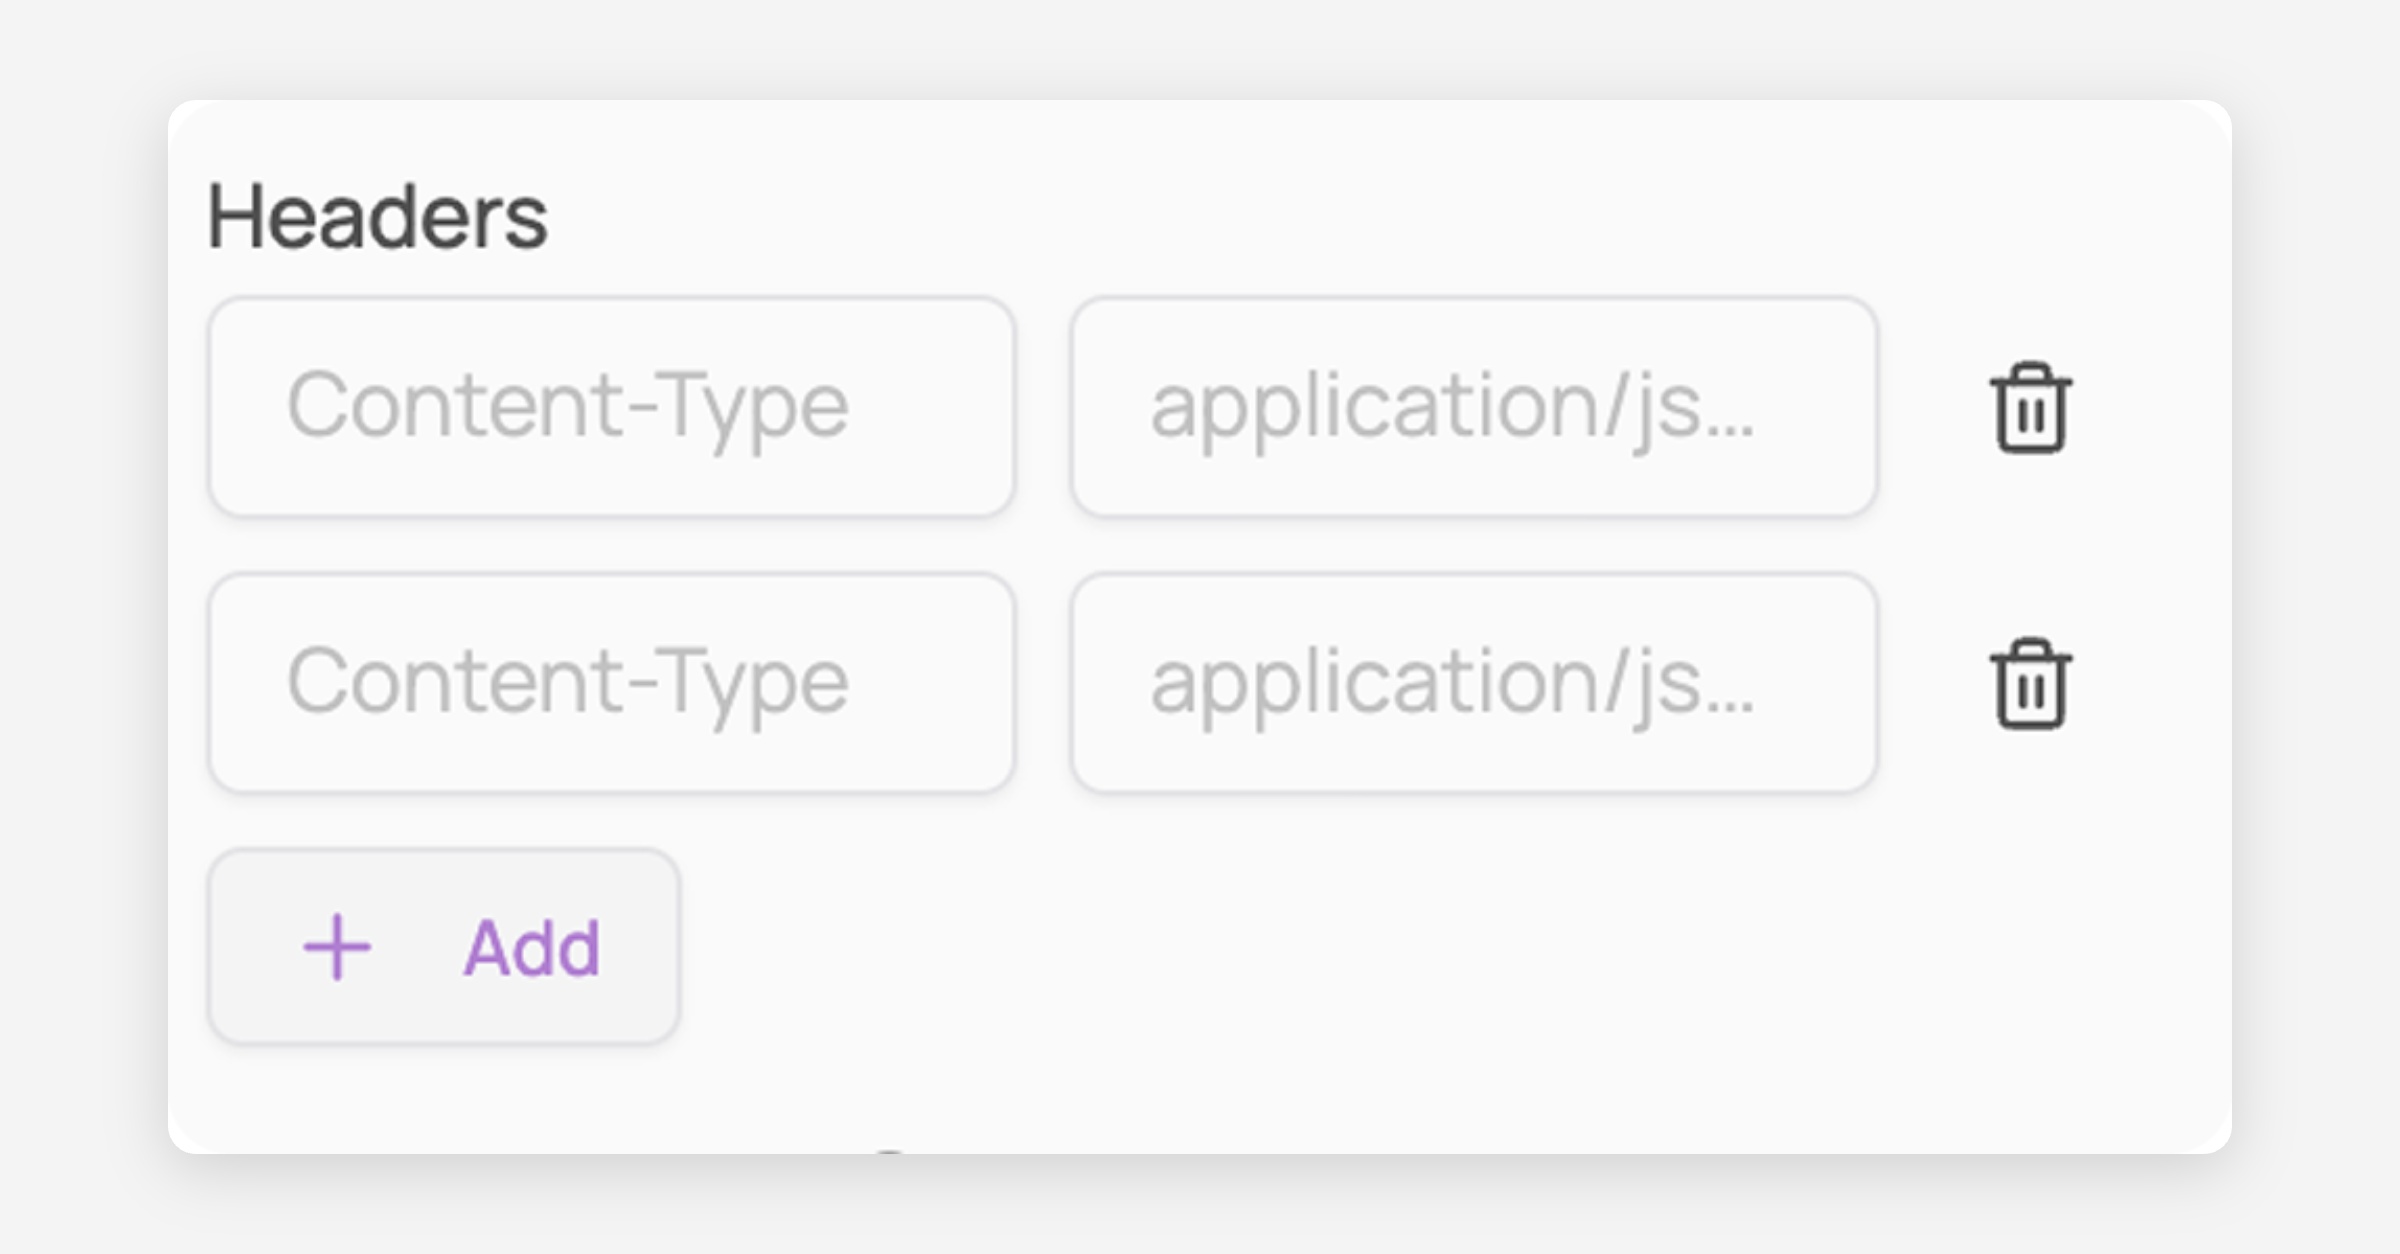
Use the Headers section to pass any HTTP headers your endpoint expects. A common example:
Header
Value
Content-Type
application/json
Click + Add to add a header row, enter the header name and its value, and use the trash icon to remove a row you no longer need.
Decide whether to read the response
Toggle Read response on if you want Corma to capture the webhook's response and make it available to later steps (e.g.,
step6.field). Leave it off if you only need to fire the request without using anything back from it.Save and test
Once everything is configured, save the step and run a test of your workflow to confirm the webhook fires correctly and, if enabled, that the response is captured as expected.