Docs / Extensions and OS plugins
Install the OS Agent on Windows laptops
How to deploy an MSI via Microsoft Intune
ENGLISH VERSION - (French version below)
Deploying an MSI via Microsoft Intune
Prerequisites
An administrator account on the Microsoft Intune portal & Entra ID with the
Global Administrator,Application administrator, andIntune administratorrolesA group of devices enrolled in Intune and linked to users in Entra ID, which will be targeted by the deployment
Optional: Access to your antivirus admin panel to whitelist the Corma agent
Step 1: Configuring permissions in Entra ID
Sign in to the Entra ID portal
Grant consent to the app registration:
Open this URL in a browser and sign in with an administrator account to grant consent
Check "Consent on behalf of your organization" and confirm the request
Step 2: Adding the application in Intune
Sign in to the Microsoft Intune portal.
Navigate to:
Apps>Windows>AddorCreate.
Select the application type:
Line-of-business app.Download the MSI file via this link (coming soon) and select it in Intune.

Fill in the application details:
Application name (e.g., "Corma Agent")
Description (optional)
Publisher (e.g., "Corma")
Install command:
/qn
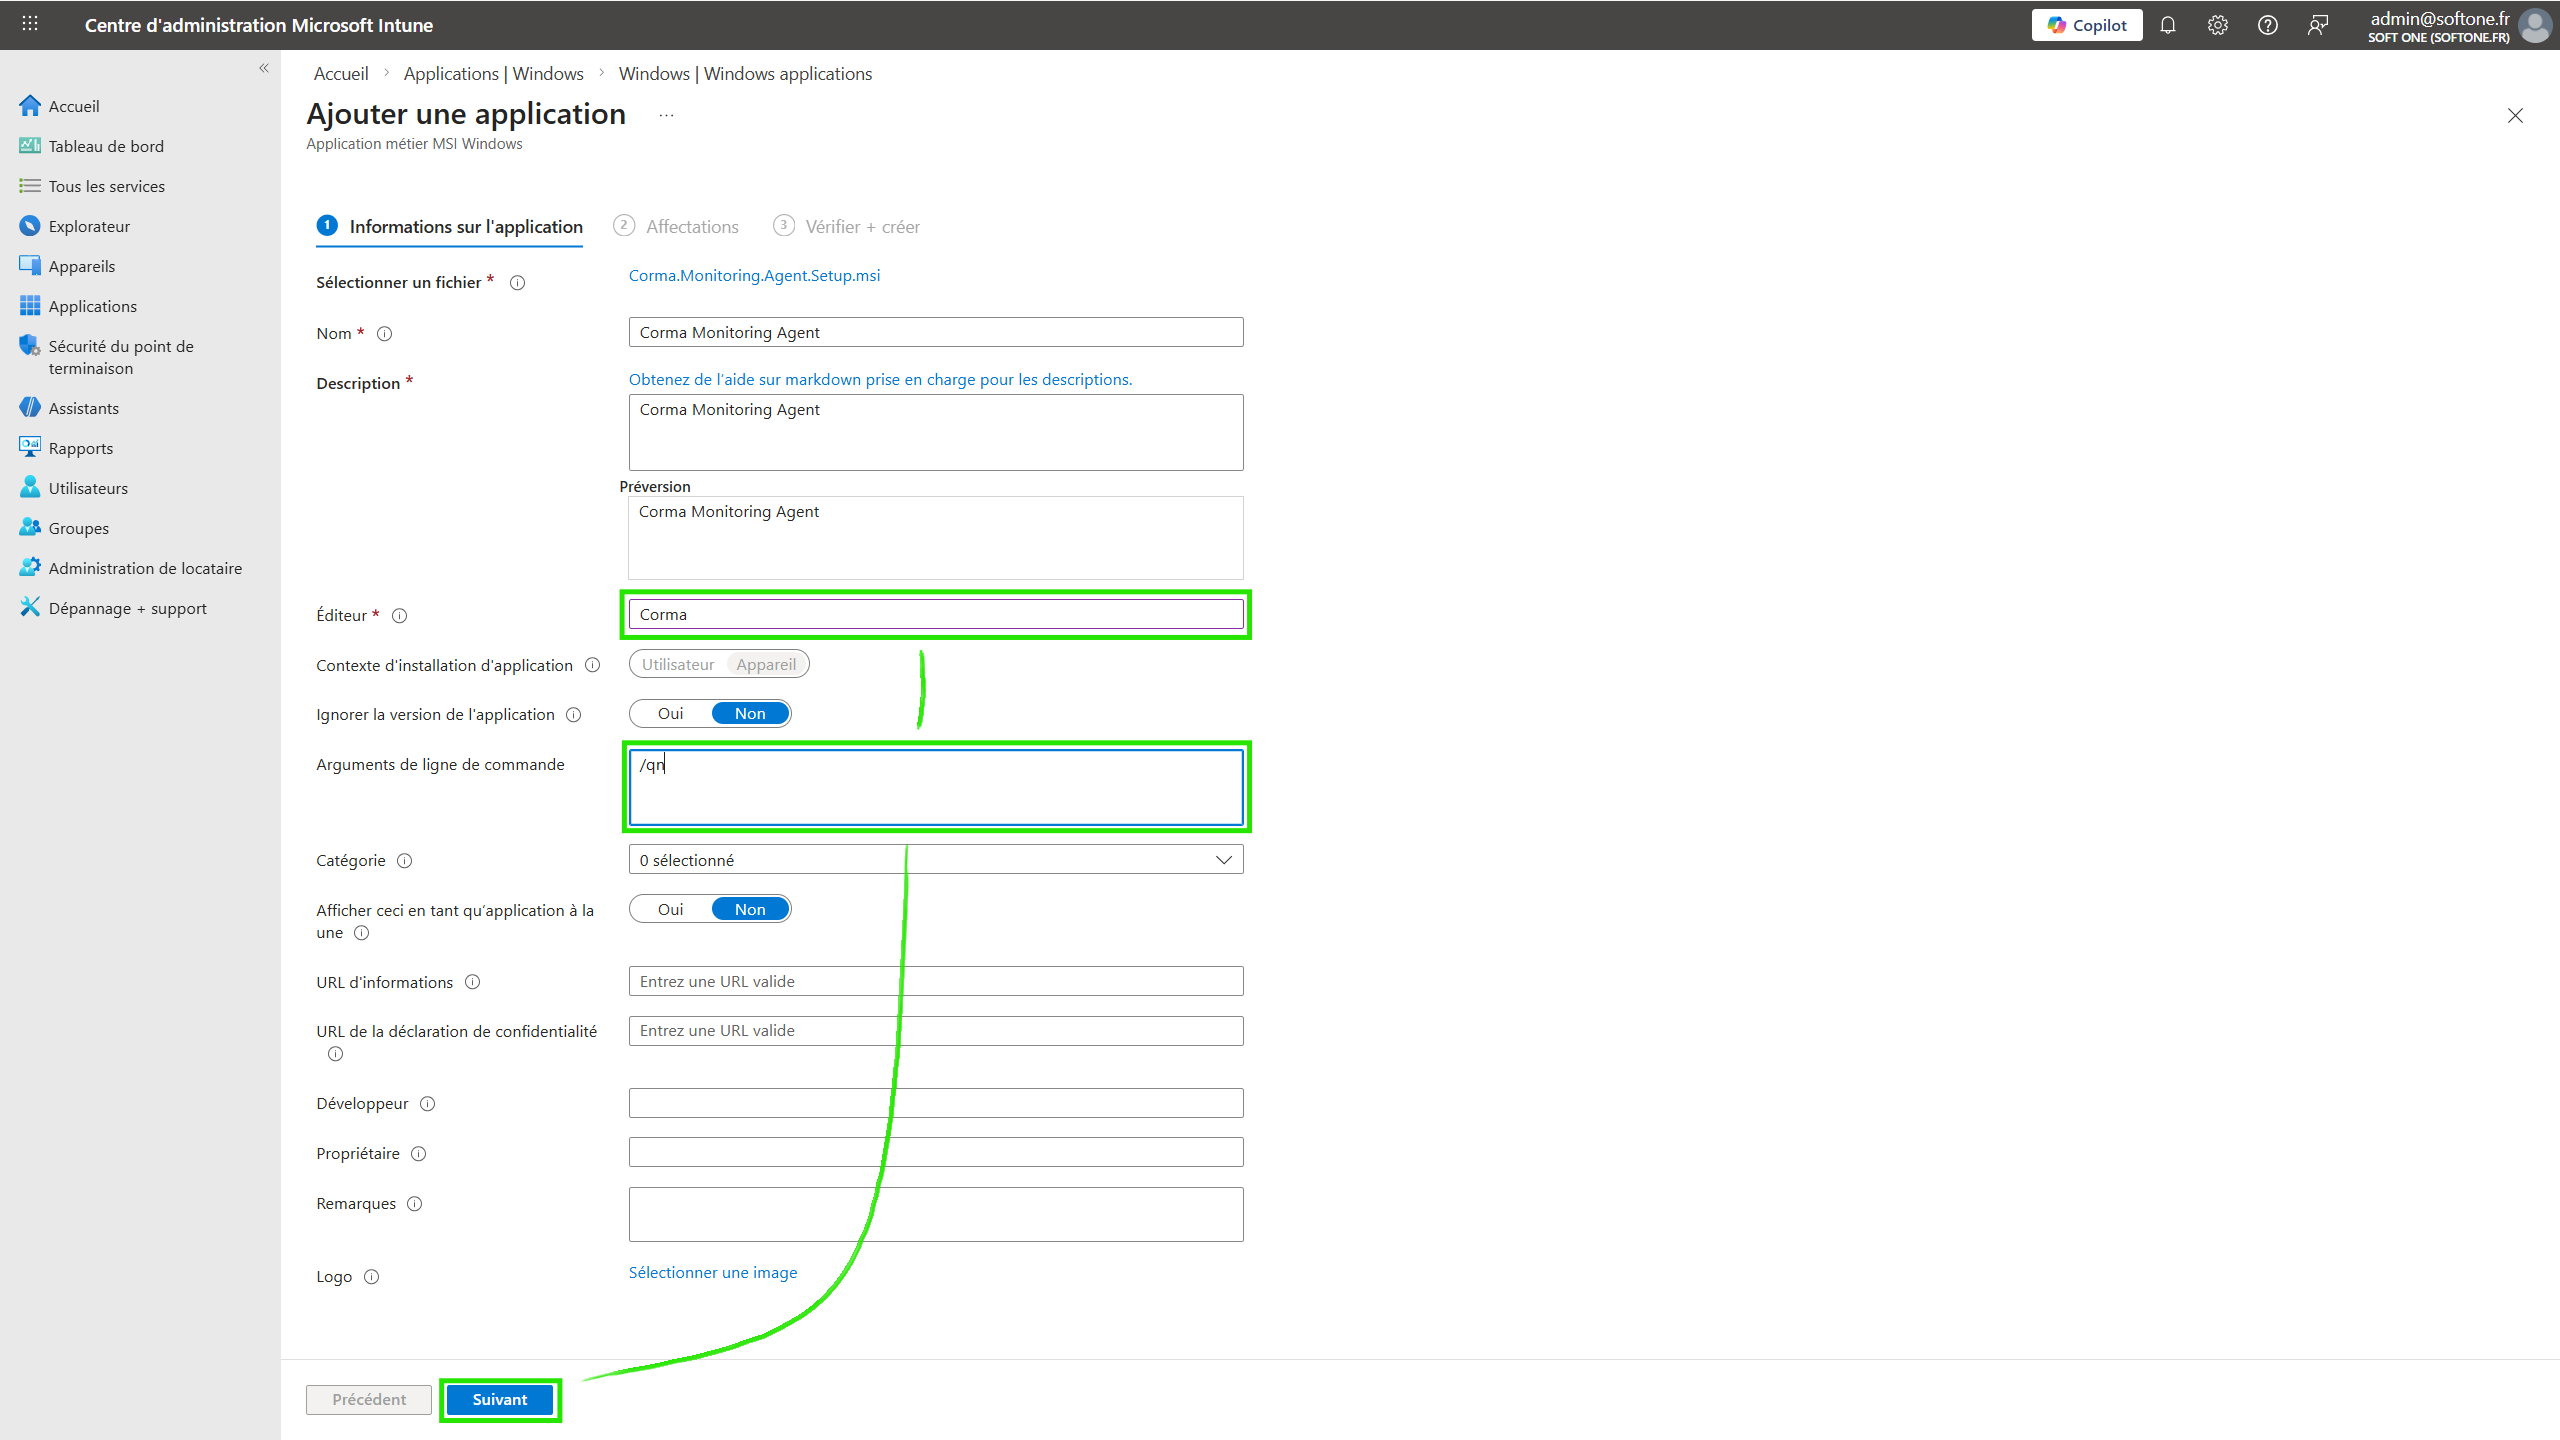
Confirm and save.
(Optional) If you are using an AI-powered antivirus, make sure the application or the folder
Program Files\Corma\Agentis approved/whitelisted.
Step 4: Deploying the application
Navigate to:
Apps>Windows> select the application you just added.Click on
Assignments>Add group.Select the target device or user group.
Choose the assignment type:
Required(automatic installation).Confirm and save.
Managing updates
The MSI handles its own updates. To deploy a new version:
Repeat steps 1 through 5 with the new MSI file.
Intune will automatically replace the previous version if the application name is identical.
VERSION FRANÇAISE - (version en anglais ci-dessus)
Tutoriel : Déploiement d’un MSI via Microsoft Intune
Prérequis
Un compte administrateur sur le portail Microsoft Intune & Entra ID avec les rôles
Global Administrator,Application administratoretIntune administratorUn groupe de device enrôlés dans Intune et rattachés à des utilisateurs dans Entra ID qui sera ciblé par le déploiement
Optionnel : Un accès à la partie admin de l'antivirus pour whitelister notre sonde.
Étape 1 : Configuration des autorisations pour Entra ID
Se connecter au portail Entra ID
Consentent à l'app registration :
Ouvrir cette URL dans un navigateur et se connecter avec un compte administrateur pour accorder le consentement
Cocher "Consentir au nom de votre organisation" et valider la demande
Étape 2 : Ajout de l’application dans Intune
Se connecter au portail Microsoft Intune.
Aller dans :
Apps>Windows>Add ou Créer.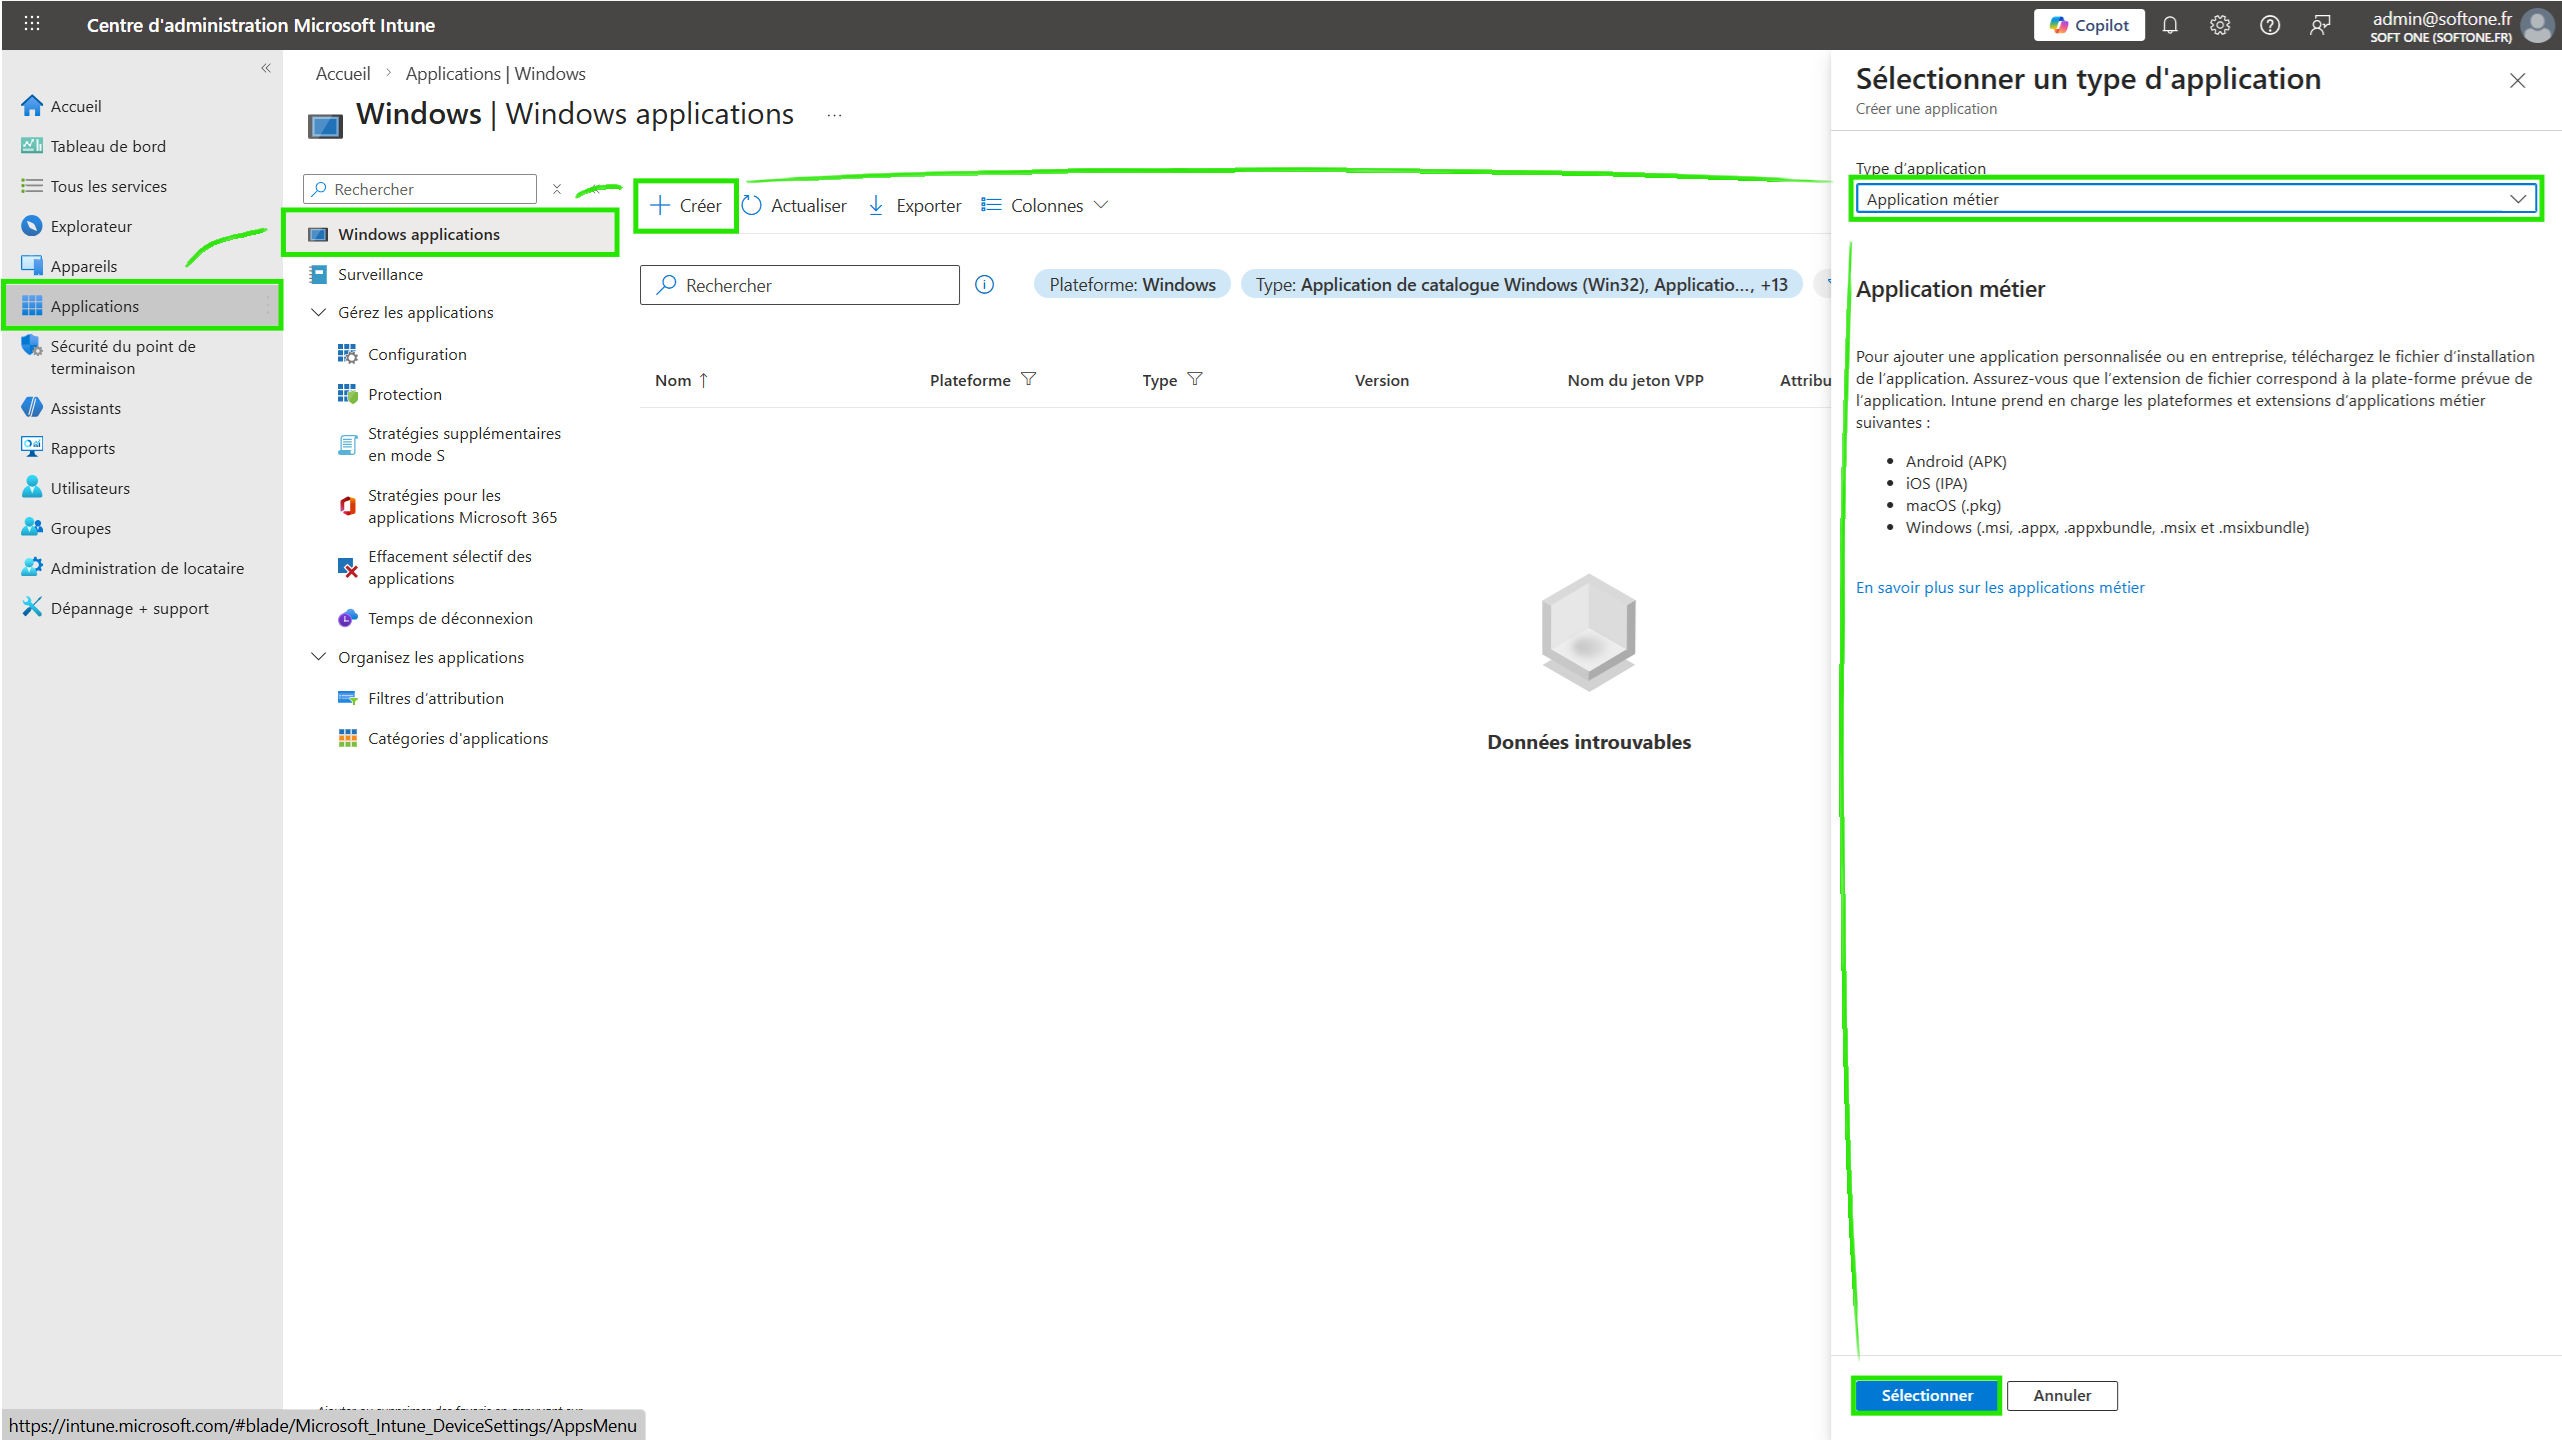
Sélectionner le type d’application :
Line-of-business app (application métier).Télécharger le fichier MSI via ce lien (à venir) et sélectionner le dans Intune

Remplir les informations :
Nom de l’application (ex: "Sonde Corma").
Description (facultatif).
Éditeur (ex: "Corma").
Commande d’installation
/qn

Valider et enregistrer.
(Optionel) Si vous utilisez un antivirus avec IA, s’assurer que l’application ou le dossier
Program Files\Corma\Agentest approuvé.
Étape 4 : Déploiement de l’application
Aller dans :
Apps>Windows> Sélectionner l’application ajoutée.Cliquer sur
Assignments>Add group.Sélectionner le groupe de devices ou d’utilisateurs cibles.
Choisir le type d’assignation :
Required(installation automatique).Valider et sauvegarder.
Gestion des mises à jour
Le MSI gère ses propres mises à jour. Pour déployer une nouvelle version :
Répéter les étapes 1 à 5 avec le nouveau fichier MSI.
Intune remplacera automatiquement l’ancienne version si le nom de l’application est identique.
Was this helpful?