Install the OS Agent on Entra-managed Windows laptops
How to deploy an MSI via Microsoft Intune
ENGLISH VERSION - (French version below)
Deploying an MSI via Microsoft Intune
Prerequisites
An administrator account on the Microsoft Intune portal & Entra ID with the
Global Administrator,Application administrator, andIntune administratorrolesA group of devices enrolled in Intune and linked to users in Entra ID, which will be targeted by the deployment
Optional: Access to your antivirus admin panel to whitelist the Corma agent
Step 1: Configuring permissions in Entra ID
Sign in to the Entra ID portal
Grant consent to the app registration:
Open this URL in a browser and sign in with an administrator account to grant consent
Check "Consent on behalf of your organization" and confirm the request
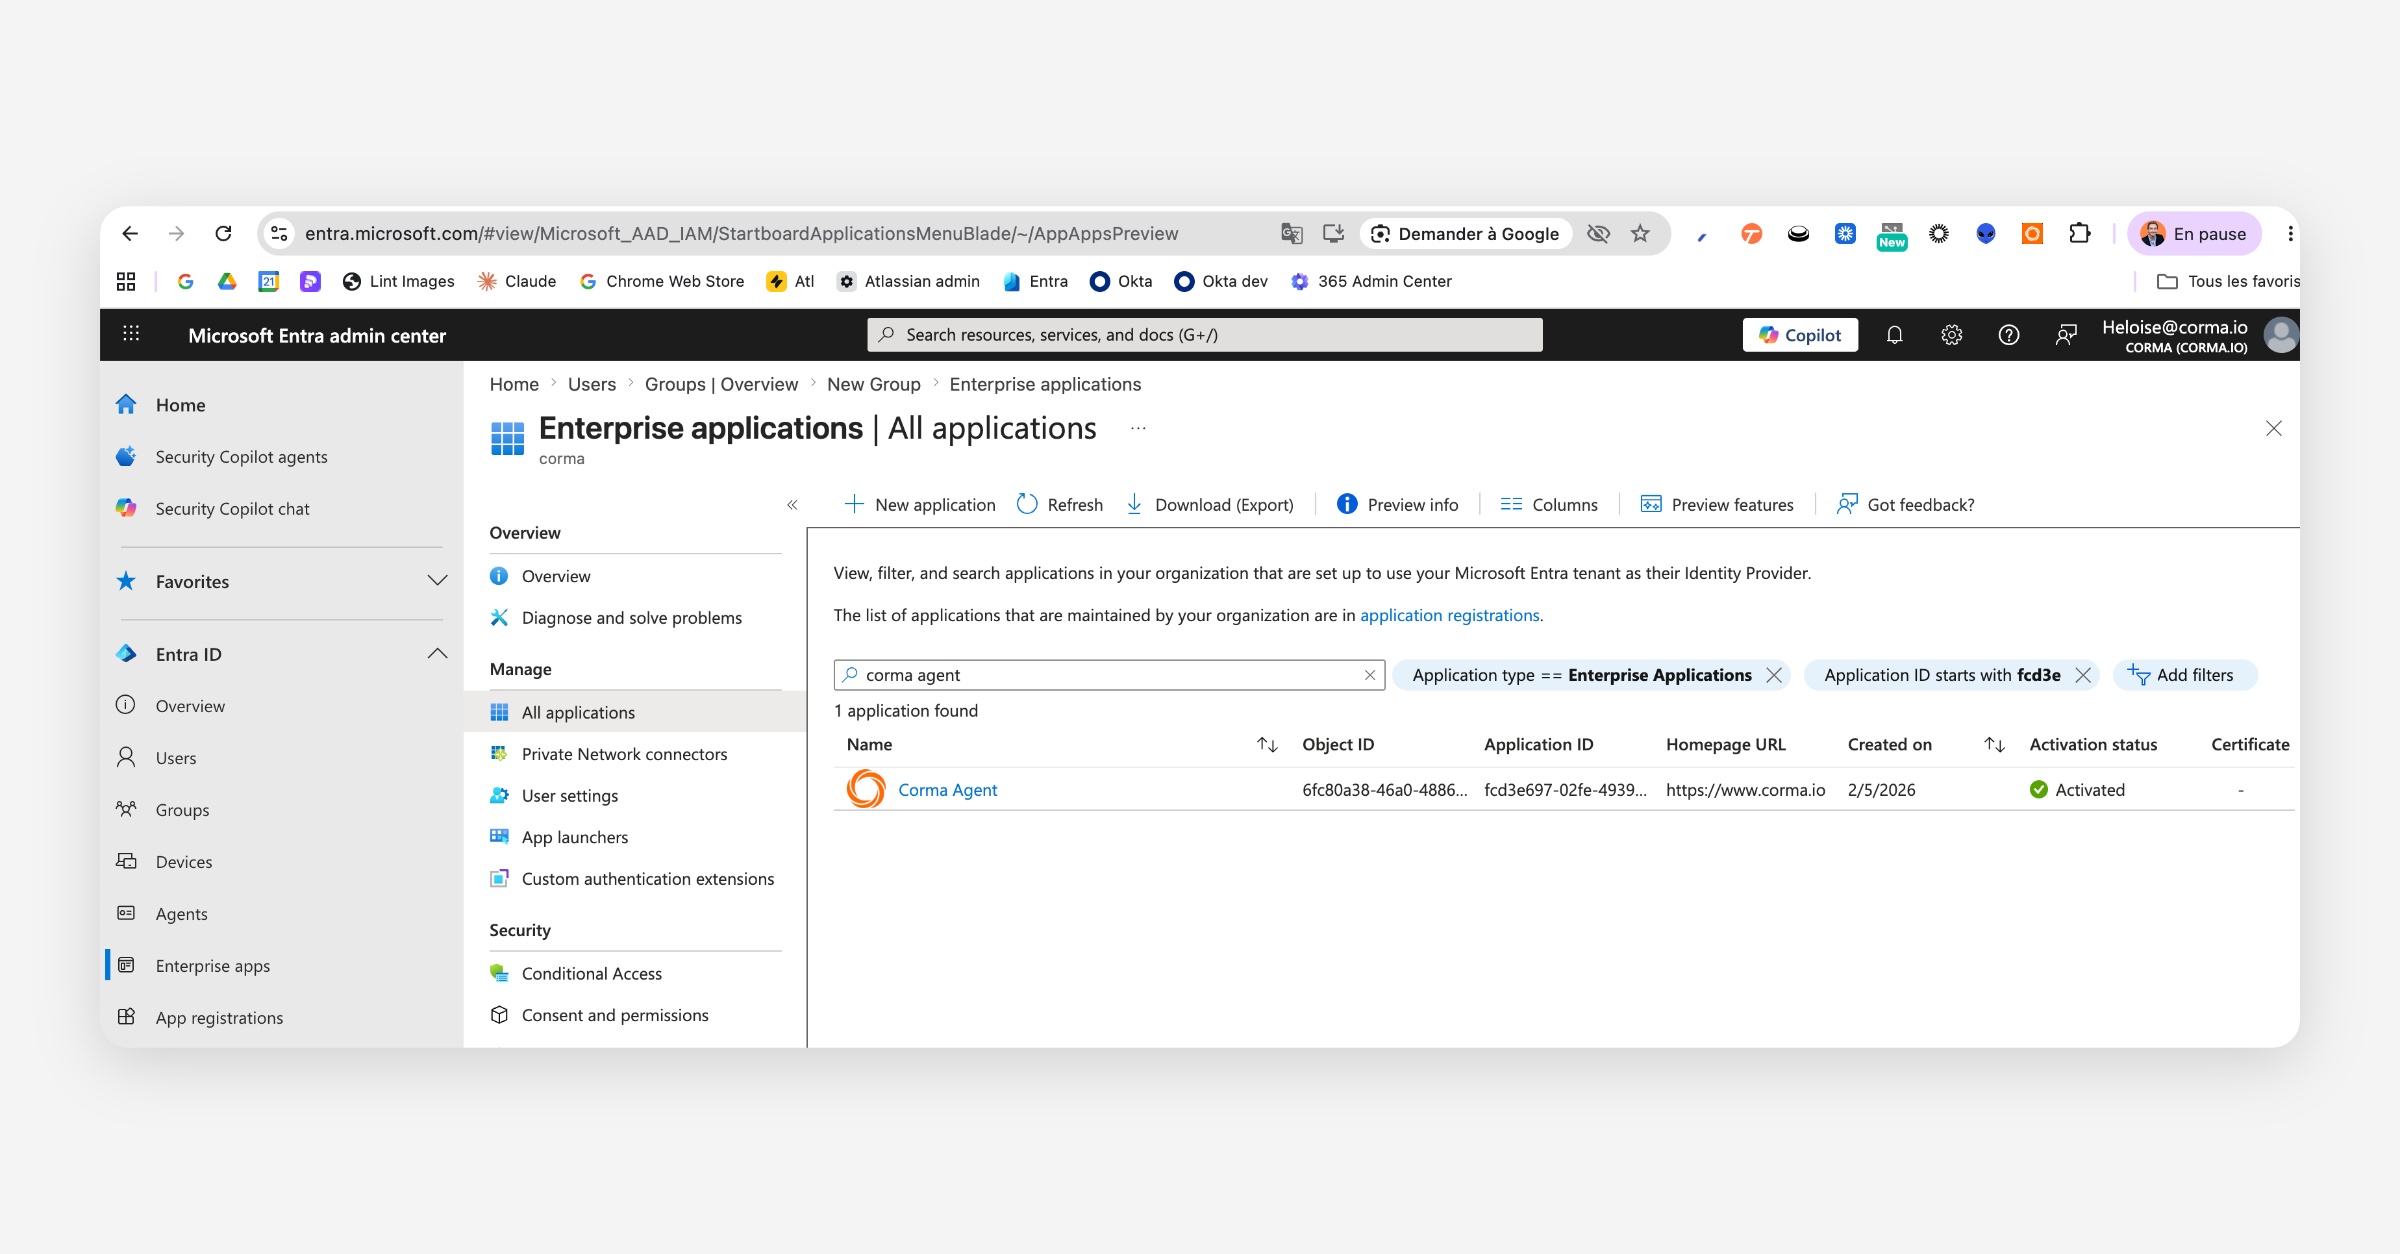
To confirm it has been installed you can go to Entra > Enterprise Apps > Search “Corma Agent”. If the app is present you can proceed to step 2

Step 2: Adding the application in Intune
Sign in to the Microsoft Intune portal.
Navigate to:
Apps>Windows>AddorCreate.
Select the application type:
Line-of-business app.Download the MSI file via this link and select it in Intune.

Fill in the application details:
Application name (e.g., "Corma Agent")
Description (optional)
Publisher (e.g., "Corma")
Install command:
/qn
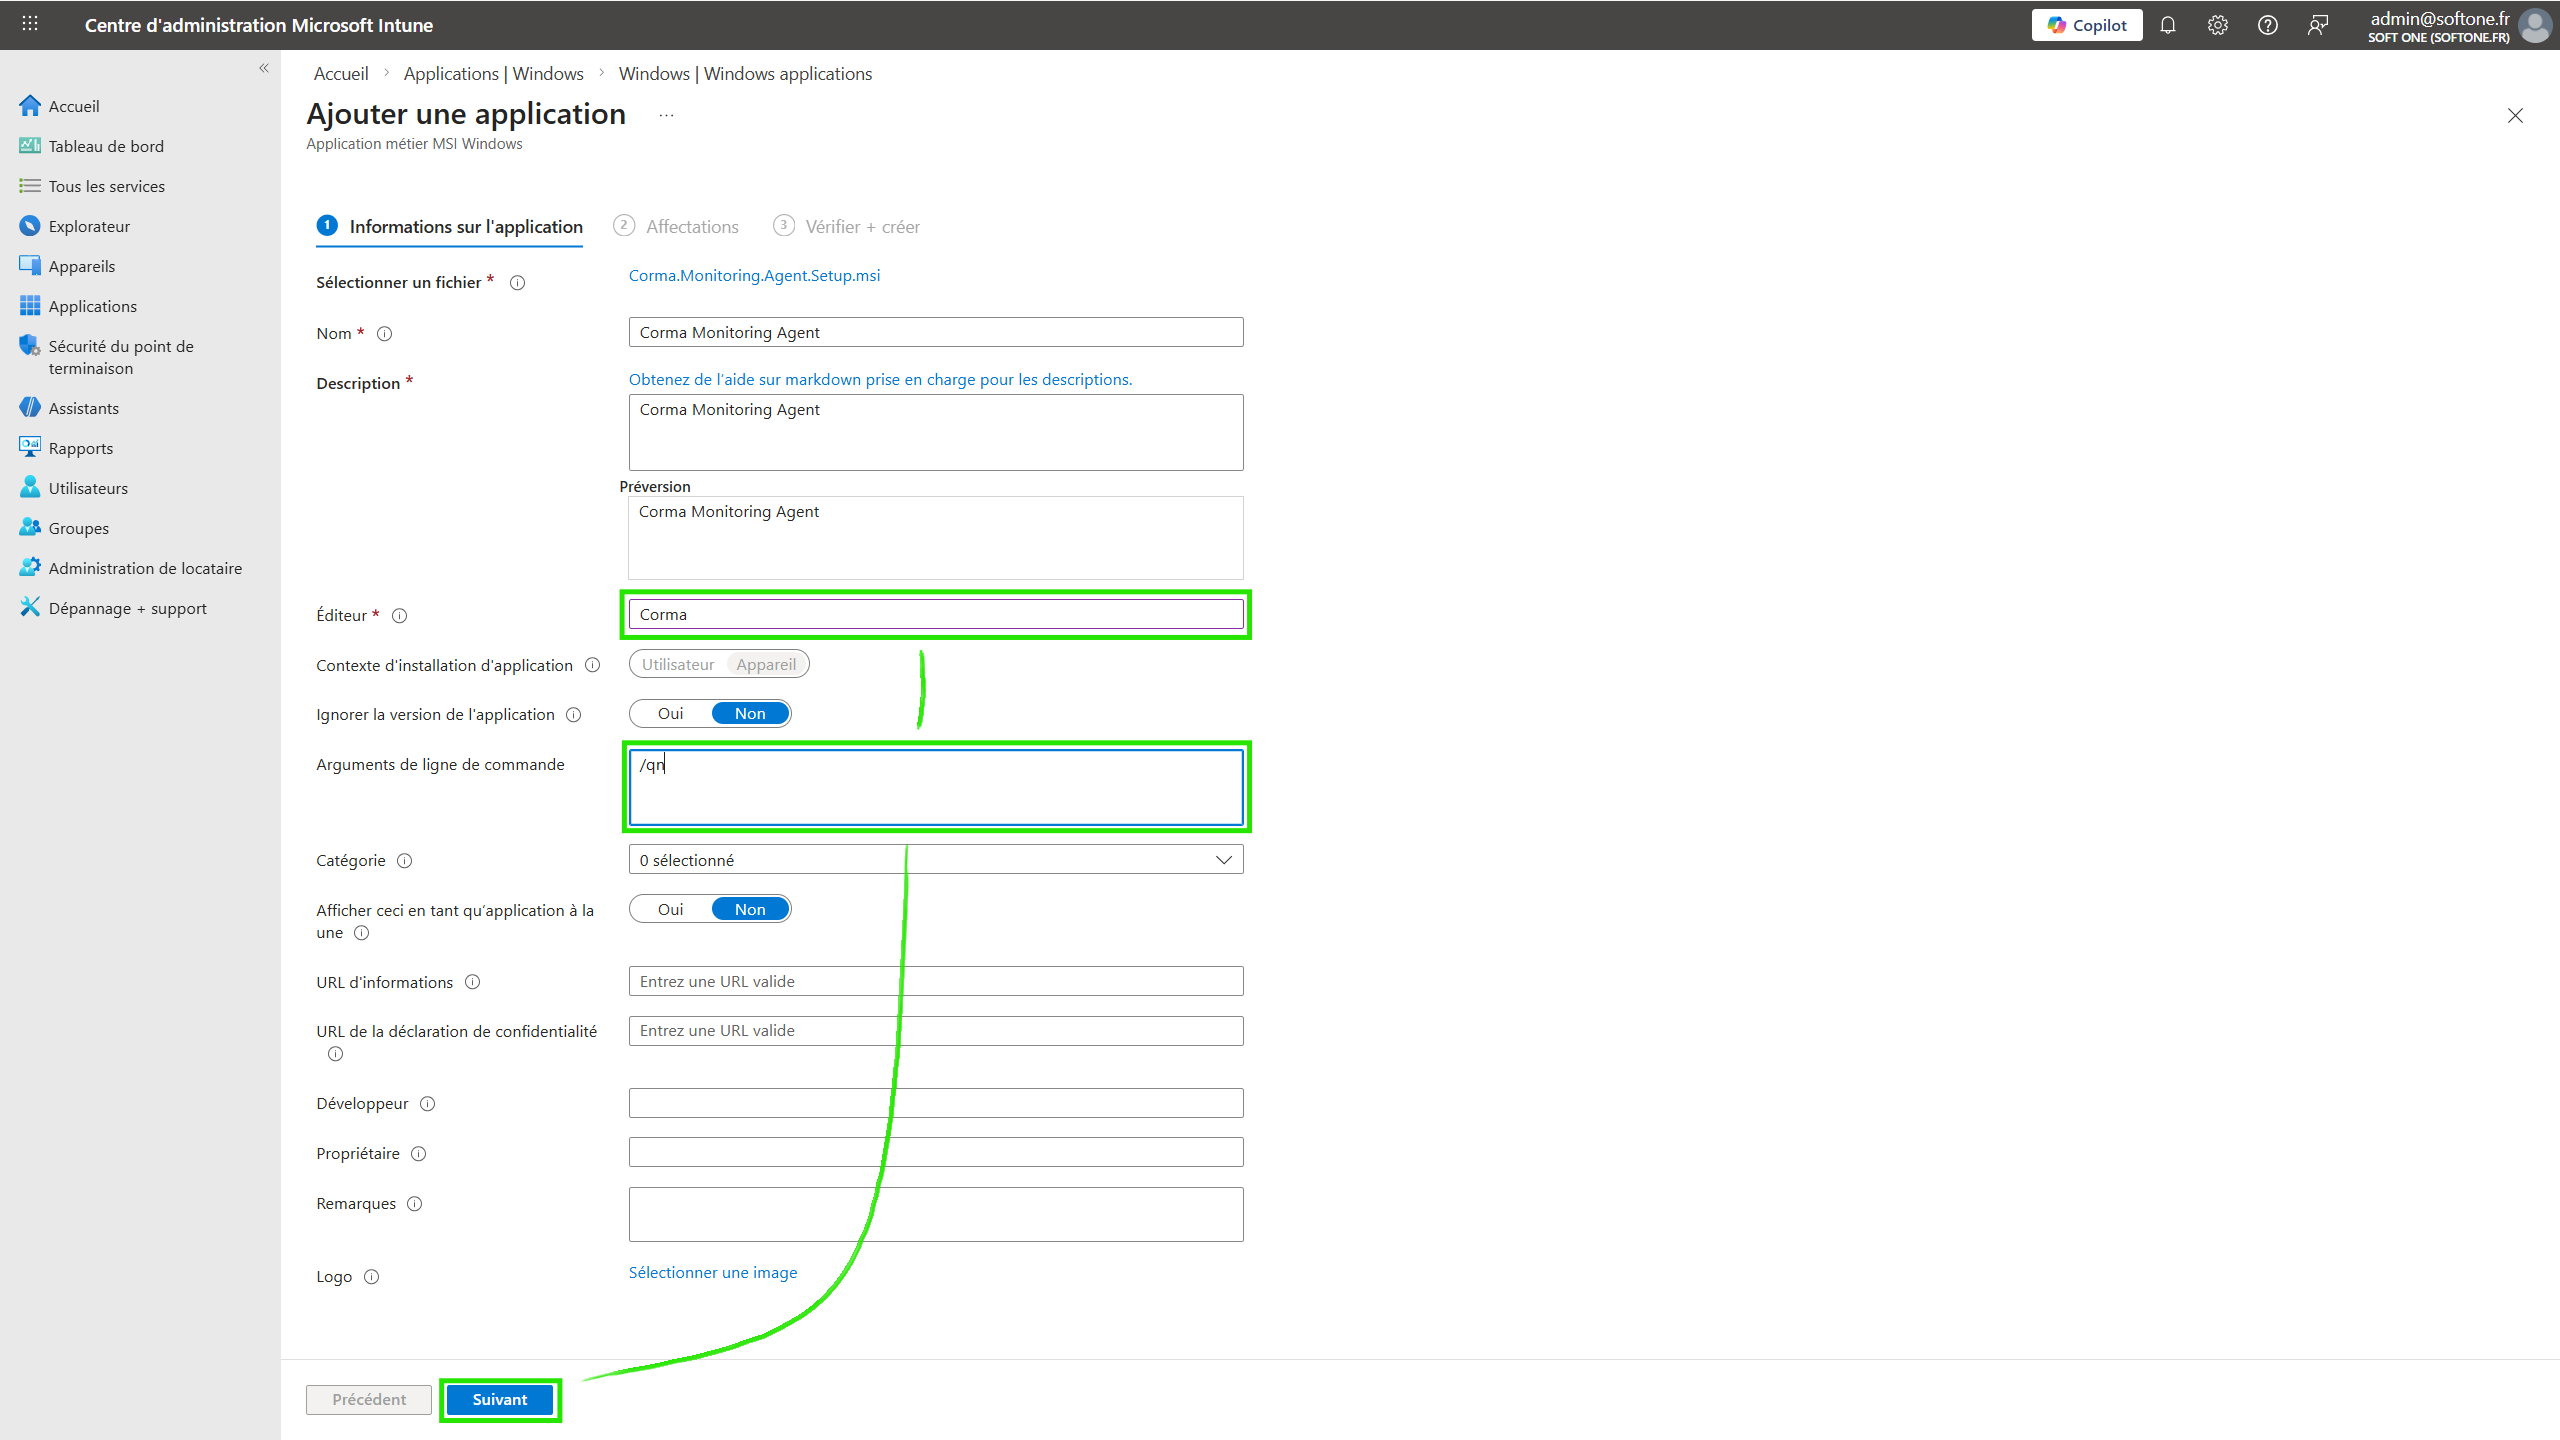
Confirm and save.
(Optional) If you are using an AI-powered antivirus, make sure the application or the folder
Program Files\Corma\Agentis approved/whitelisted.
Step 4: Deploying the application
Navigate to:
Apps>Windows> select the application you just added.Click on
Assignments>Add group.Select the target device or user group.
Choose the assignment type:
Required(automatic installation).Confirm and save.
Managing updates
The MSI handles its own updates. To deploy a new version:
Repeat steps 1 through 5 with the new MSI file.
Intune will automatically replace the previous version if the application name is identical.
VERSION FRANÇAISE - (version en anglais ci-dessus)
Tutoriel : Déploiement d’un MSI via Microsoft Intune
Prérequis
Un compte administrateur sur le portail Microsoft Intune & Entra ID avec les rôles
Global Administrator,Application administratoretIntune administratorUn groupe de device enrôlés dans Intune et rattachés à des utilisateurs dans Entra ID qui sera ciblé par le déploiement
Optionnel : Un accès à la partie admin de l'antivirus pour whitelister notre sonde.
Étape 1 : Configuration des autorisations pour Entra ID
Se connecter au portail Entra ID
Consentent à l'app registration :
Ouvrir cette URL dans un navigateur et se connecter avec un compte administrateur pour accorder le consentement
Cocher "Consentir au nom de votre organisation" et valider la demande
Pour valider que l’installation s’est bien faite vous pouvez vous rendre sur Entra > Enterprise Apps > Chercher “Corma Agent”. Si l’application est bien présente vous pouvez passer à l’étape 2.
Étape 2 : Ajout de l’application dans Intune
Se connecter au portail Microsoft Intune.
Aller dans :
Apps>Windows>Add ou Créer.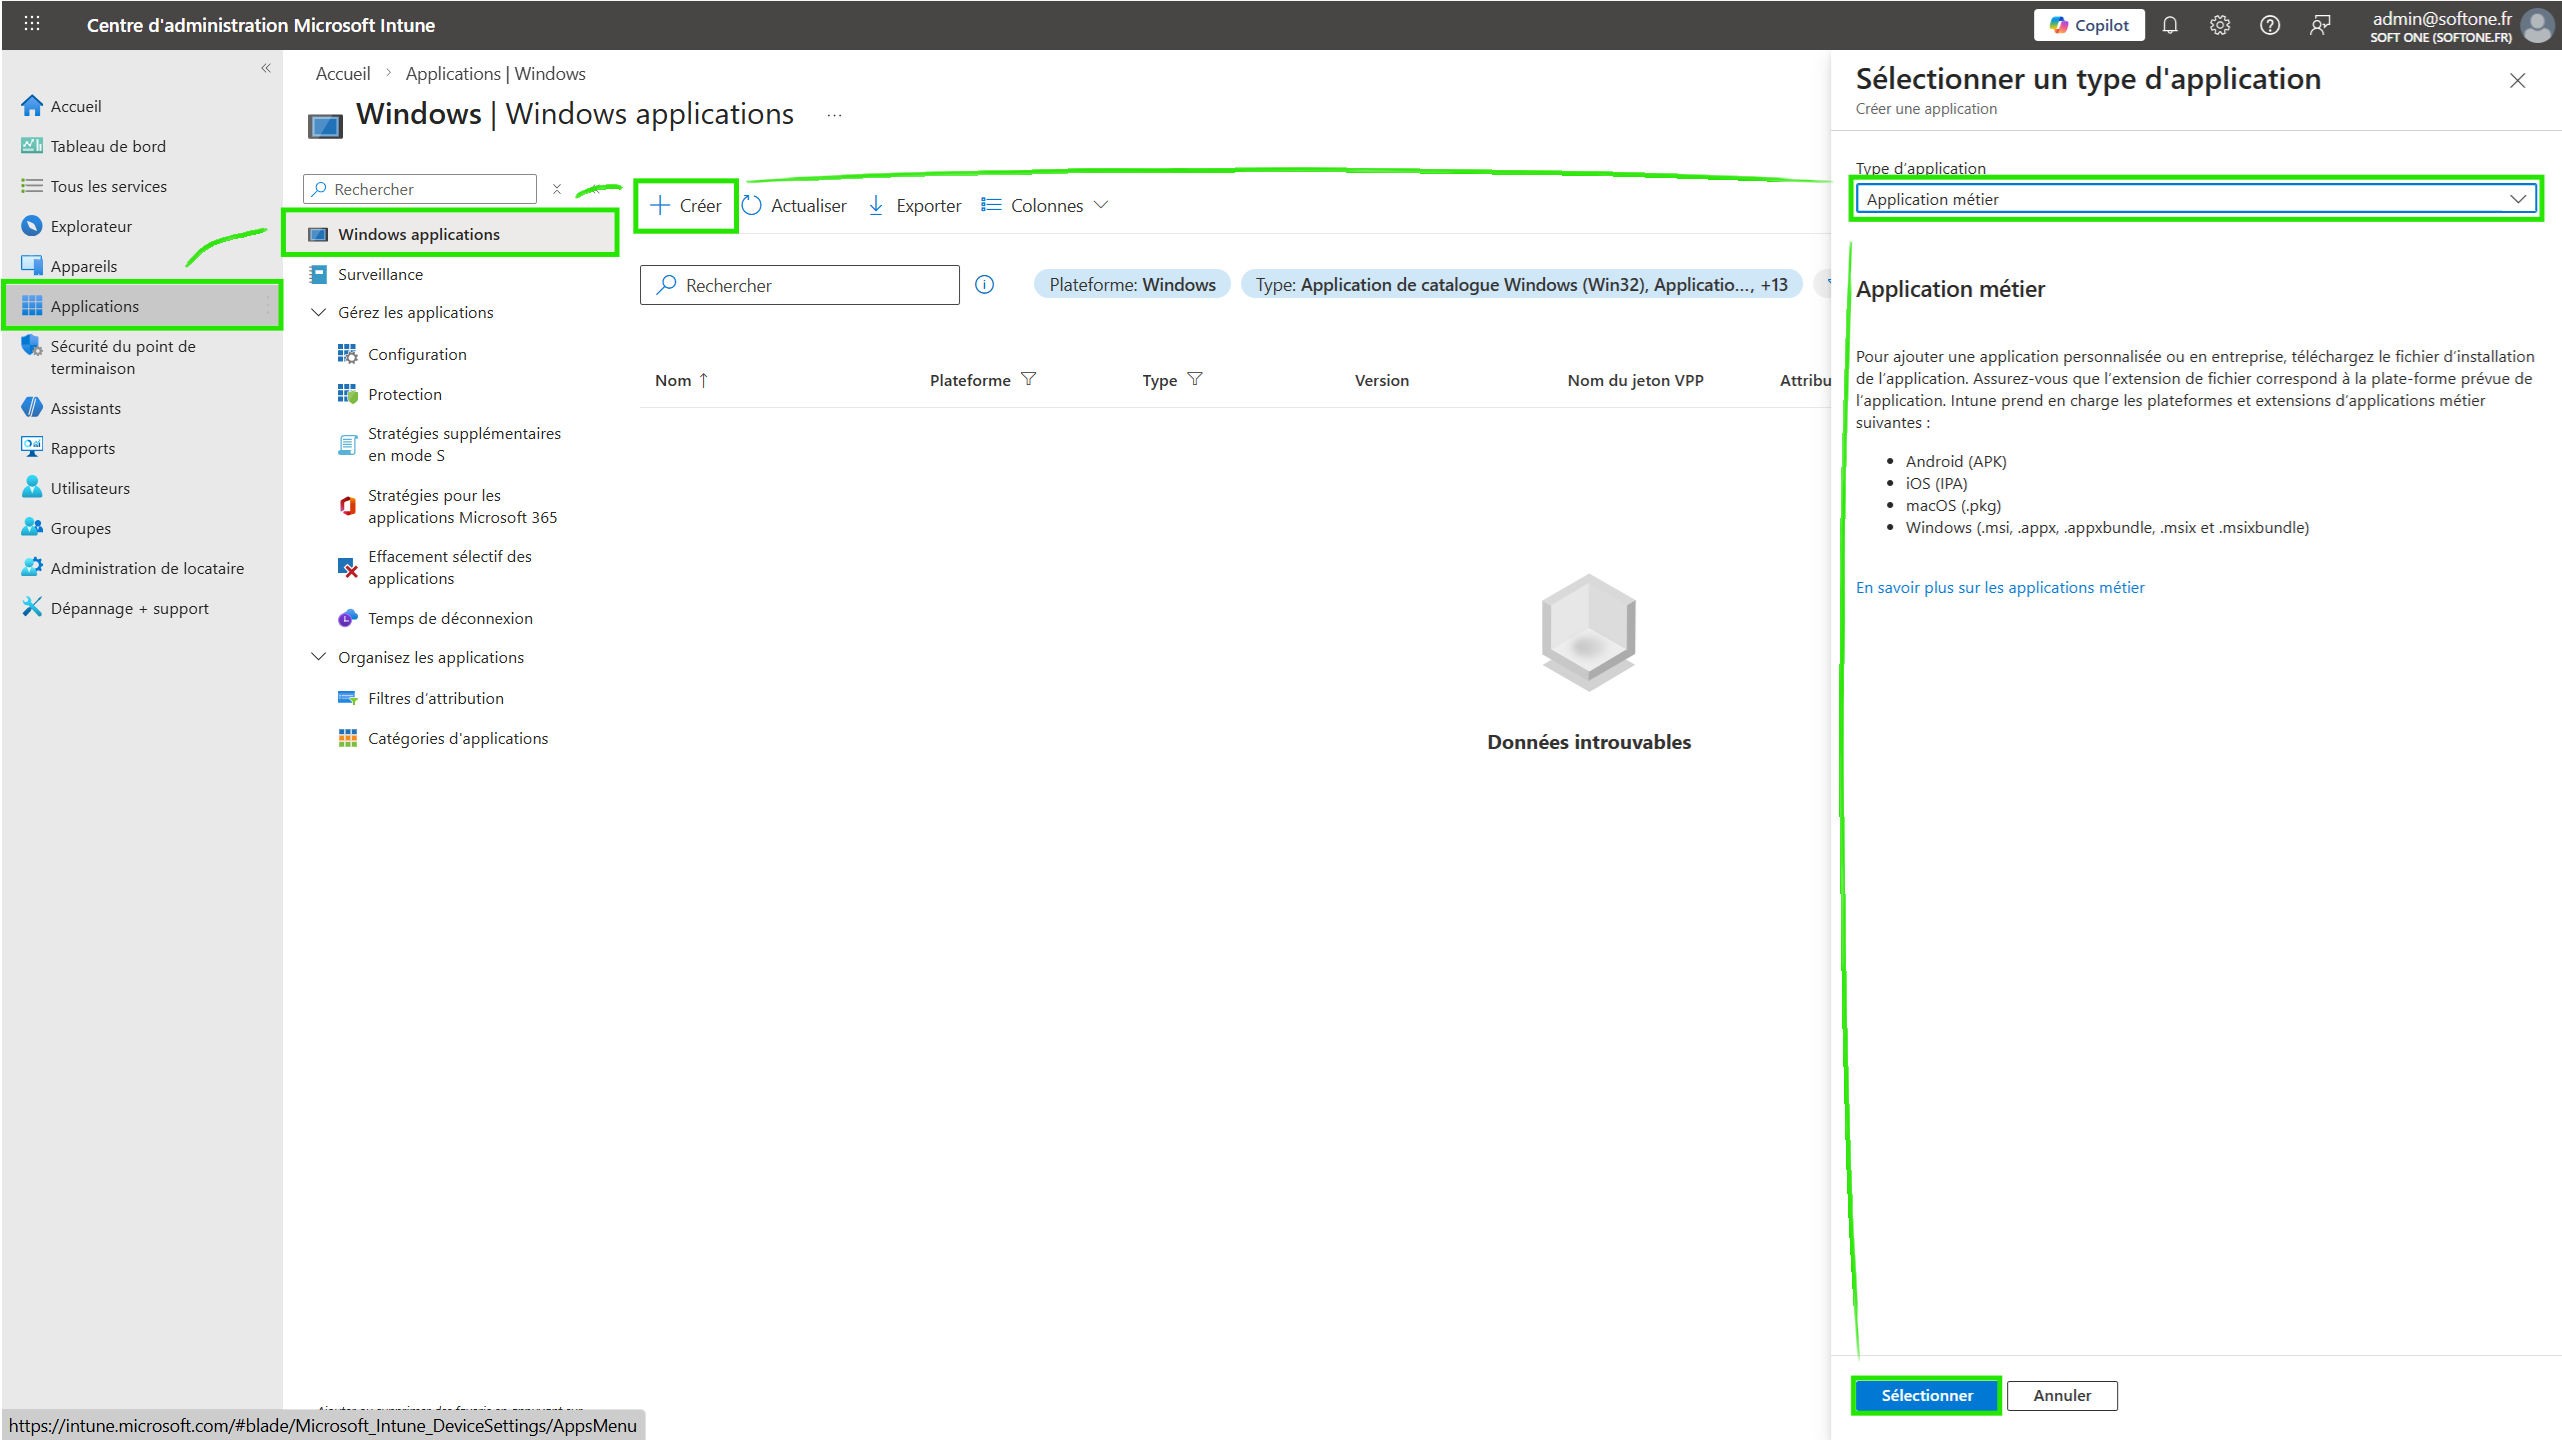
Sélectionner le type d’application :
Line-of-business app (application métier).Télécharger le fichier MSI via ce lien et importer le fichier dans Intune

Remplir les informations :
Nom de l’application (ex: "Sonde Corma").
Description (facultatif).
Éditeur (ex: "Corma").
Commande d’installation
/qn

Valider et enregistrer.
(Optionel) Si vous utilisez un antivirus avec IA, s’assurer que l’application ou le dossier
Program Files\Corma\Agentest approuvé.
Étape 4 : Déploiement de l’application
Aller dans :
Apps>Windows> Sélectionner l’application ajoutée.Cliquer sur
Assignments>Add group.Sélectionner le groupe de devices ou d’utilisateurs cibles.
Choisir le type d’assignation :
Required(installation automatique).Valider et sauvegarder.
Gestion des mises à jour
Le MSI gère ses propres mises à jour. Pour déployer une nouvelle version :
Répéter les étapes 1 à 5 avec le nouveau fichier MSI.
Intune remplacera automatiquement l’ancienne version si le nom de l’application est identique.
Was this helpful?