Docs / Integrations
Miro - Agent
A service account with admin access is required to connect Miro to Corma with the Agent
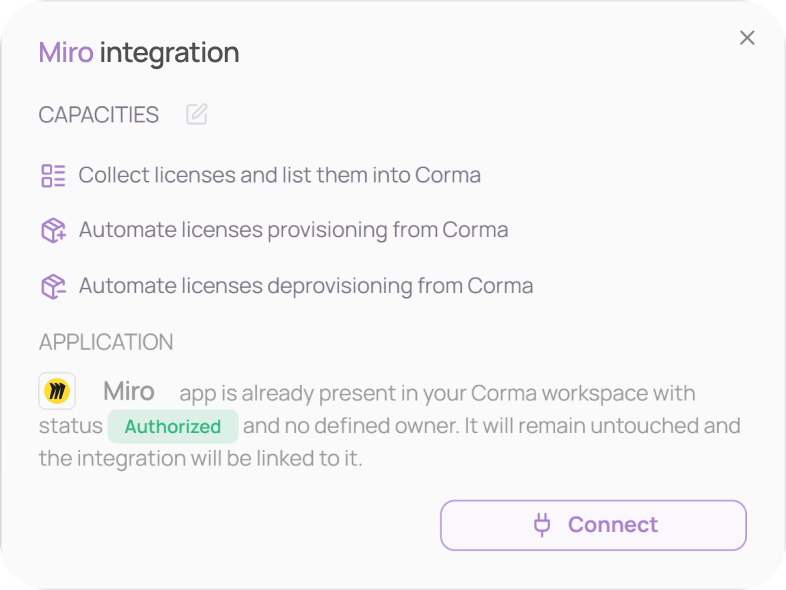
With the Agent connected to Miro, you can:
Collect license types: retrieve every Miro licenses used by your employees, and have them listed in Corma by types, which are either Full (Standard), Free or Free Restricted licenses. Get valuable insights on who is using what in your company to quickly make sure everyone has the appropriate Miro license at the right time.
License (de)provisioning: automatically create or delete Miro accounts from Corma without going manually to your Miro workspace. The agent now automatically handles these tasks, fully on its own, and without needing any SCIM or any public API either.
Retrieved data: License Type, License Role, Email, Username, Last Activity
Here’s how to setup your Miro Agent properly:
On your Corma app go to the Data sources page
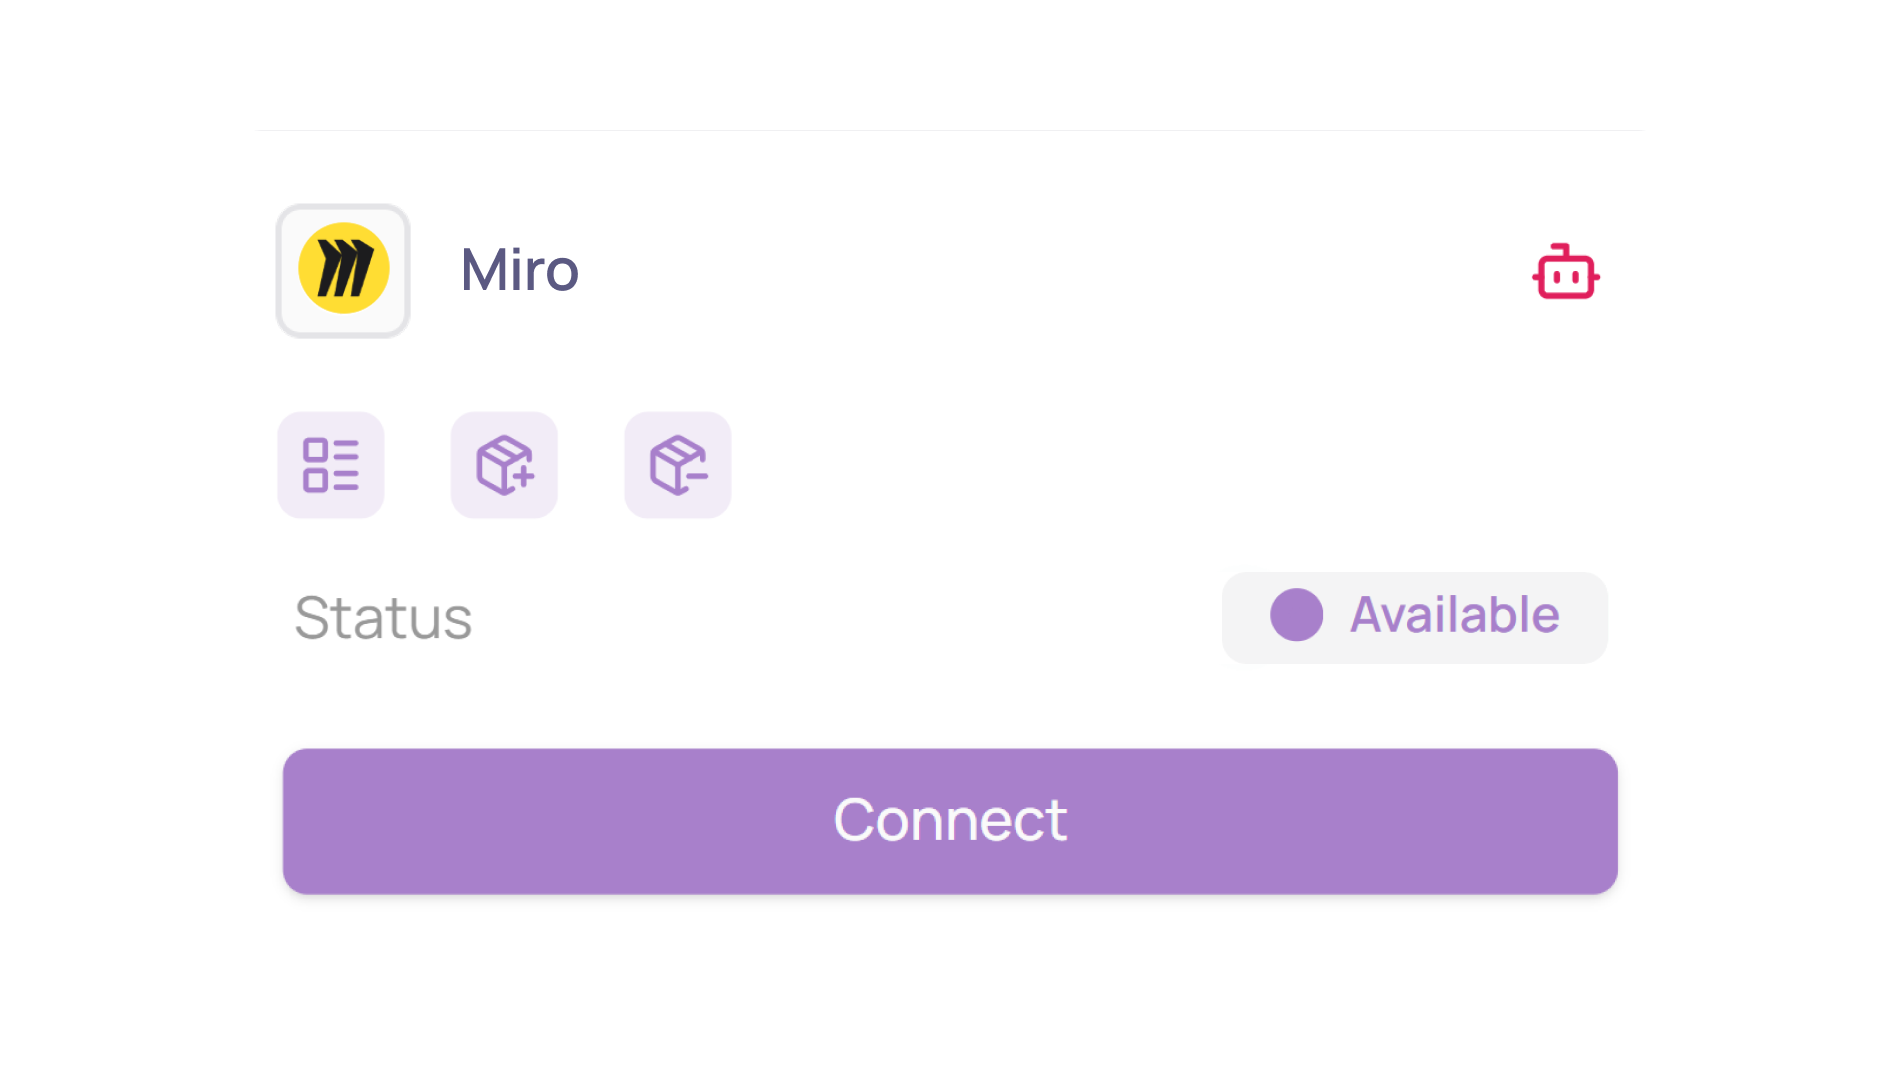
Under "All data sources" search for “Miro” and find the one with the agent icon. Then click on “Connect”
Click on "Connect" again
Select your authentication method
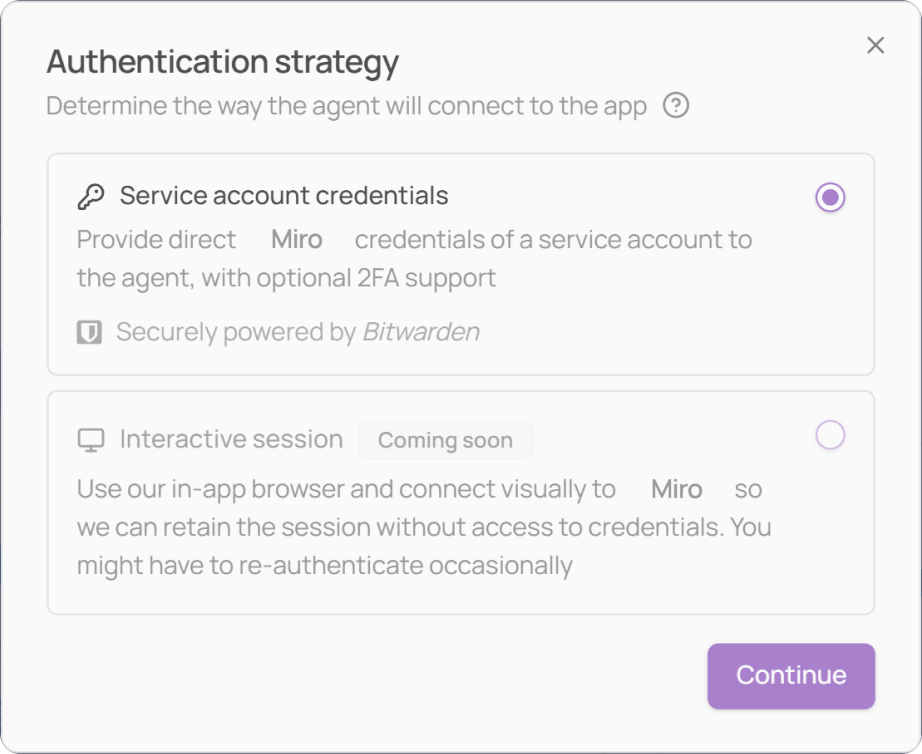
Method 1: provide your credentials for autonomous agent integration
Provide Corma with your Miro service account credentials directly (that must have admin rights). Corma will handle the login automatically, including TOTP-based 2FA codes (e.g., Google Authenticator).
Method 2: manually connect to let us save your session temporarily
Corma opens an embedded browser where you log in manually, using your Miro service account credentials (with admin rights). Your session is then saved and the agent acts on your behalf within that session.
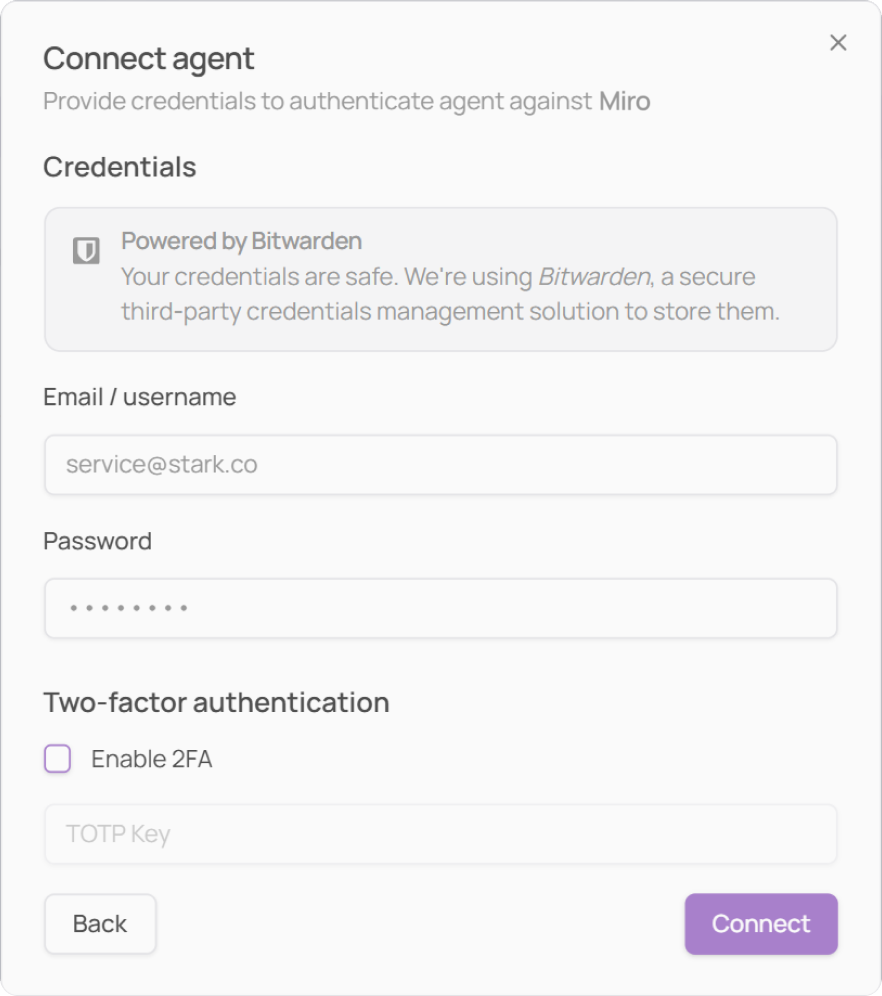
Method 1: Service account credentials
Use this if your service account uses:
An email address and password
A "Sign in with Google", as long as you have the underlying Google account credentials.
Enter your Miro service account credentials in the fields provided (email, password) and click on “Connect“
SAML SSO and 2FA are only supported on Miro Enterprise plans. If the login fails, switch to Method 2.
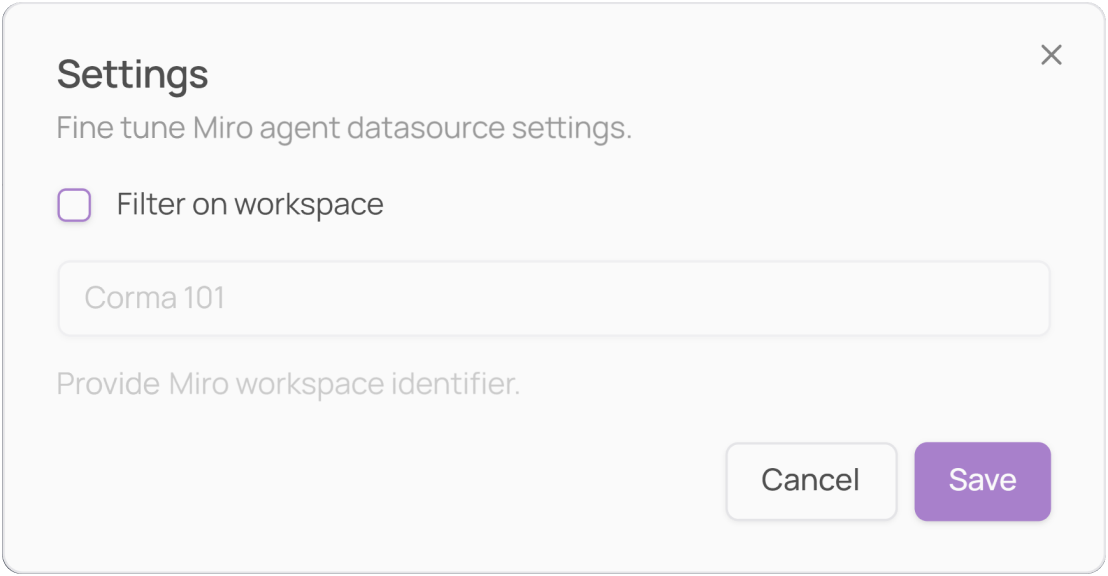
Select which workspace you want the agent to operate on. In Miro, workspaces are called “Teams” and you can find the name of your Miro Team on the top left icon in Miro.
Please indicate the exact team name as it appears in the app's interface (not an ID or URL), ensuring the agent operates on the correct workspace and not on a personal or unrelated account.
Confirm that the Agent successfully logs in
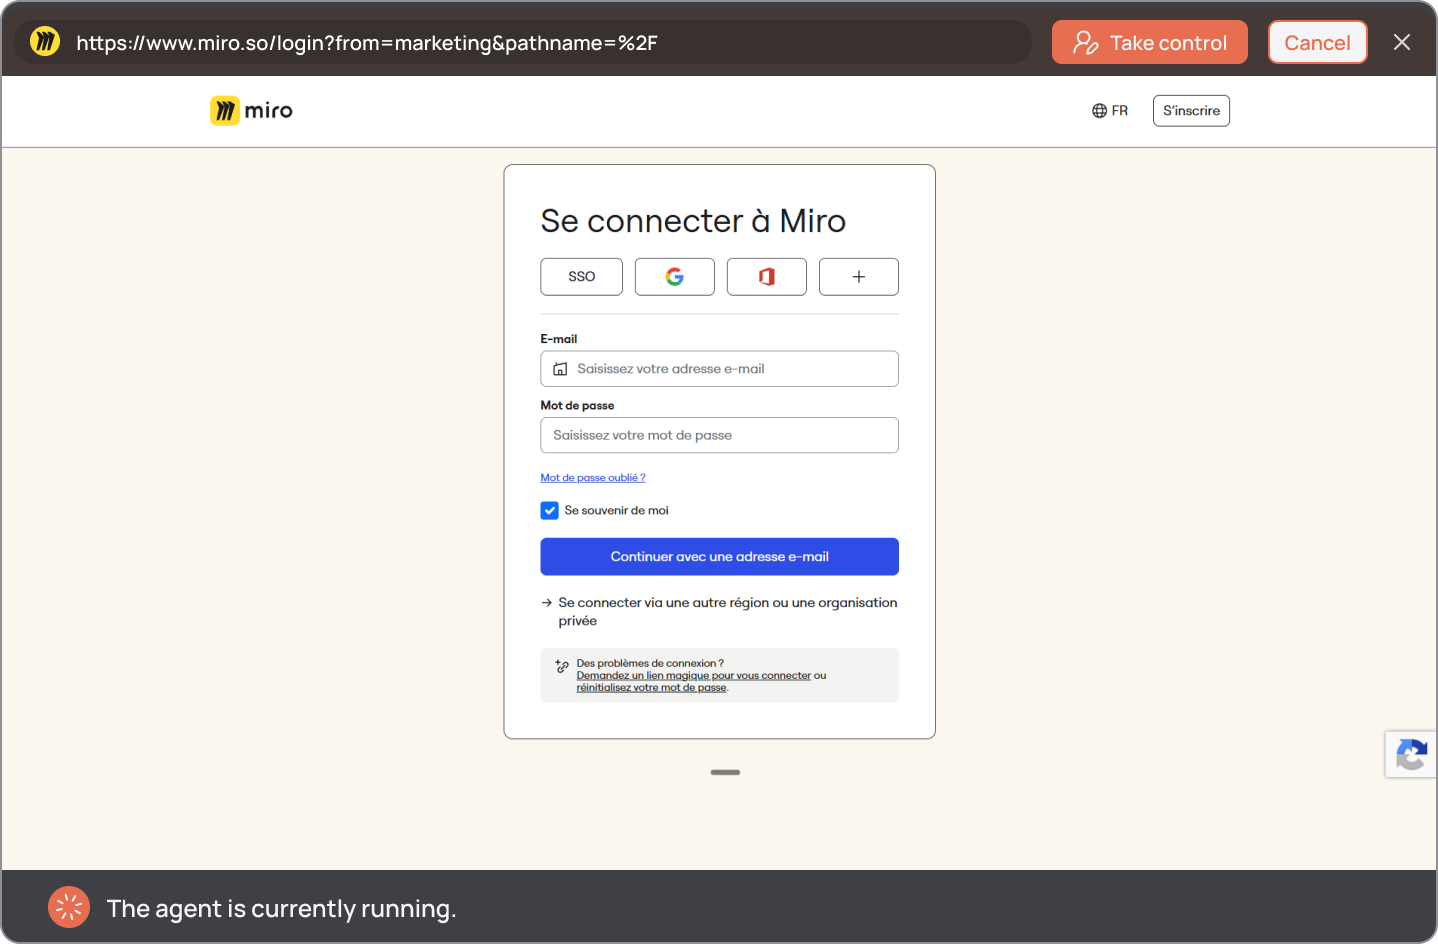
A browser will pop up, with the agent automatically starting to log in to Miro using the service account credentials. The first agent login takes some time.
You can click on “Take control” at any time to stop the run, and manually interact with the browser. You can then resume at any time, clicking on the same button now showing “Resume”.
You can also click on “Cancel” to stop the agent completely. You’ll be redirected to the “Authentication Strategy” card.
If for some reason the agent can’t log in, you’ll be asked to manually enter your credentials and log in.
Once the agent is successfully logged in, you then need to click on “Validate login”.
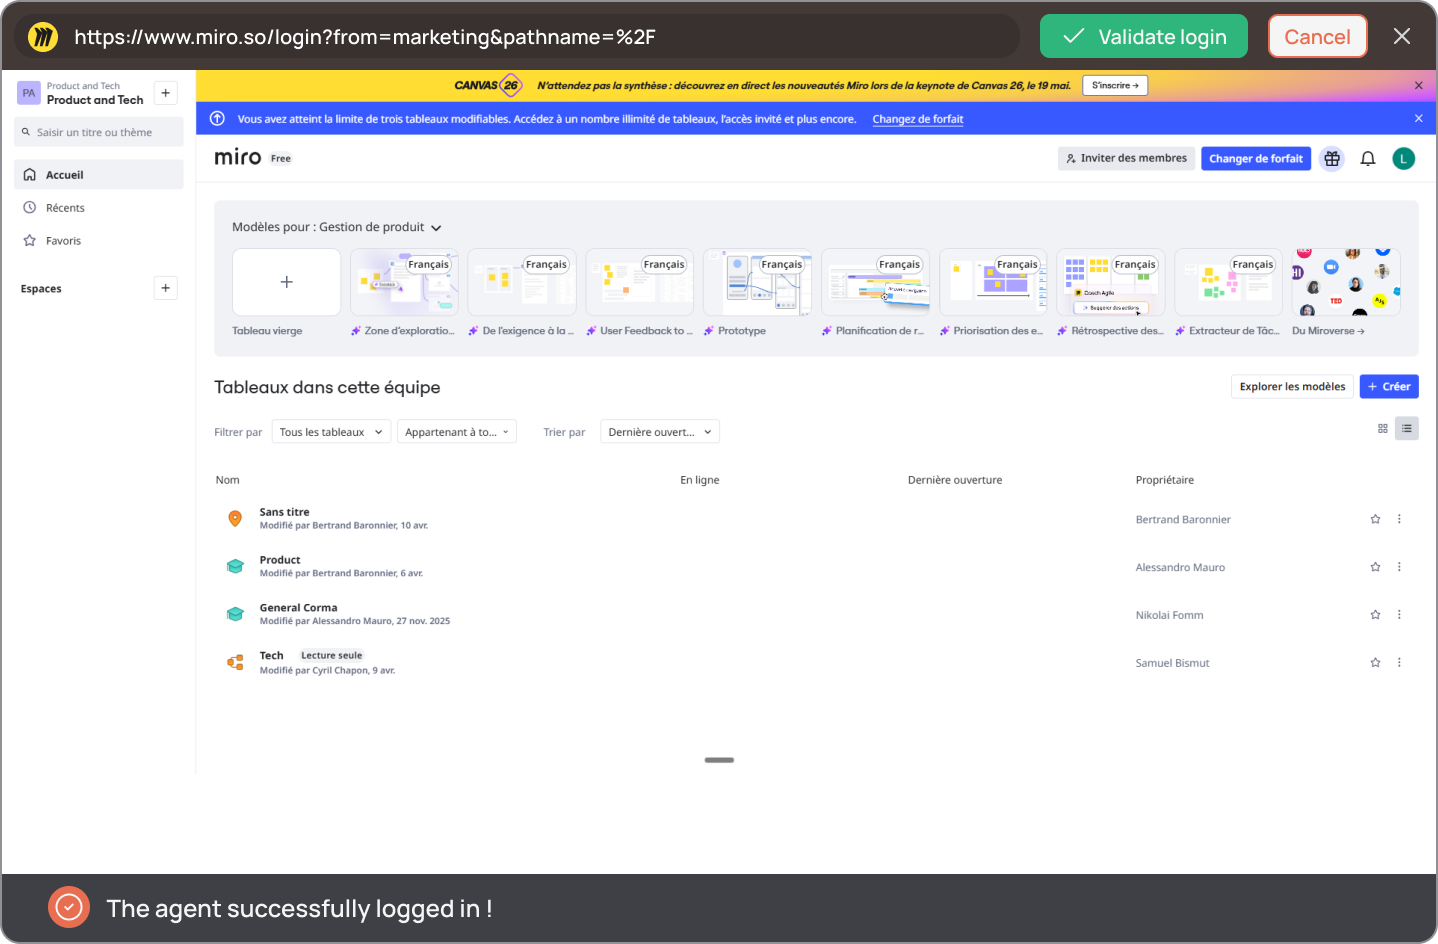
You’ve successfully connected Miro to Corma!
Method 2: Interactive session
Disclaimer: this method only saves your session. Therefore, if the session expires, Corma will ask you to connect manually again.
Use this if your service account uses:
Enterprise SSO (Okta, Azure AD, Google Workspace SAML, etc.)
Microsoft SSO, especially if unexpected pop-up windows appear
Email-based 2FA (one-time codes sent to your inbox, you'll need to enter these during the manual login)
No password at all (SSO-only accounts)
Corma will open an embedded browser window. Log in to Miro as you normally would using your service account, including any SSO flow, 2FA code, or email verification your company requires.
If you receive a 2FA code by email during this process, simply enter it in the browser as prompted.

Once you successfully logged in, click on “Validate login”

You’ve successfully connected Miro to Corma!
Data should be synchronized within the next 24 hours and will be synched every day to your Corma app.
Was this helpful?